This is a highly requested post on how to fill in a flowerbed with landscaping! Many of you have messaged me asking where to even start with your landscaping. While I am not an expert, I have learned many things over the years. Most of what I know is because I just go for it. I have always loved working in my yard, even when we were first married. It’s a passion and something I could spend hours working on, and definitely have! This process takes time and patience too. We have lived in our home for 8 years when I write this original post in May 2020.
Update 2024
*EDIT*: Fast forward to today (May 2024) and I have taken some updated photos to share. I have tweaked a few things and our house has been painted. Instead of writing an entire new post, I’m going to share updated photos and what we have changed since 2020. It’s still early in the season for the updated photos, so everthing isn’t in full bloom yet. I’ll try to remember to update photos when in bloom too!
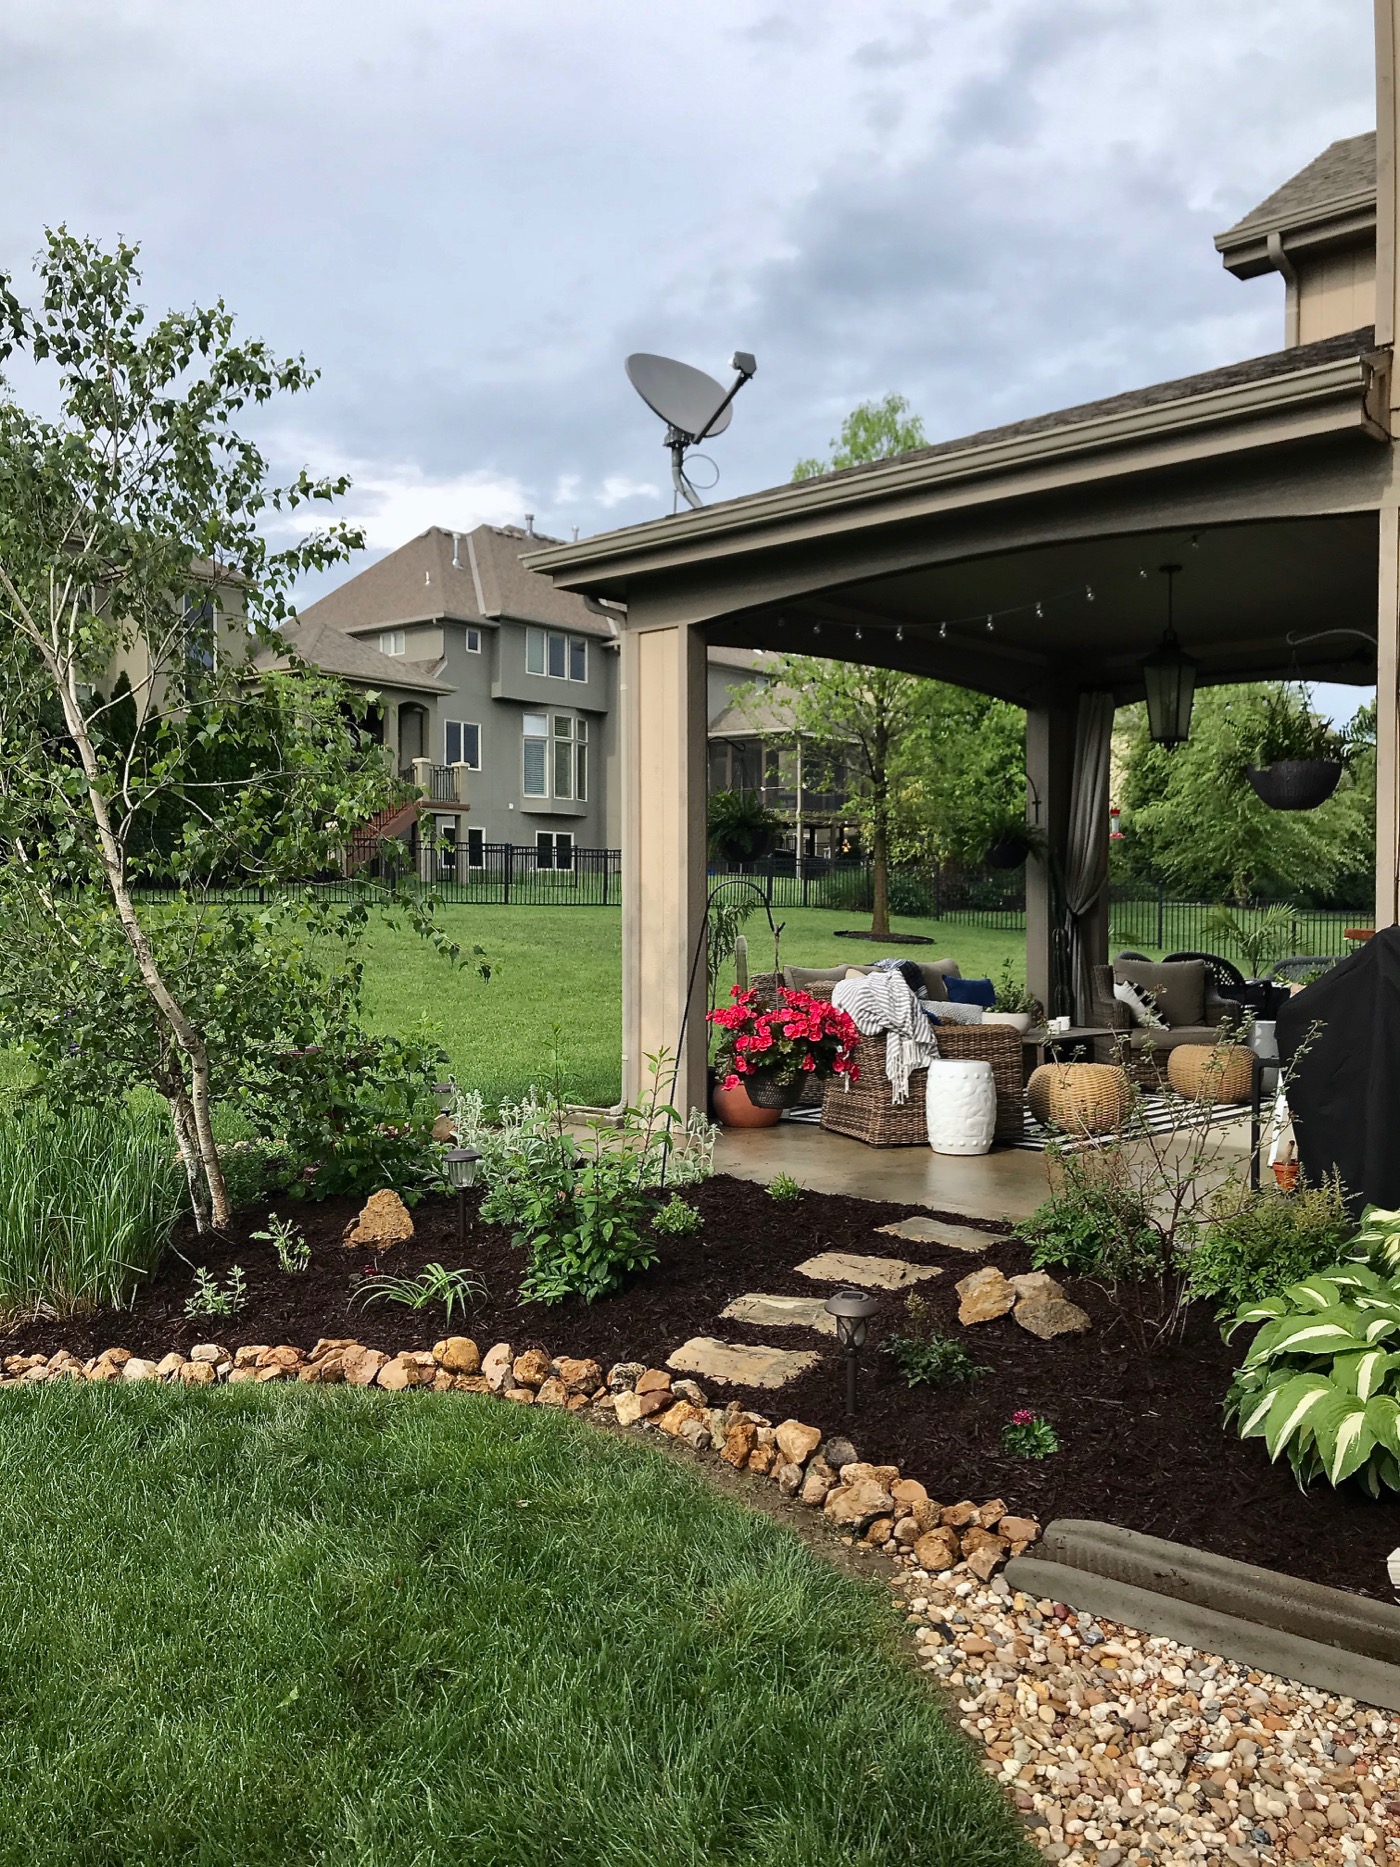
Here is the view in 2020.
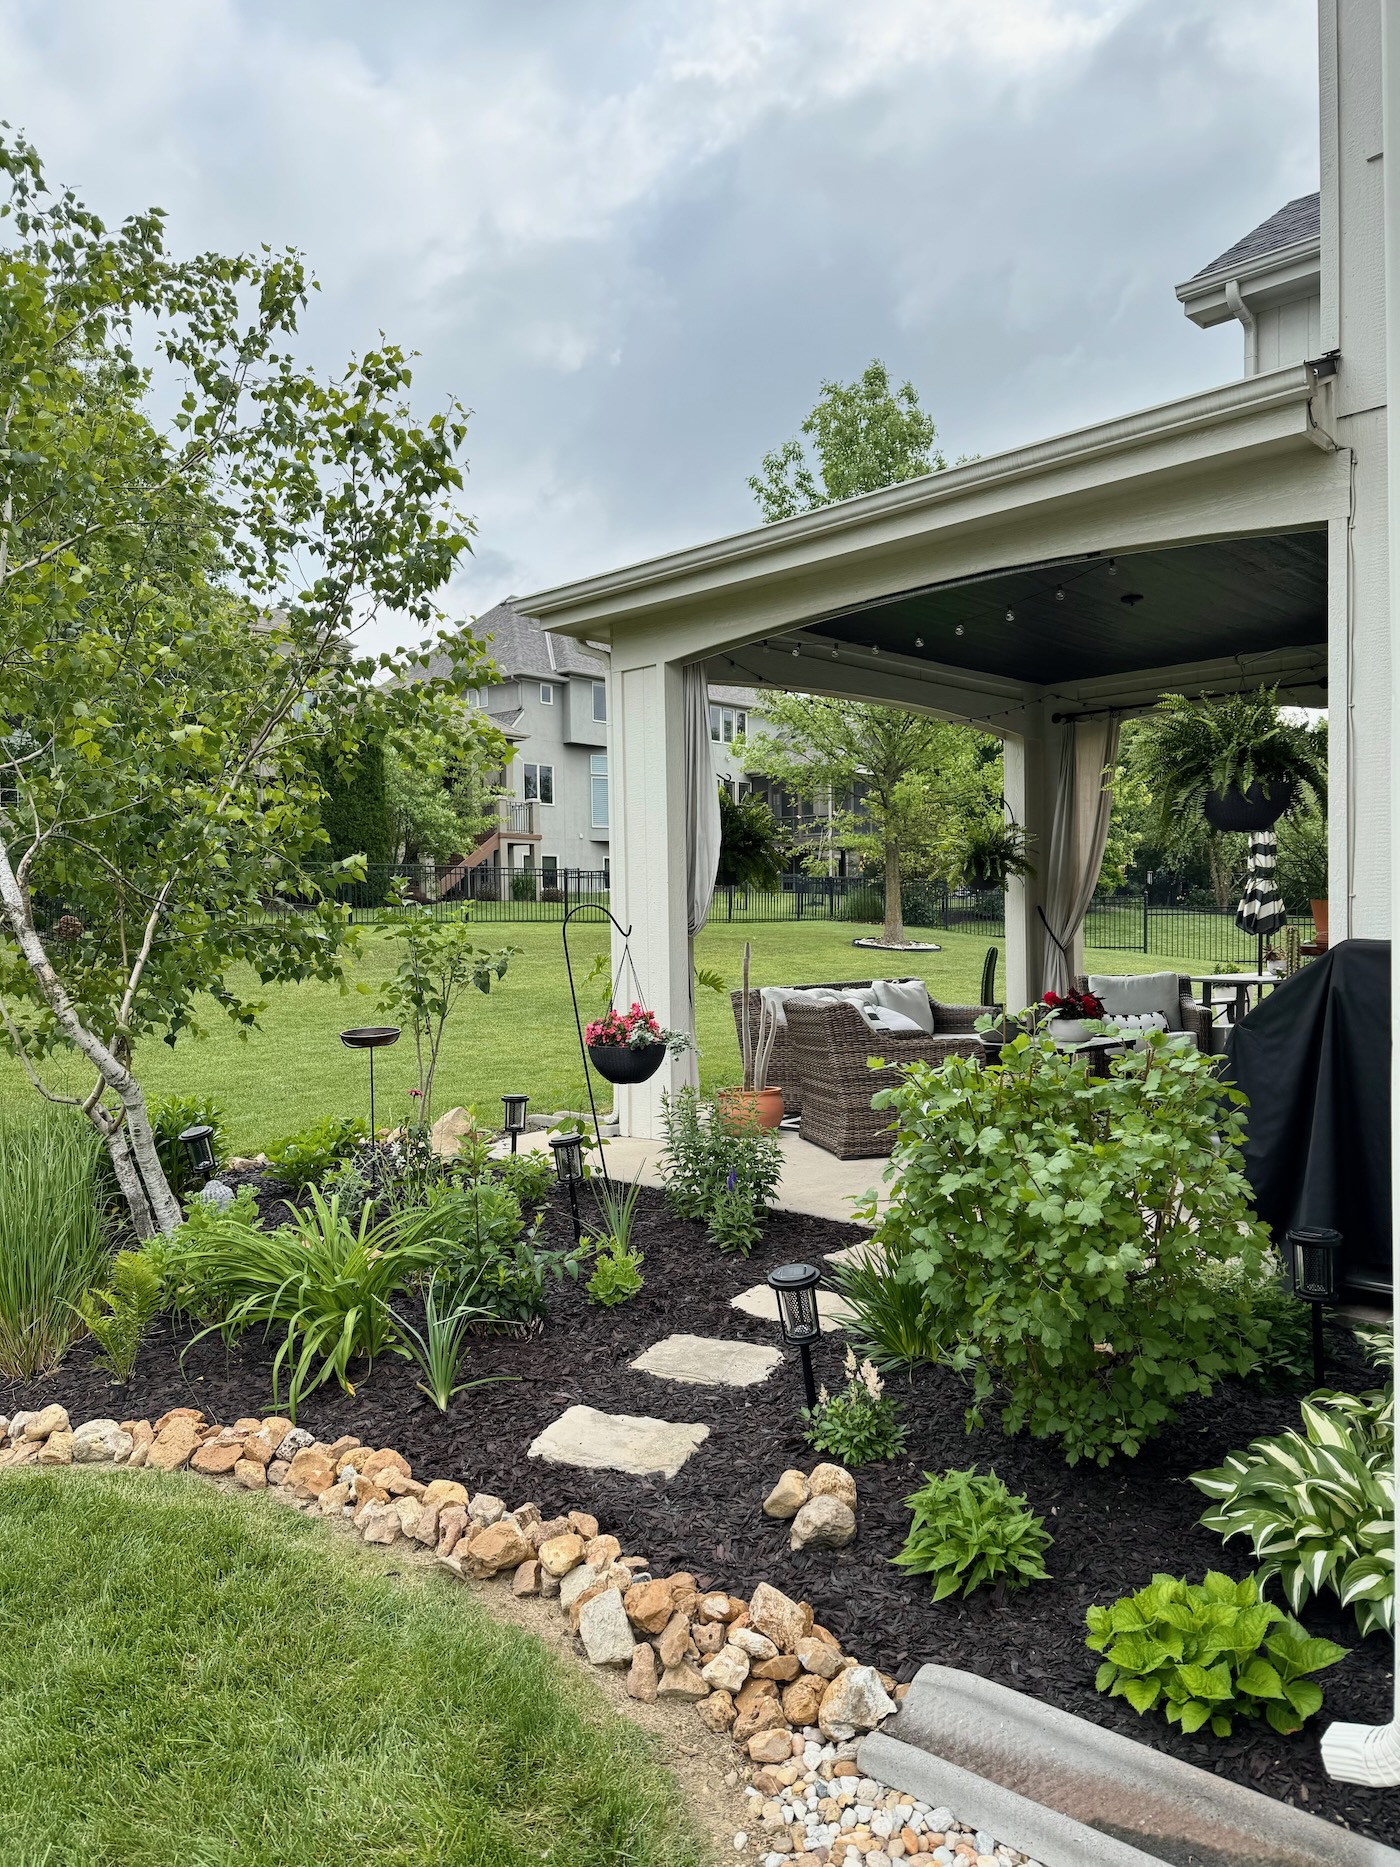
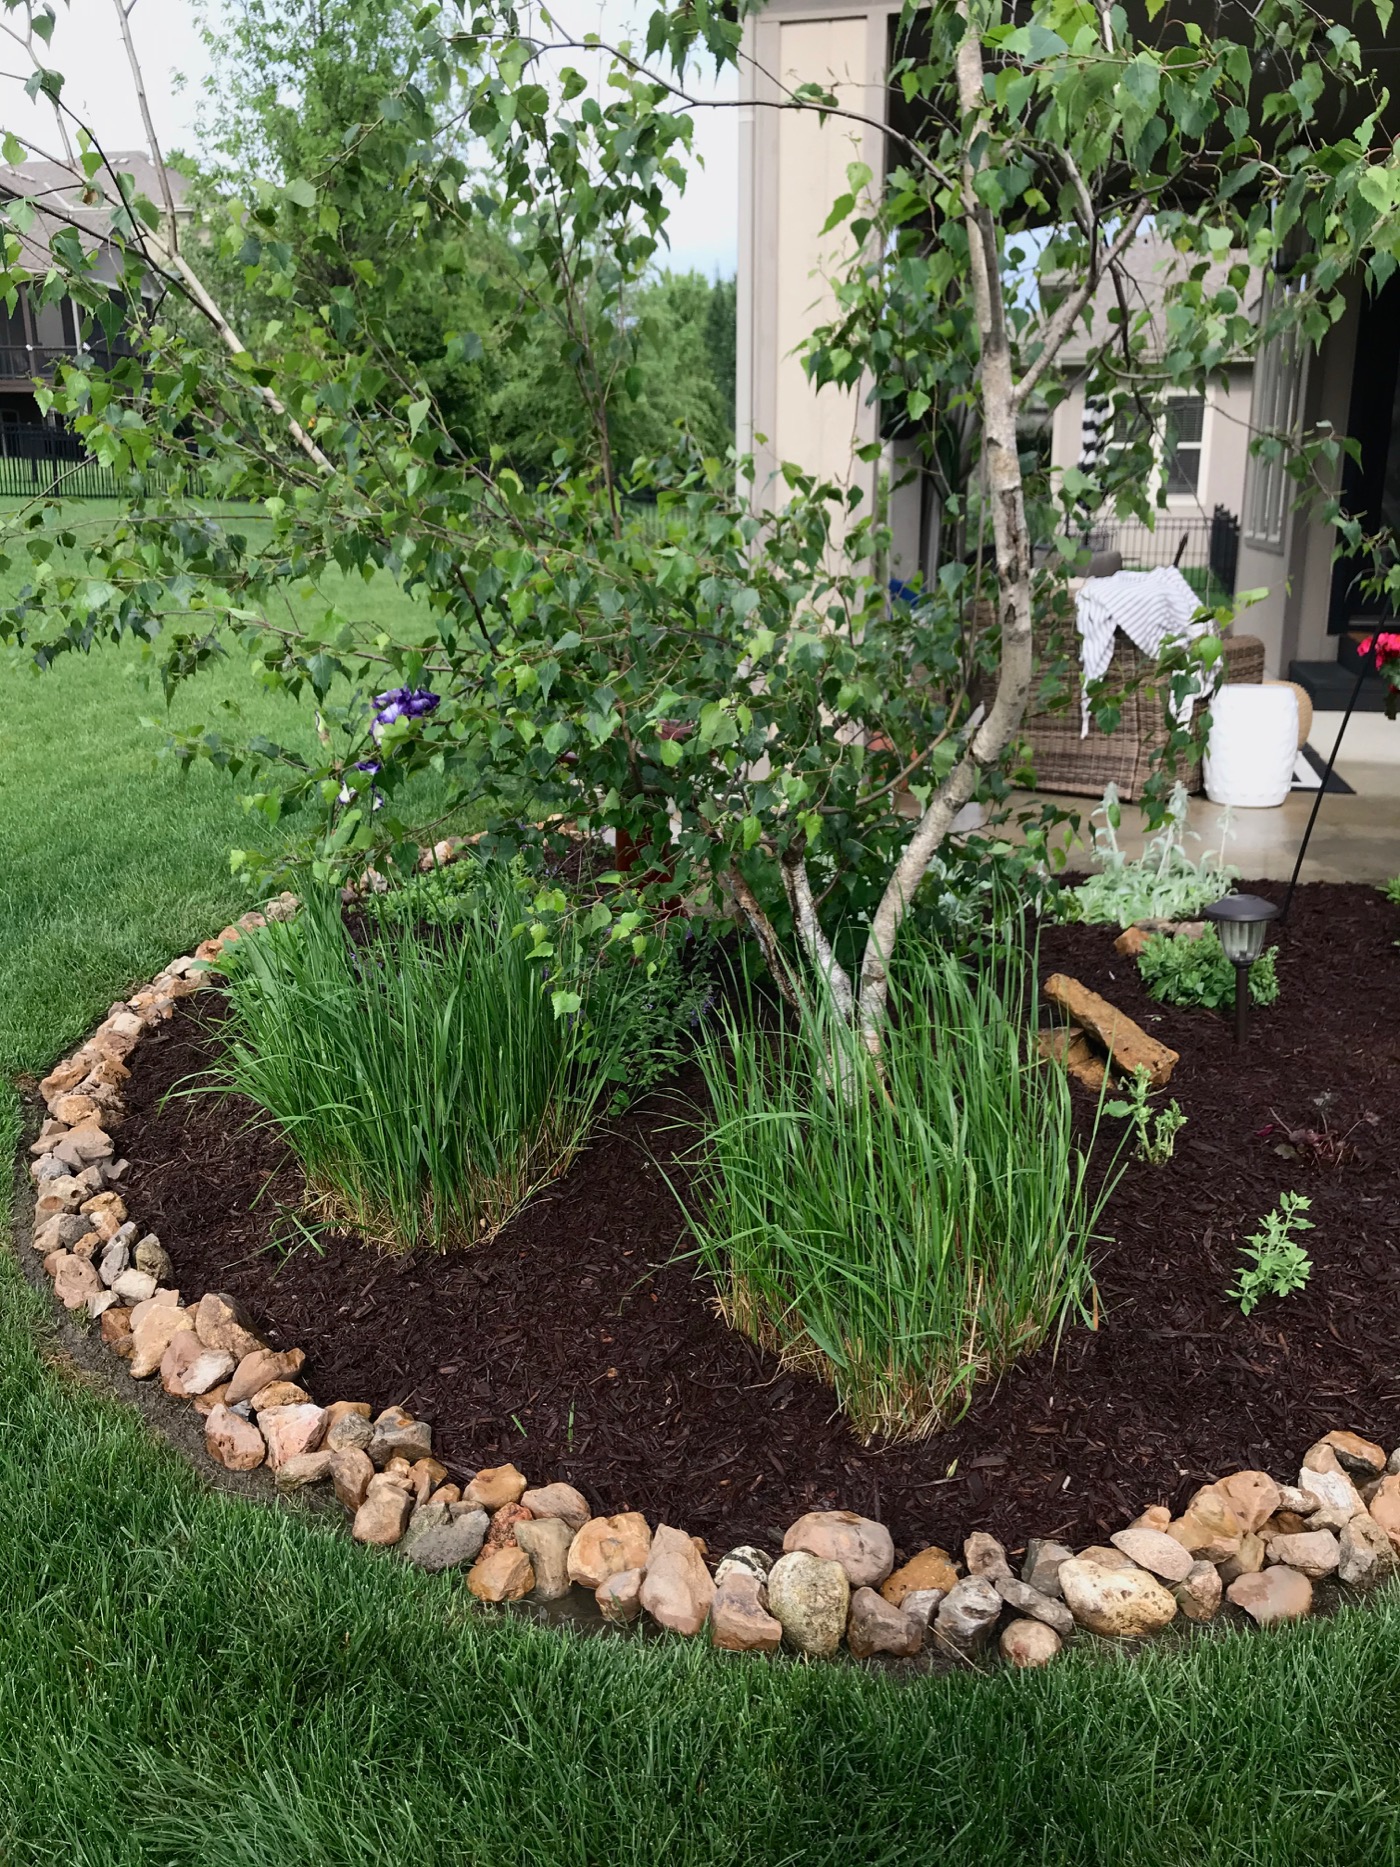
And the view in 2024.
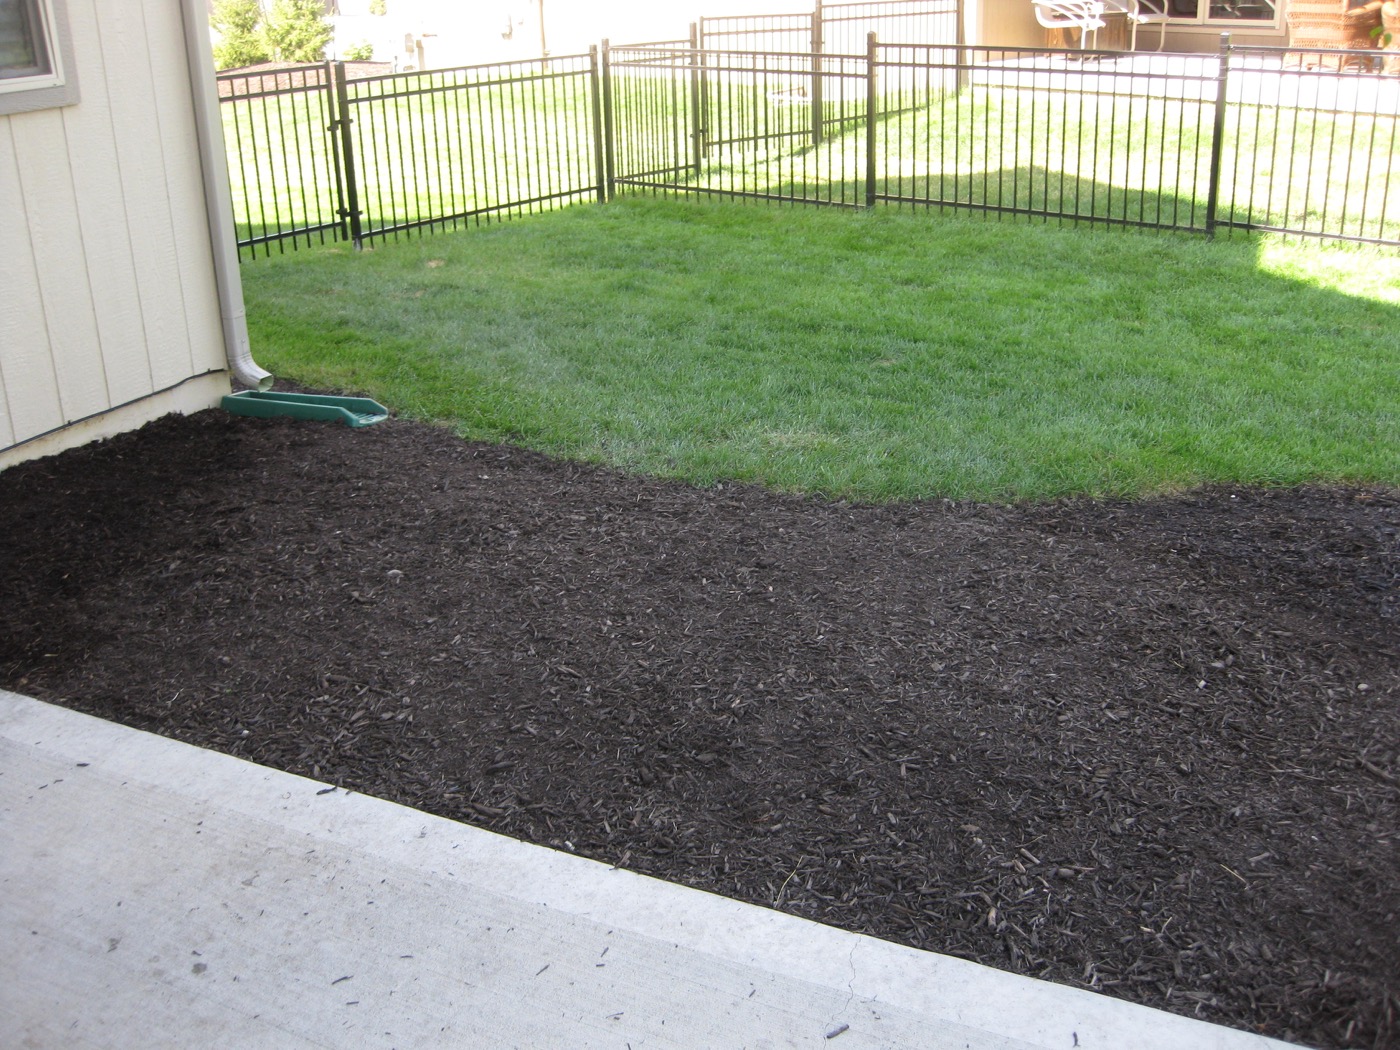
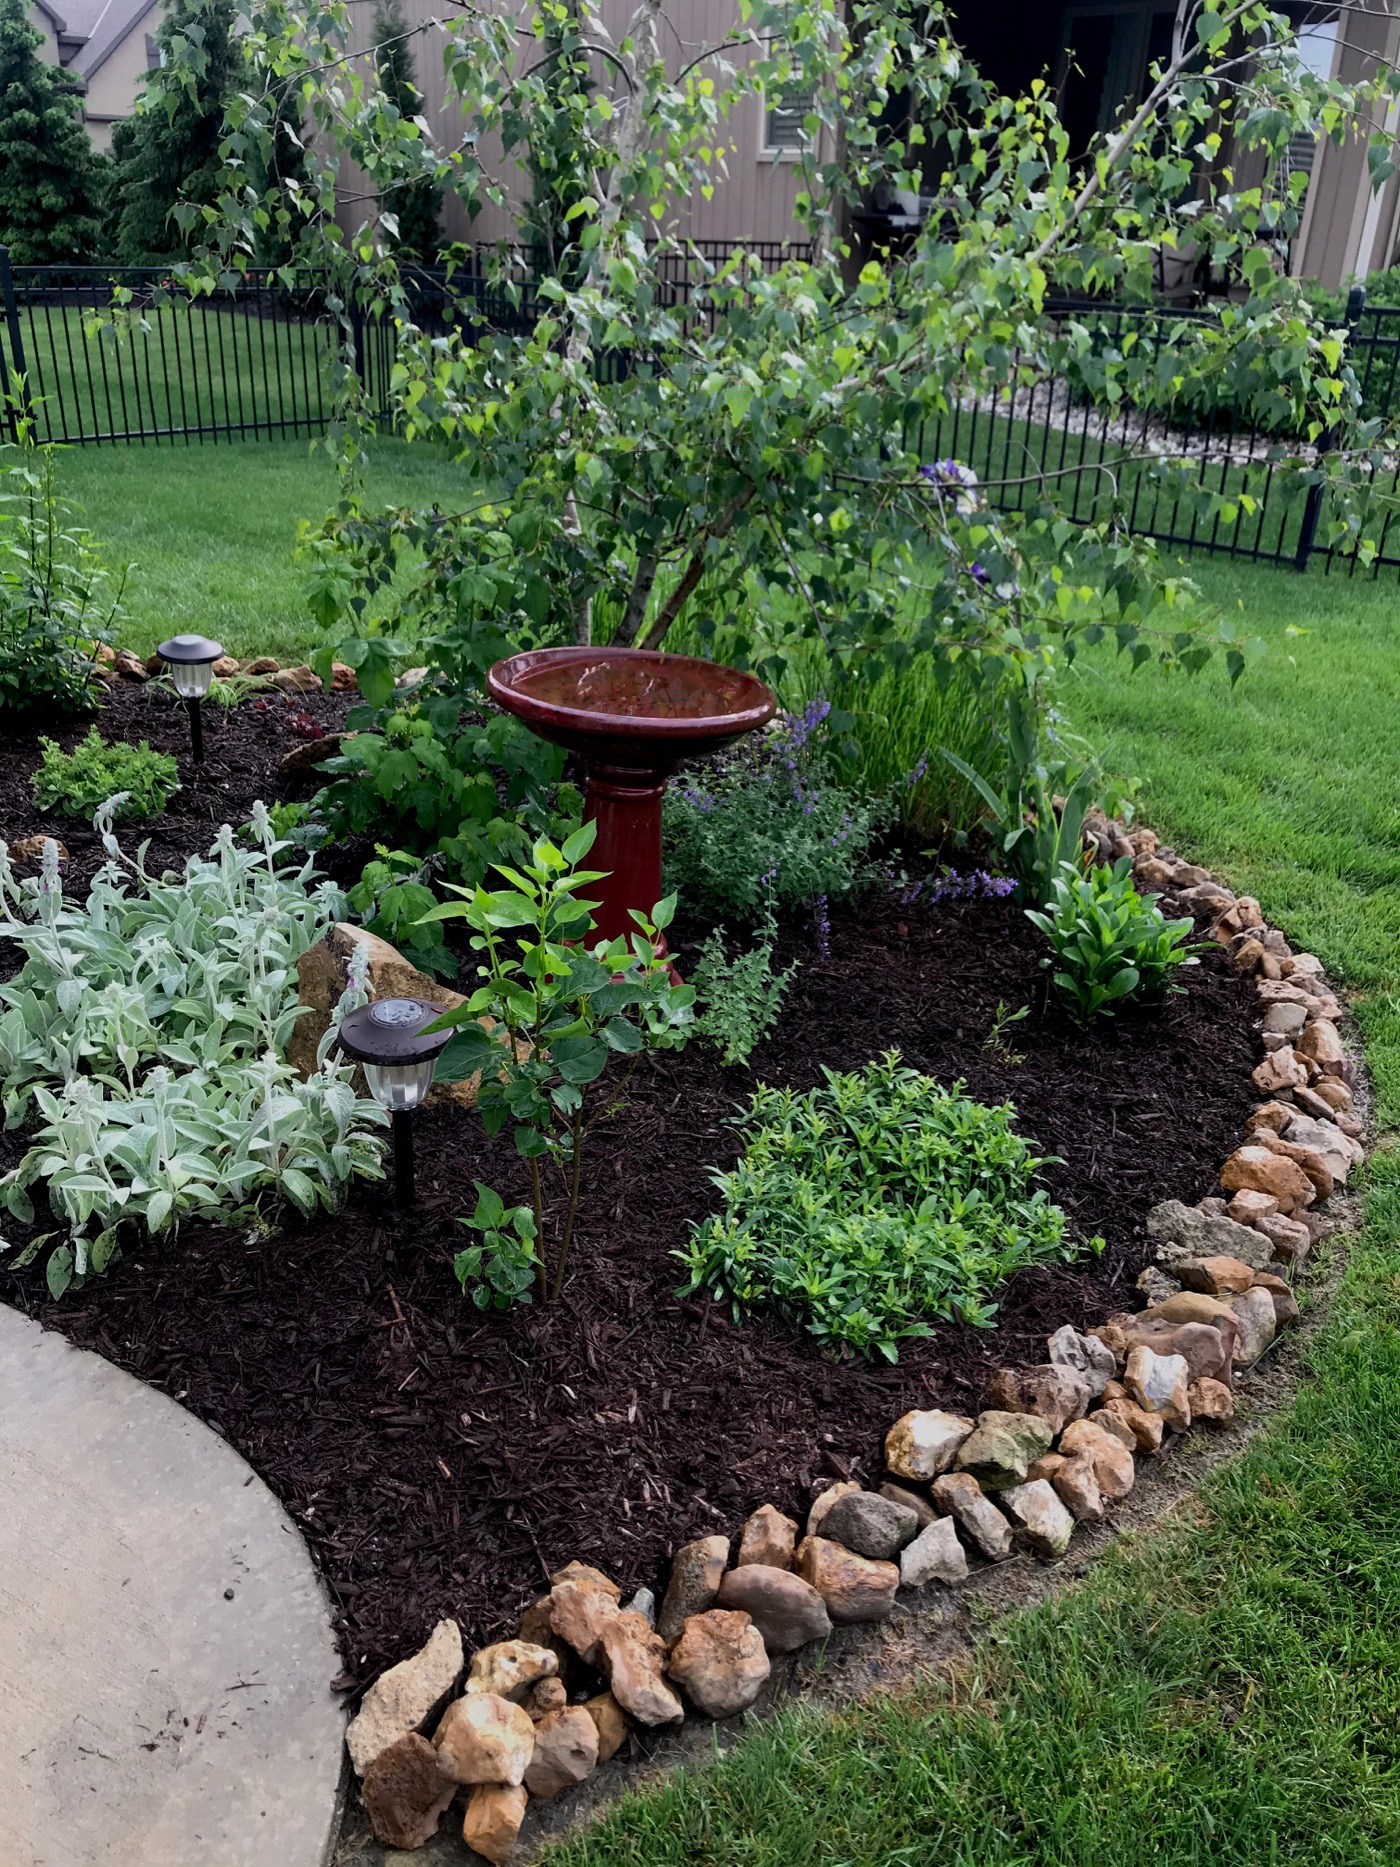
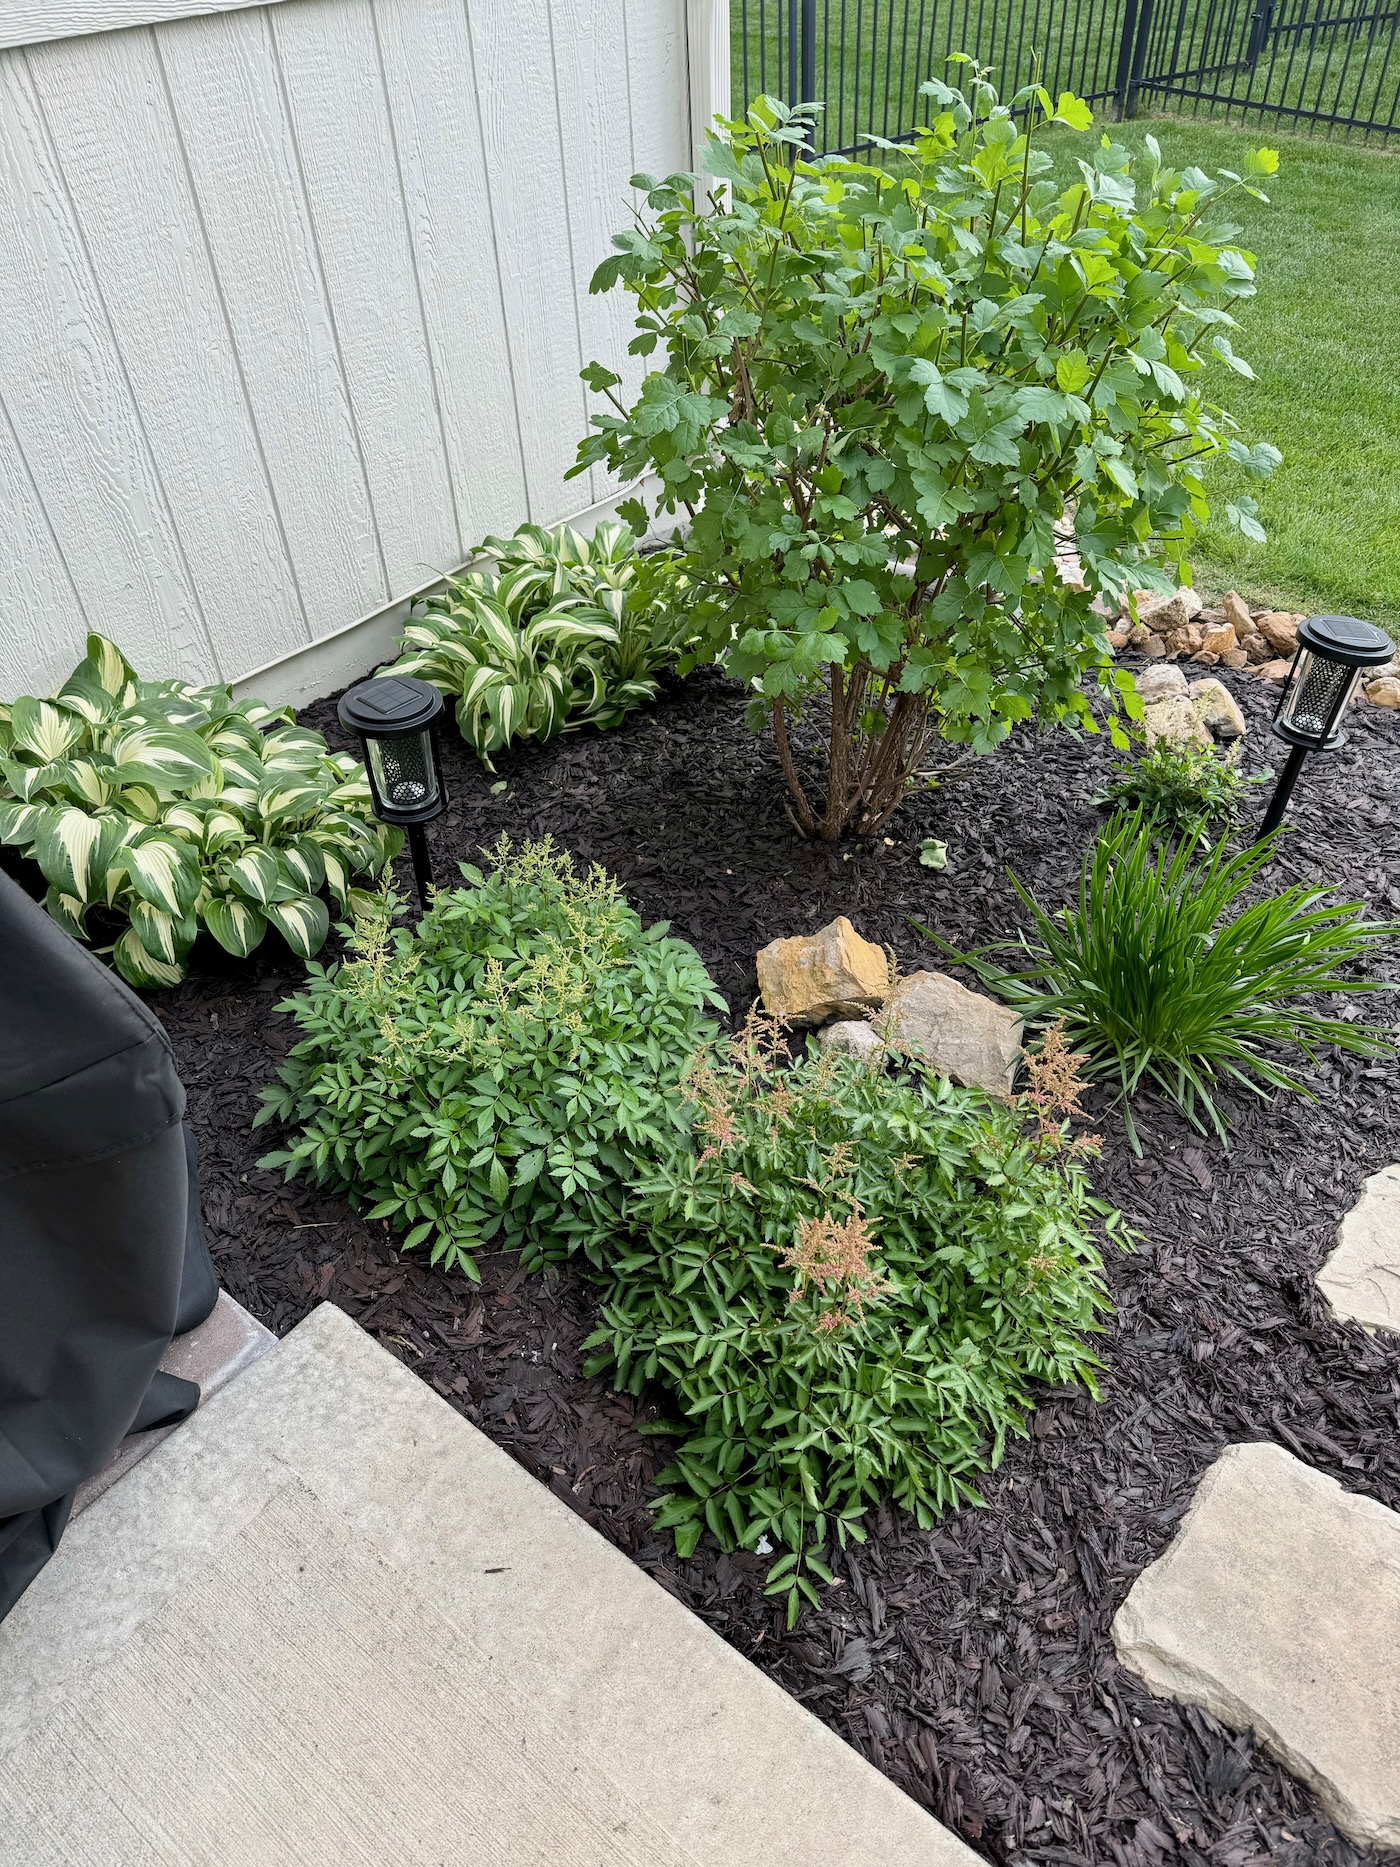
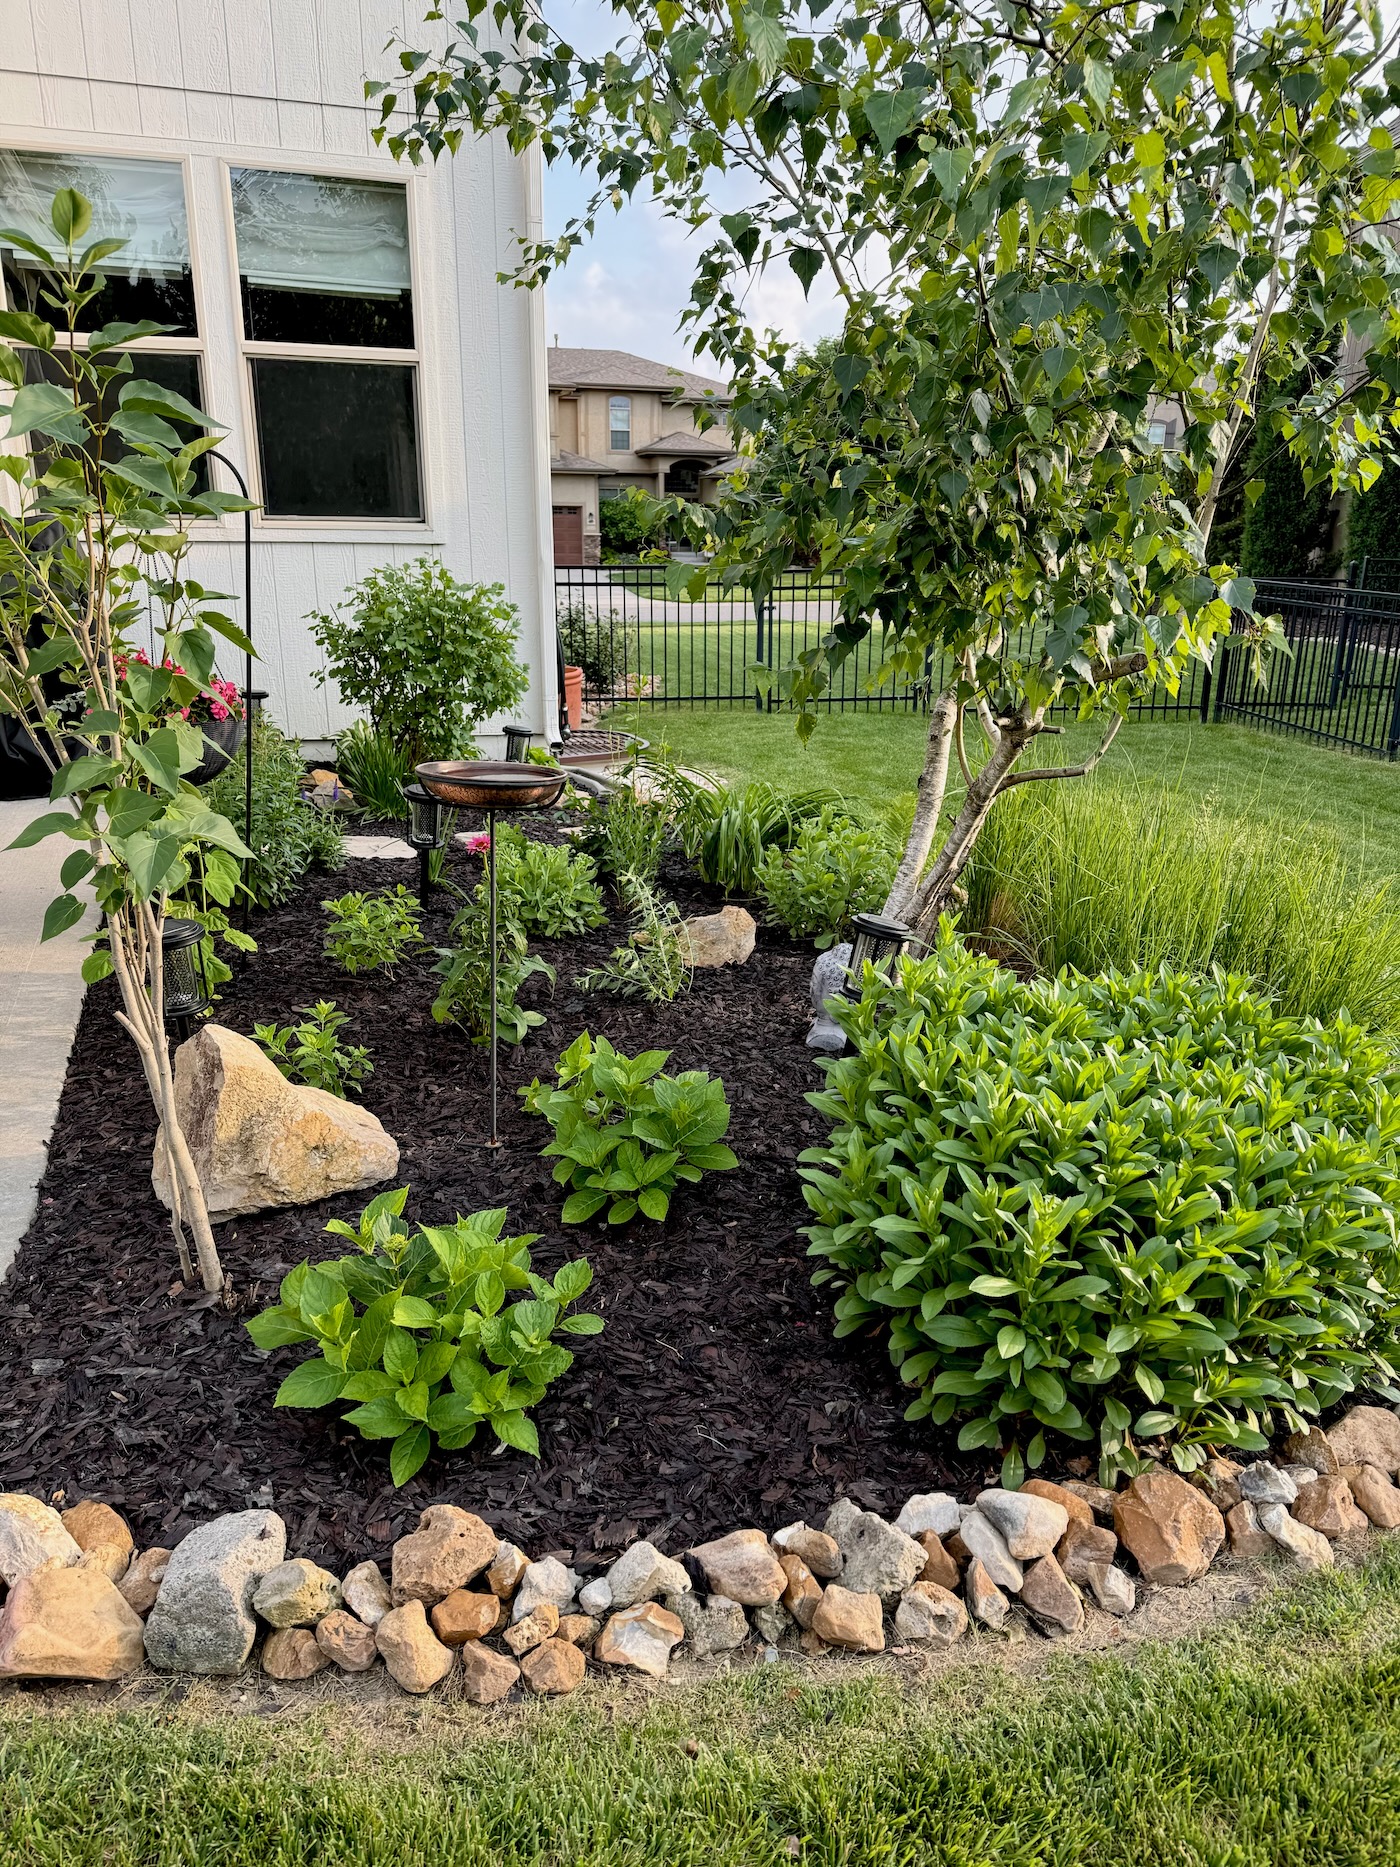
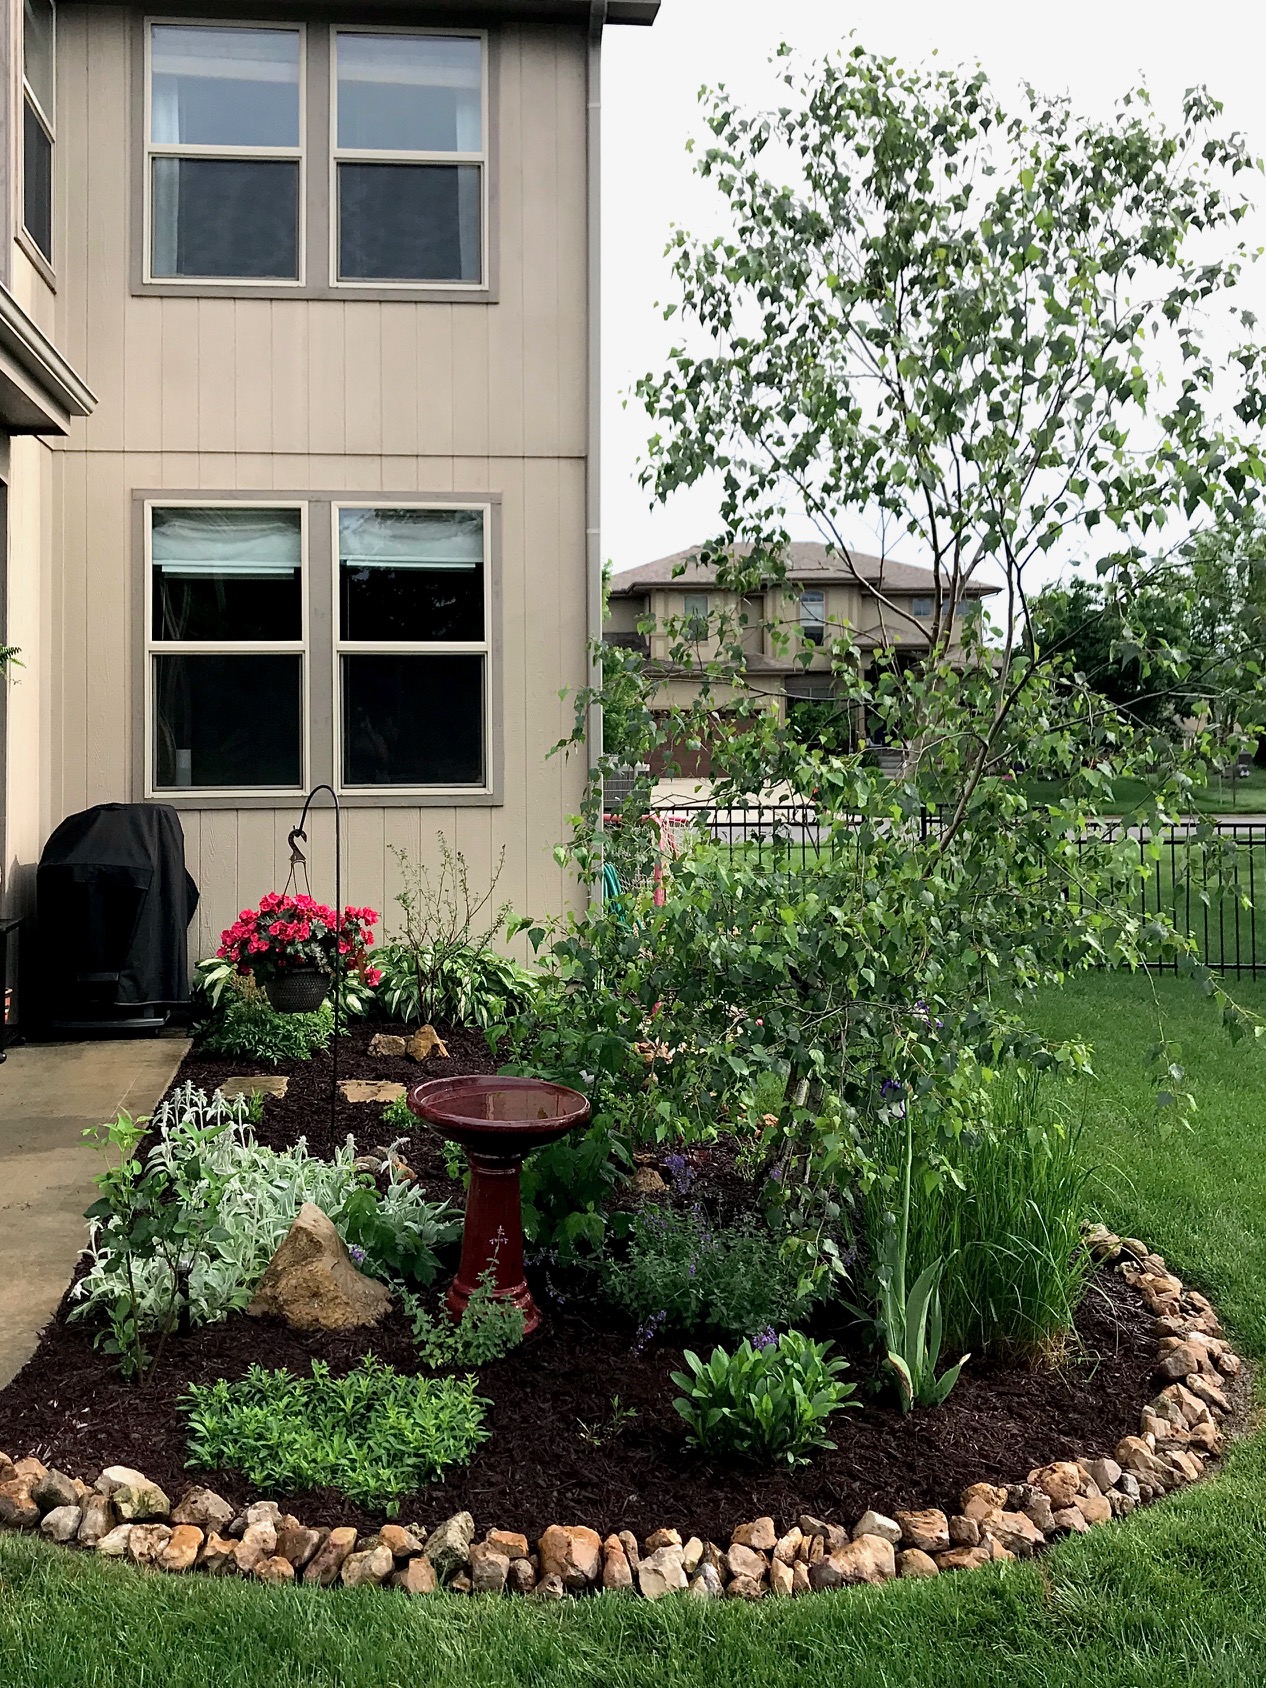
When we moved into our spec home in 2012, there was only landscaping mapped out for the front of the home. I decided to ask the landscapers to create a berm at the back of the house, next to the covered patio. Paying for this from the start was so helpful. They basically created a blank slate for me, adding one river birch tree and that’s it. Here is what it looked like right after we moved in. The curve softens the patio.
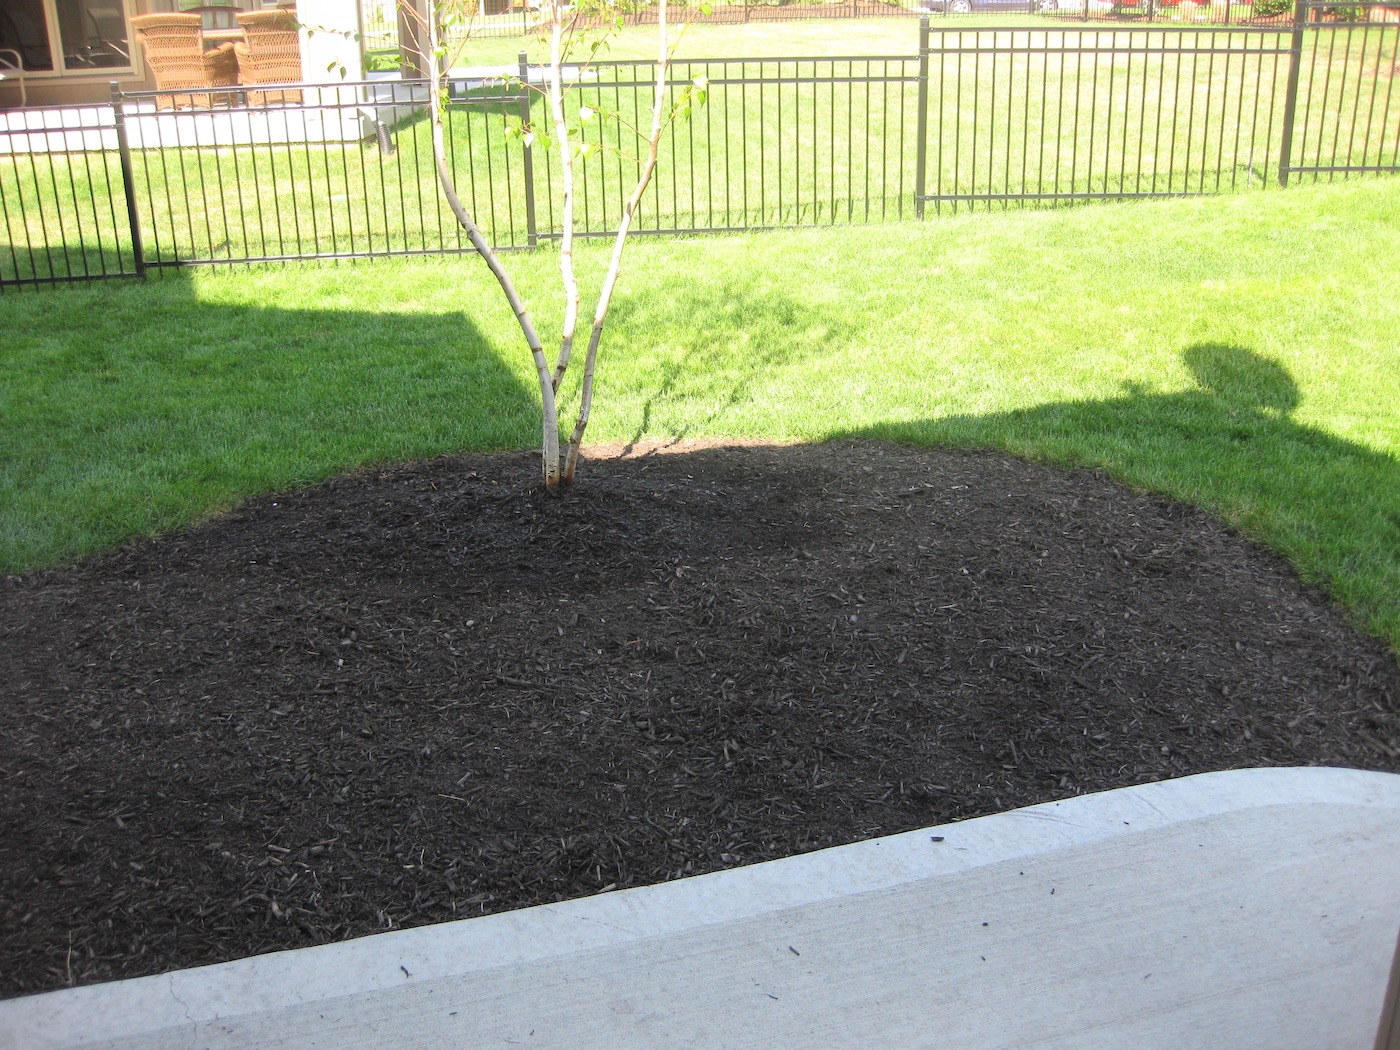
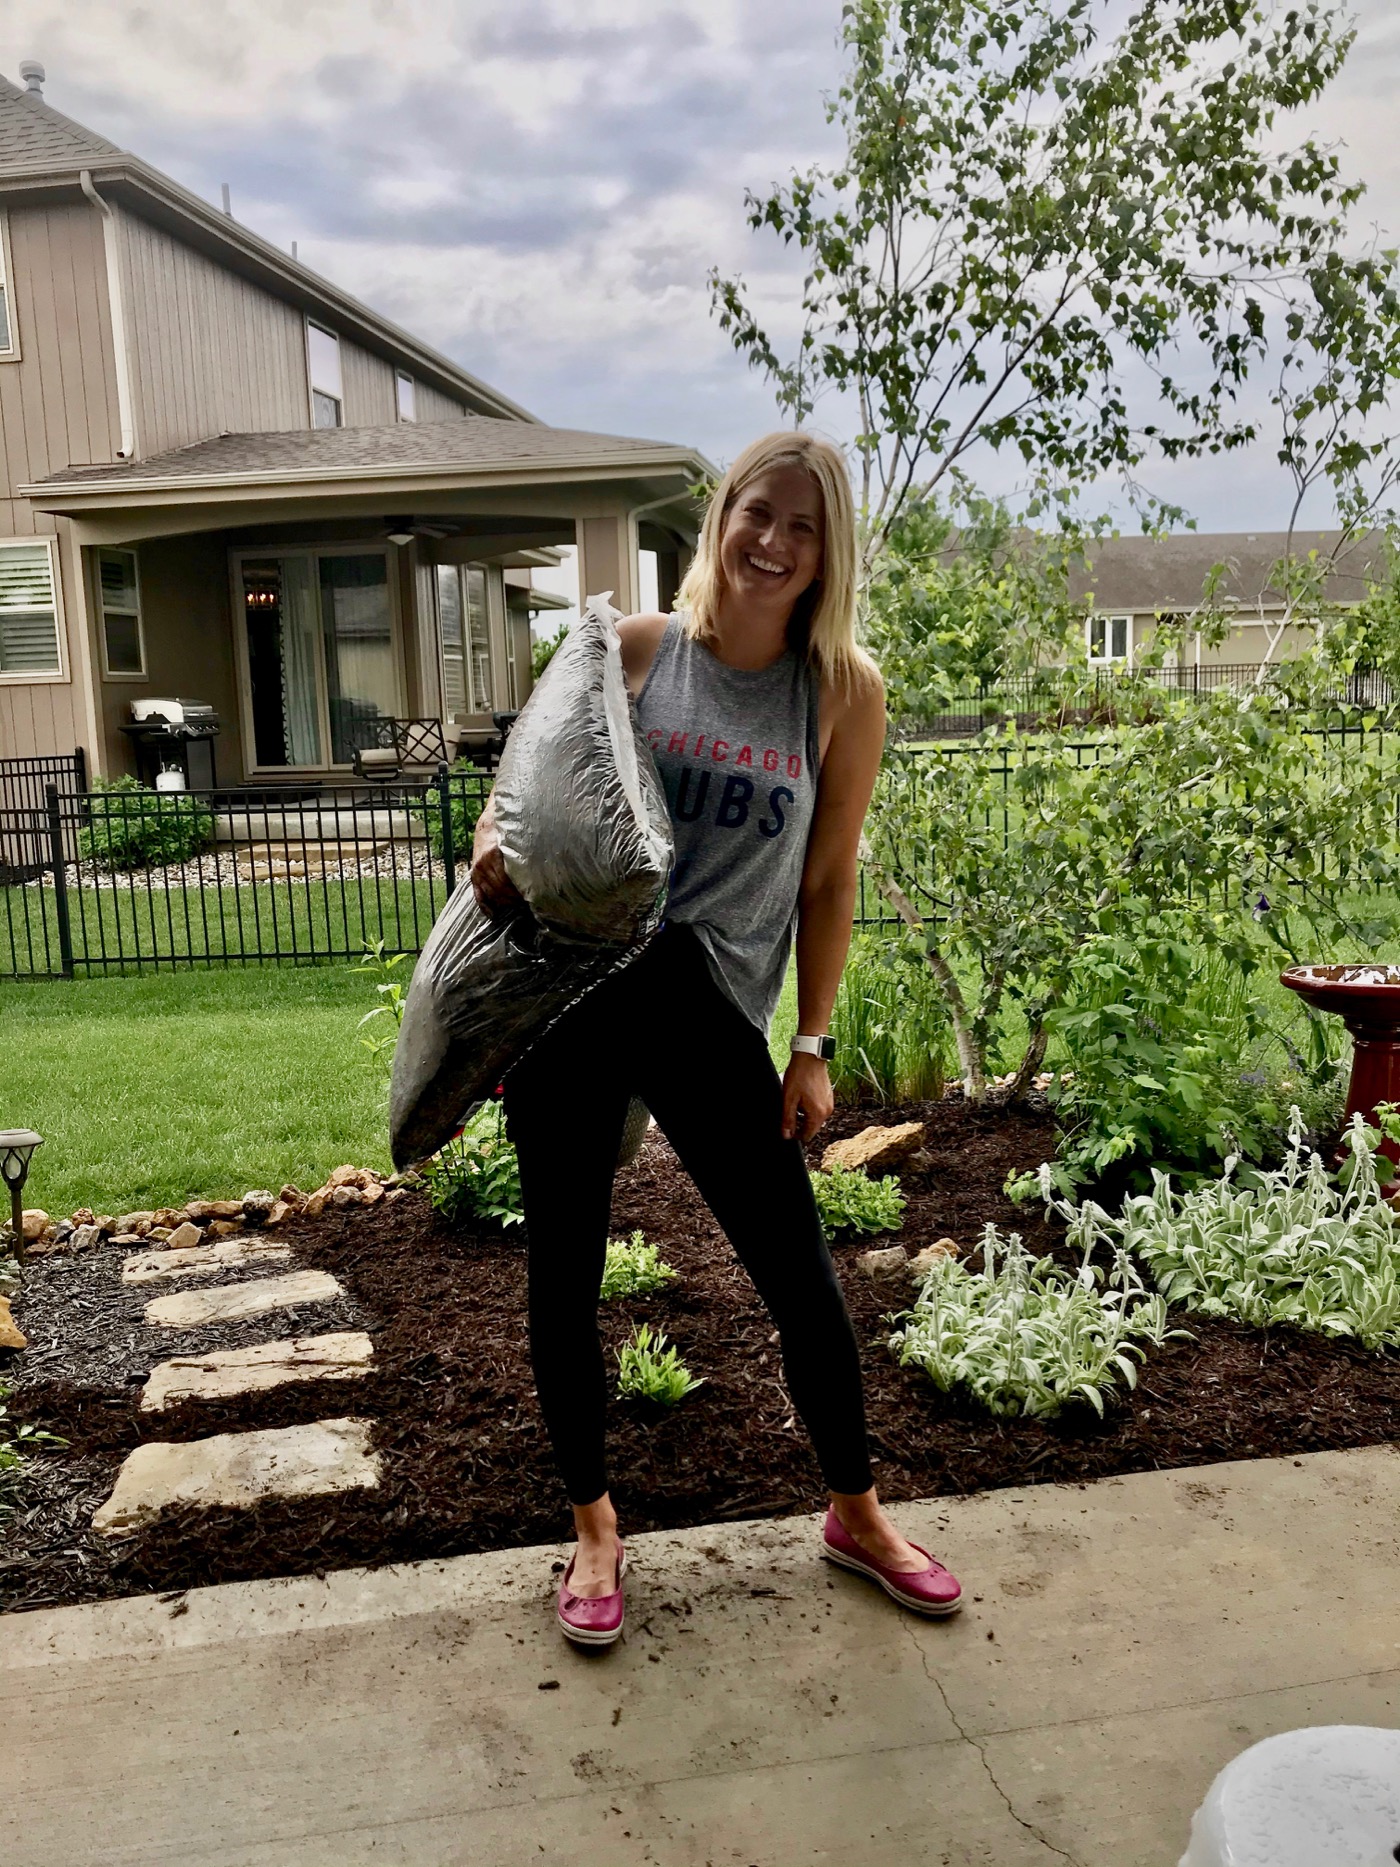
I knew that having something aesthetically pleasing next to where we lounge and sit and entertain would take things up a notch back here. Adding the river birch tree instantly added height and whimsy. In 2024, the birch is still going strong.
Now to fill in the berm! The space doesn’t look that big, but I have added so many plants back here, it’s crazy!
The view in 2020.
And in 2024.

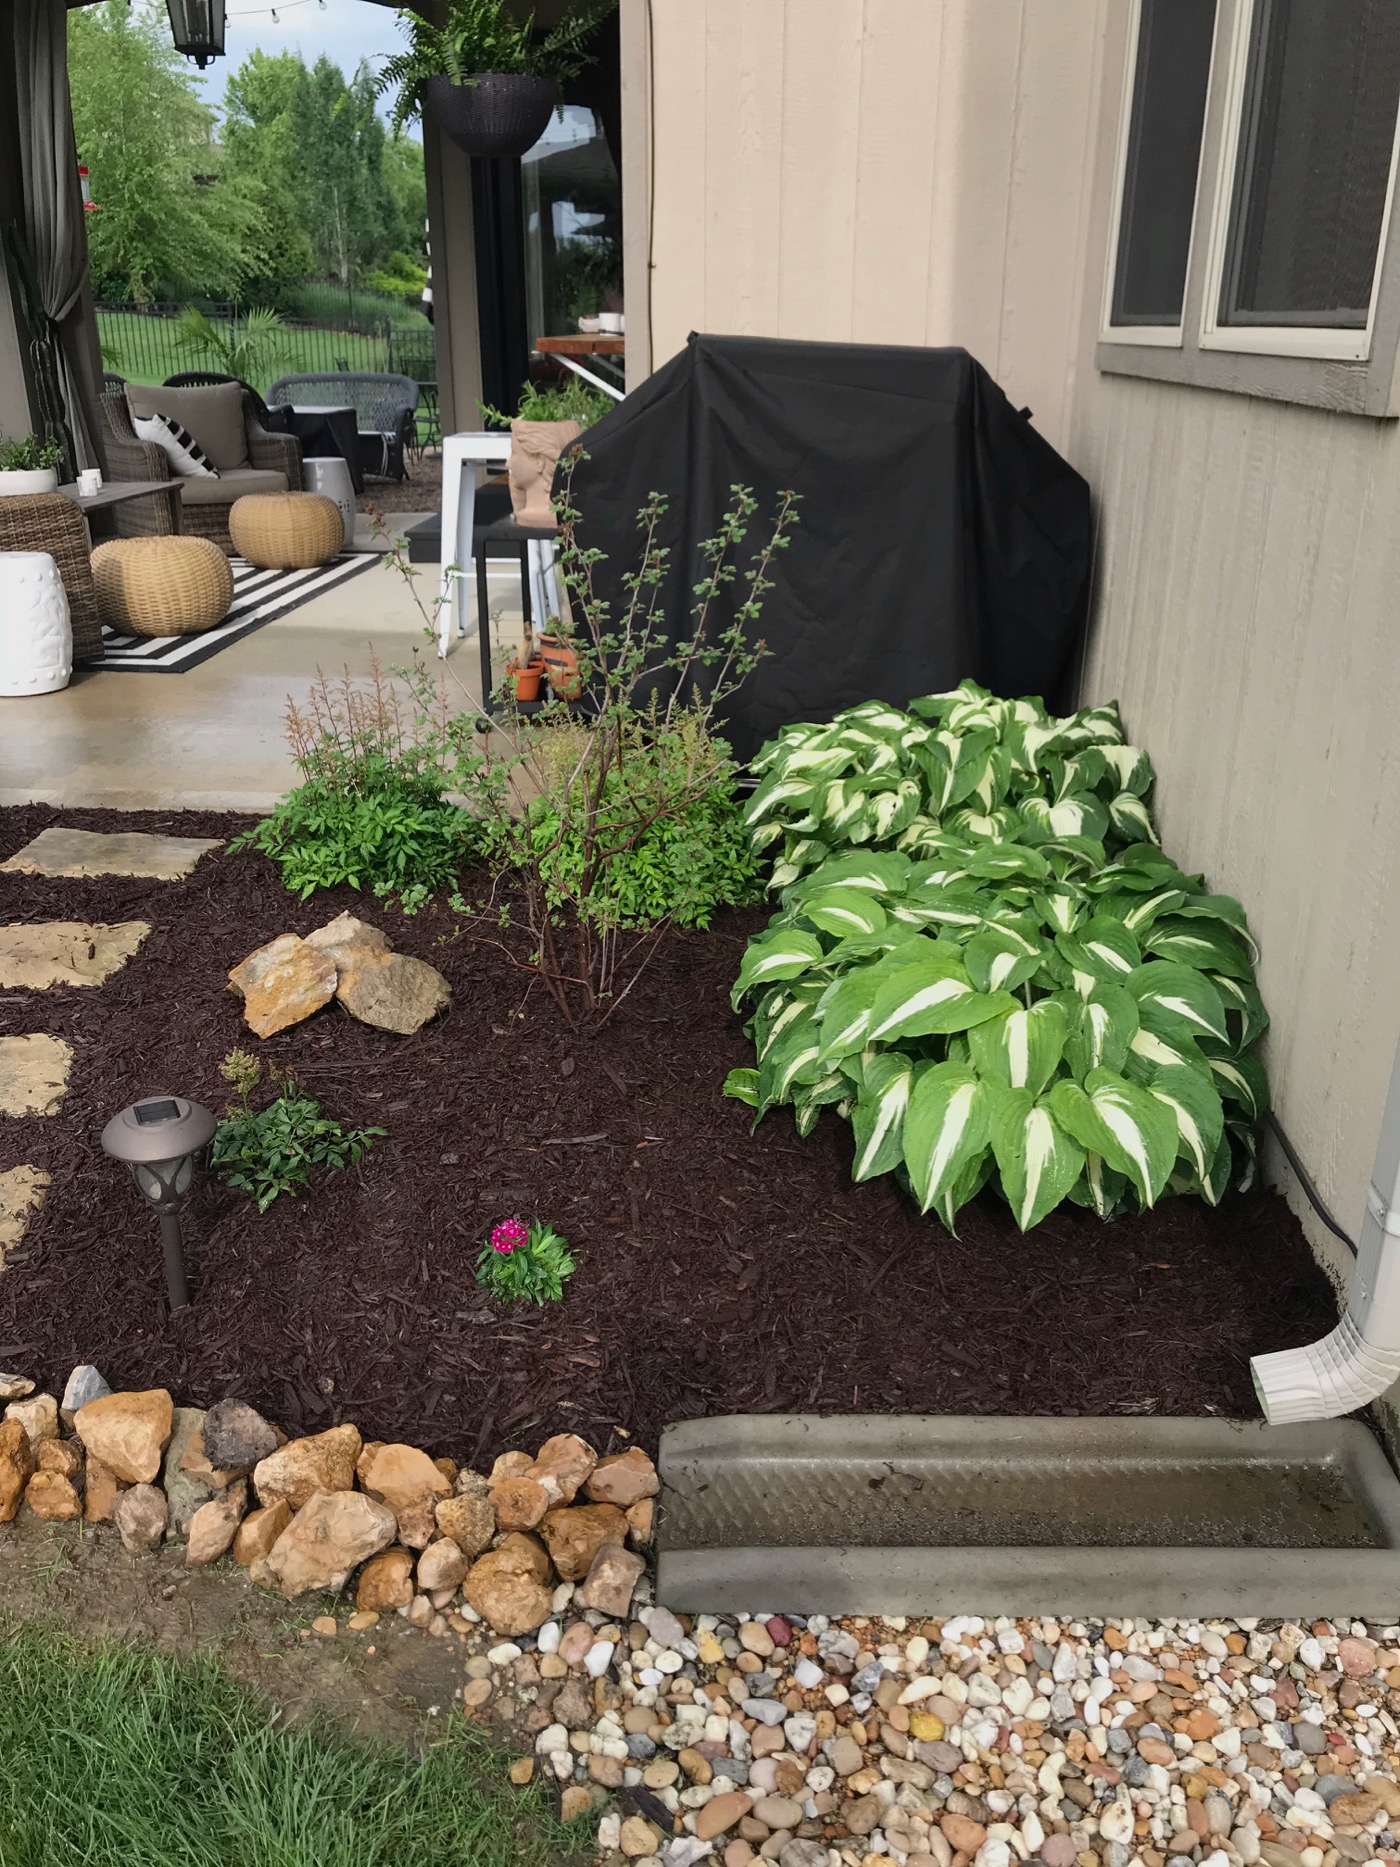
Rock Border
The first thing we decided to do was to add rock around the edge of the berm to give it texture and color and to help keep the mulch in the bed. We had the rock delivered to our driveway and my husband and I individually hand laid all of the rock! We do have grass that comes up between the rocks and I either hand pick (preferred method), or I spray a grass and weed spray. The border creates a visual barrier and looks for finished.

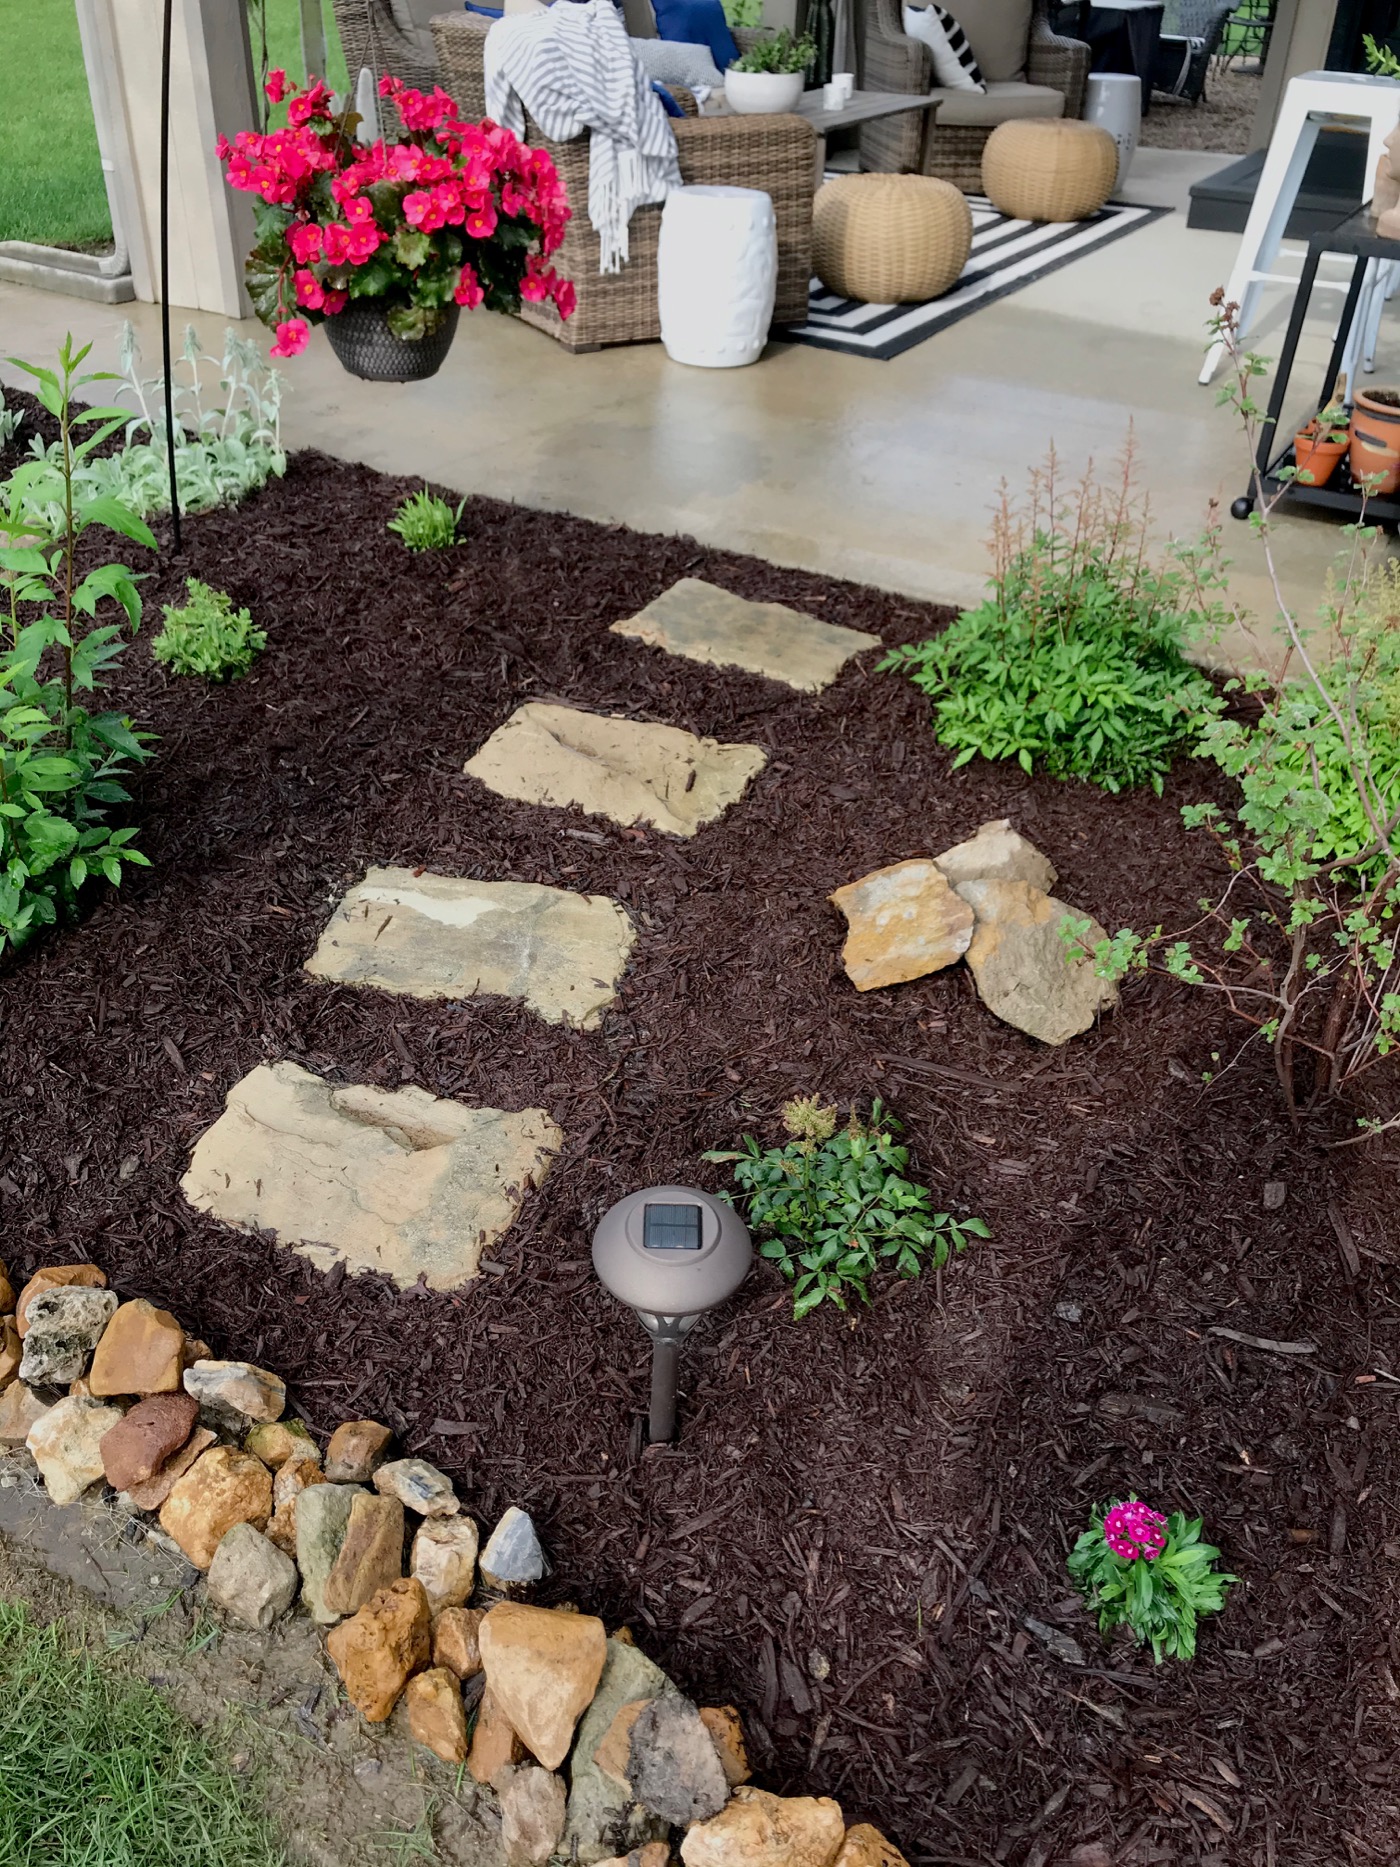
Stepping Stone Pavers
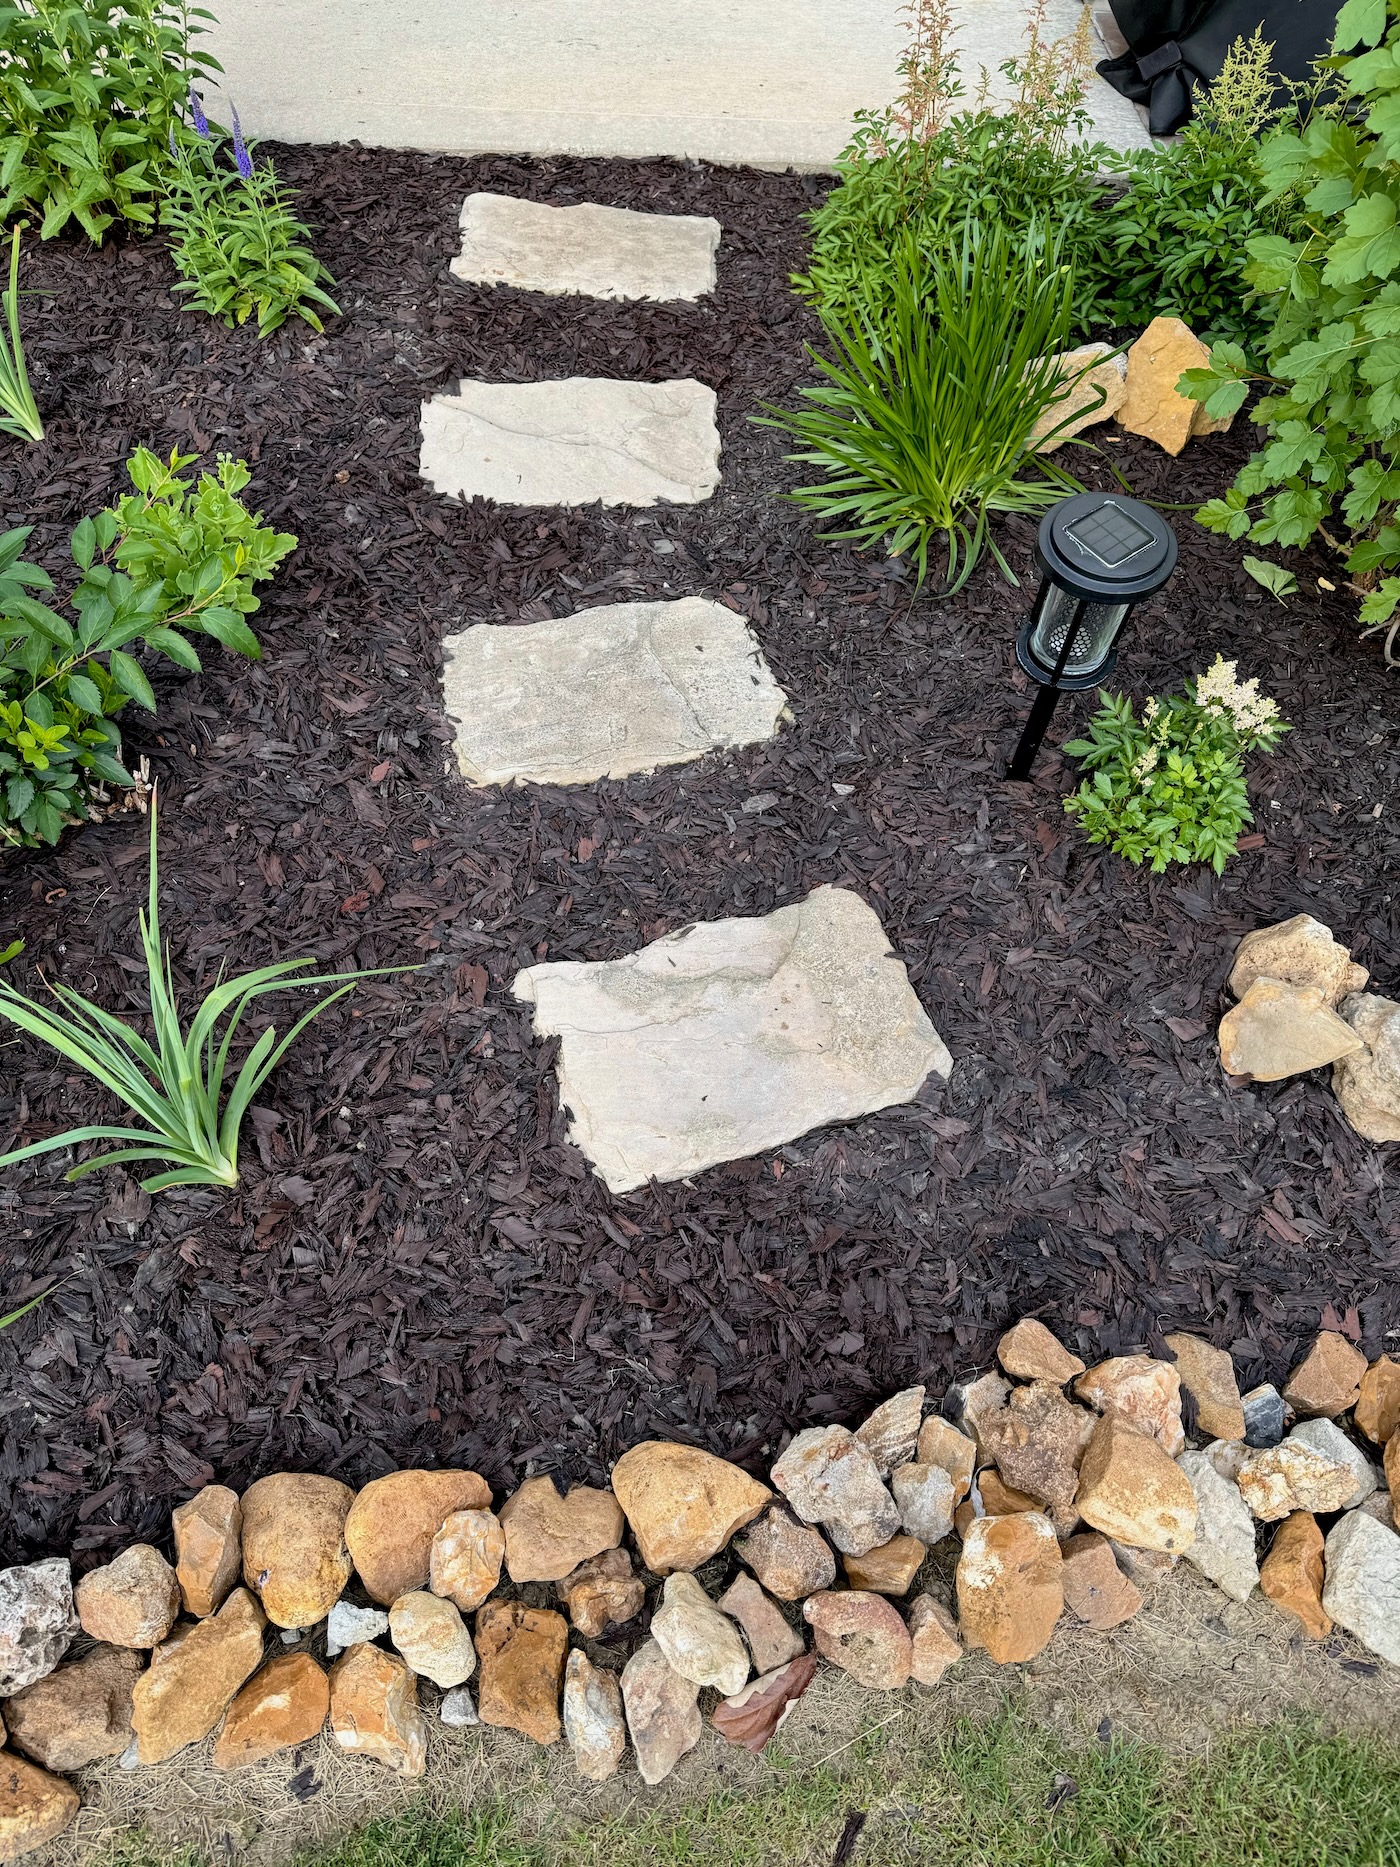
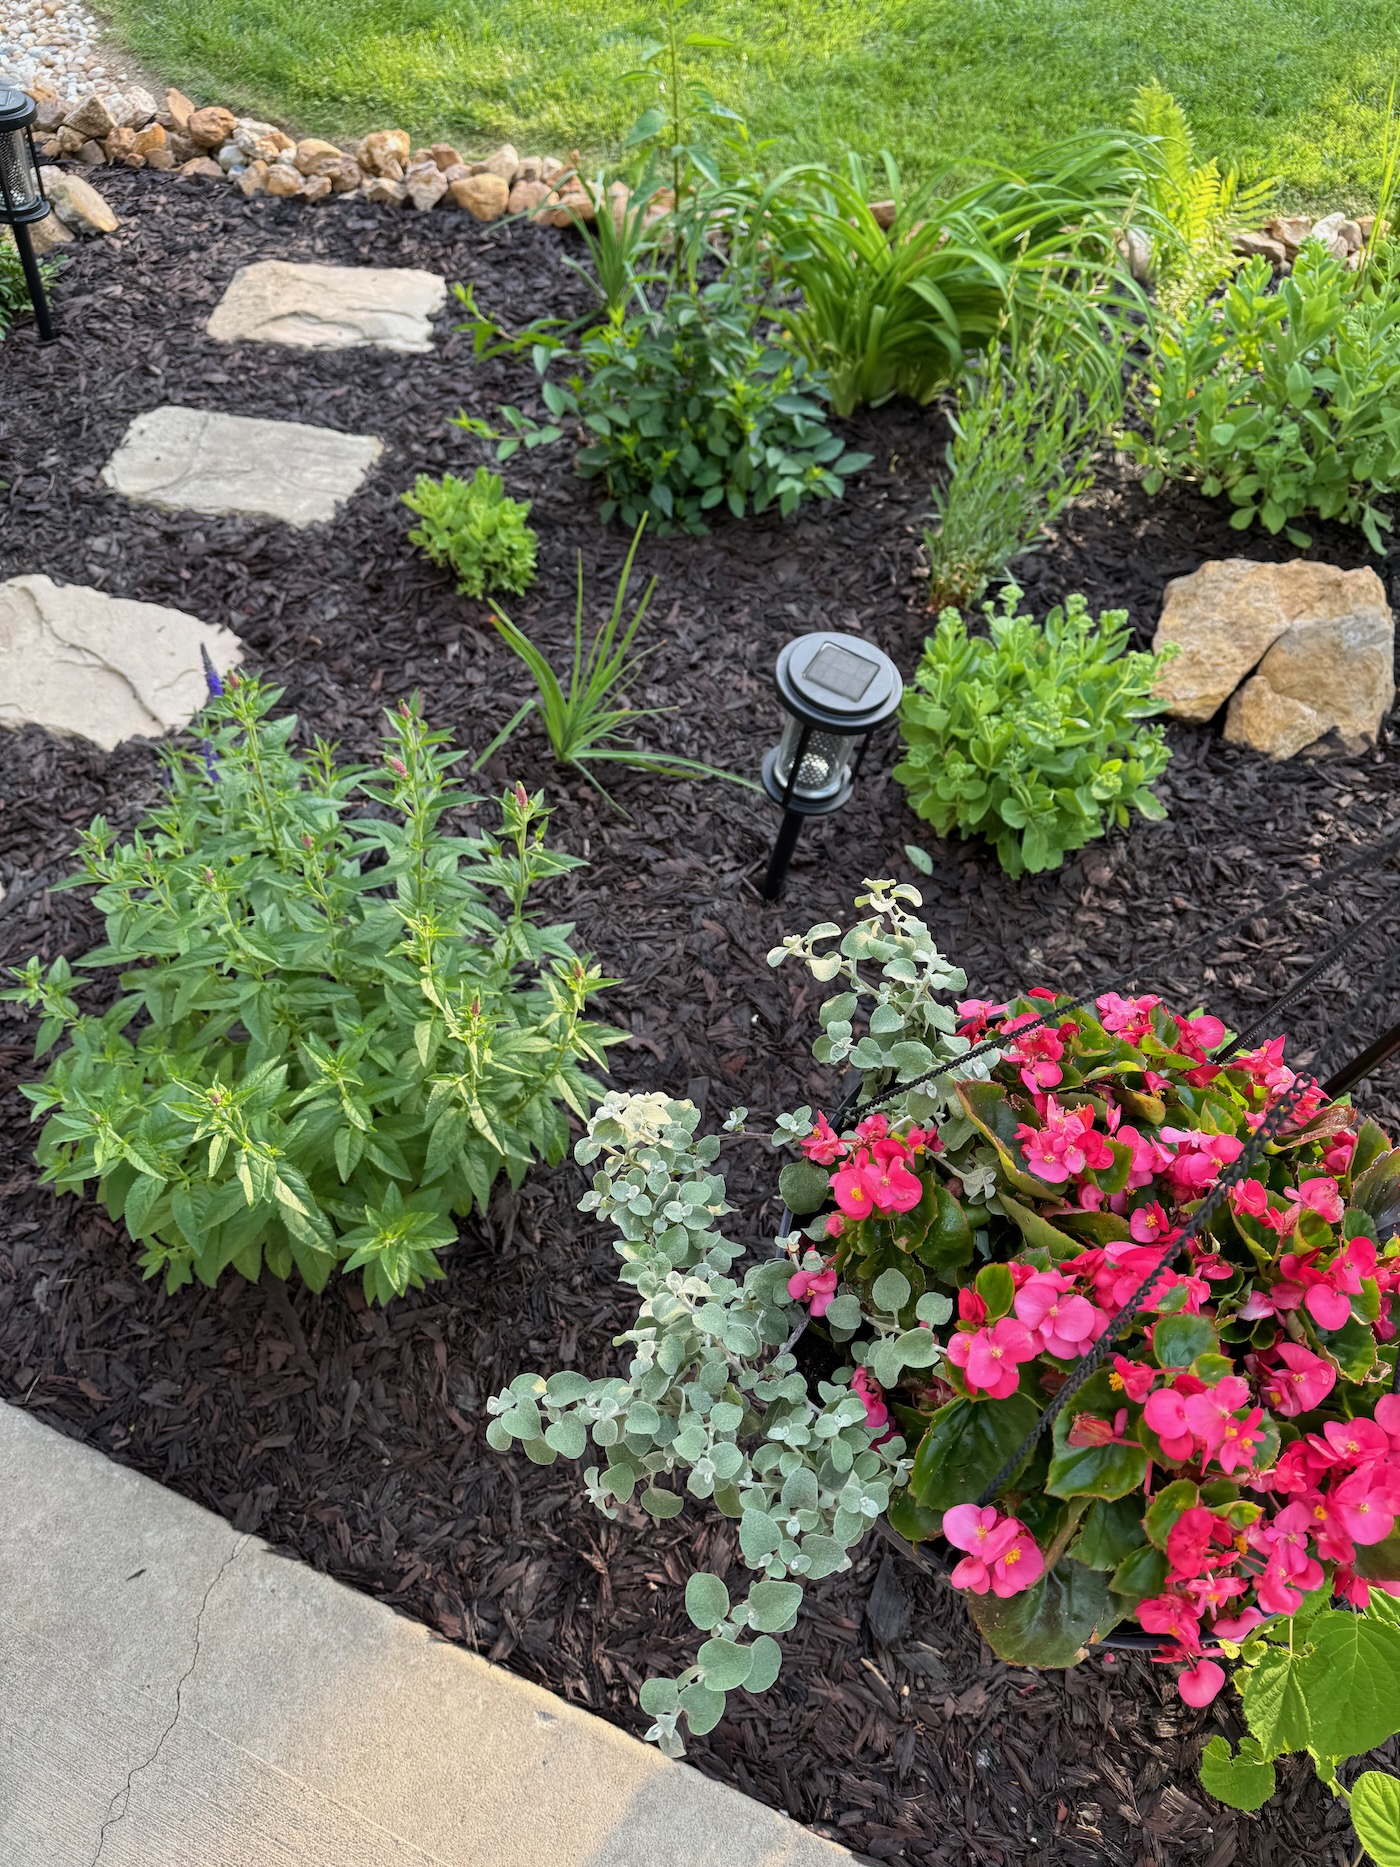
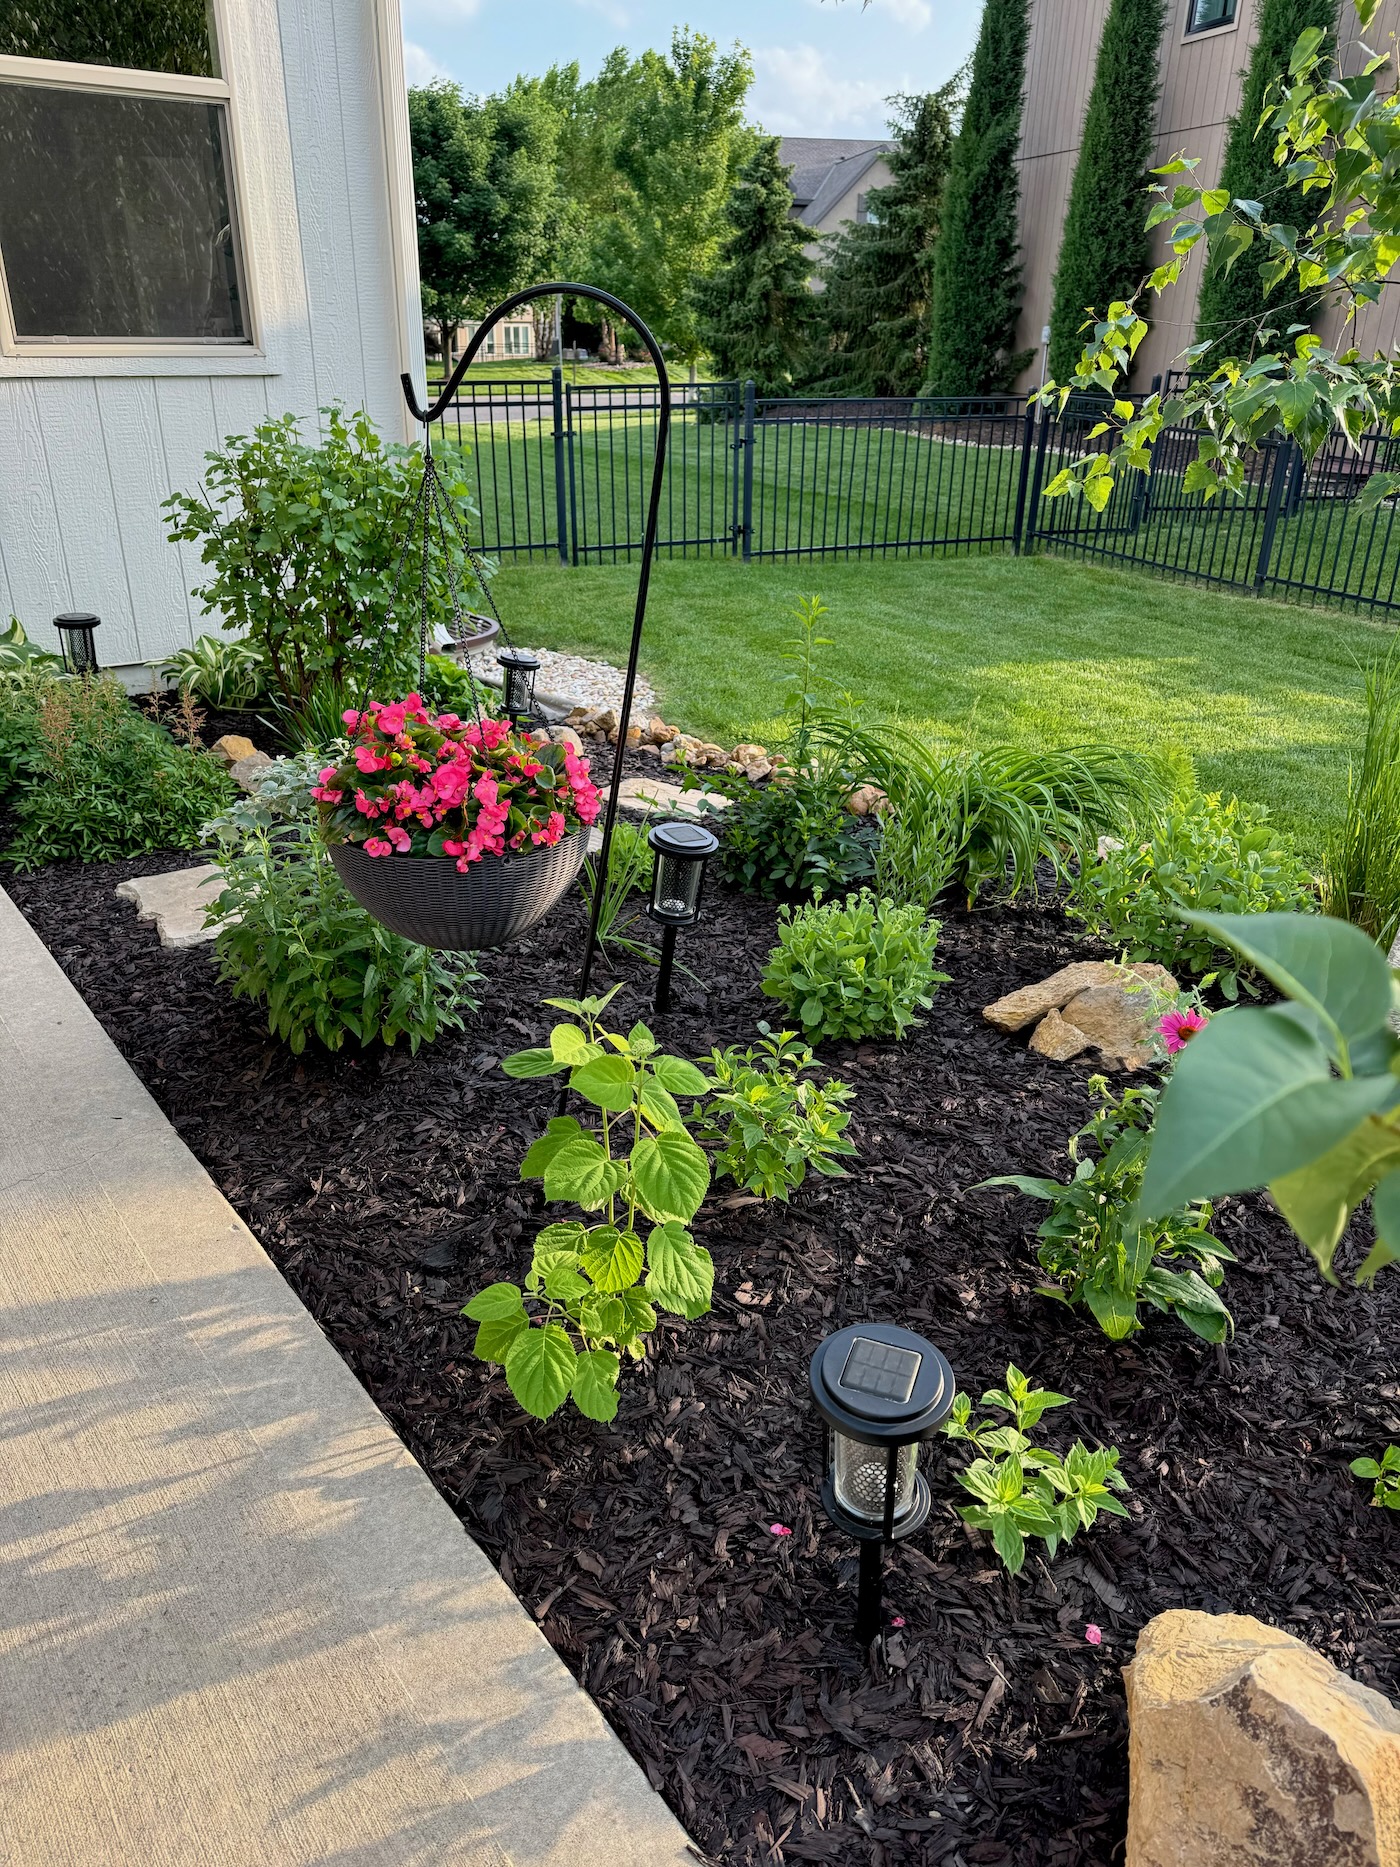
Along with the rock, we purchased stepping stones from Home Depot to add a walkway from the covered patio to the fence gate. Adding stepping stones creates an inviting pathway for adults and kids to take the path instead of taking the mulch! Ha! Stepping stones are an inexpensive way to break up the mulch, add texture, dimension, and function. We have them in two other places in our landscaping up front as well.
View in 2020.
And in 2024. They have stayed put for many years!
Adding Perennials
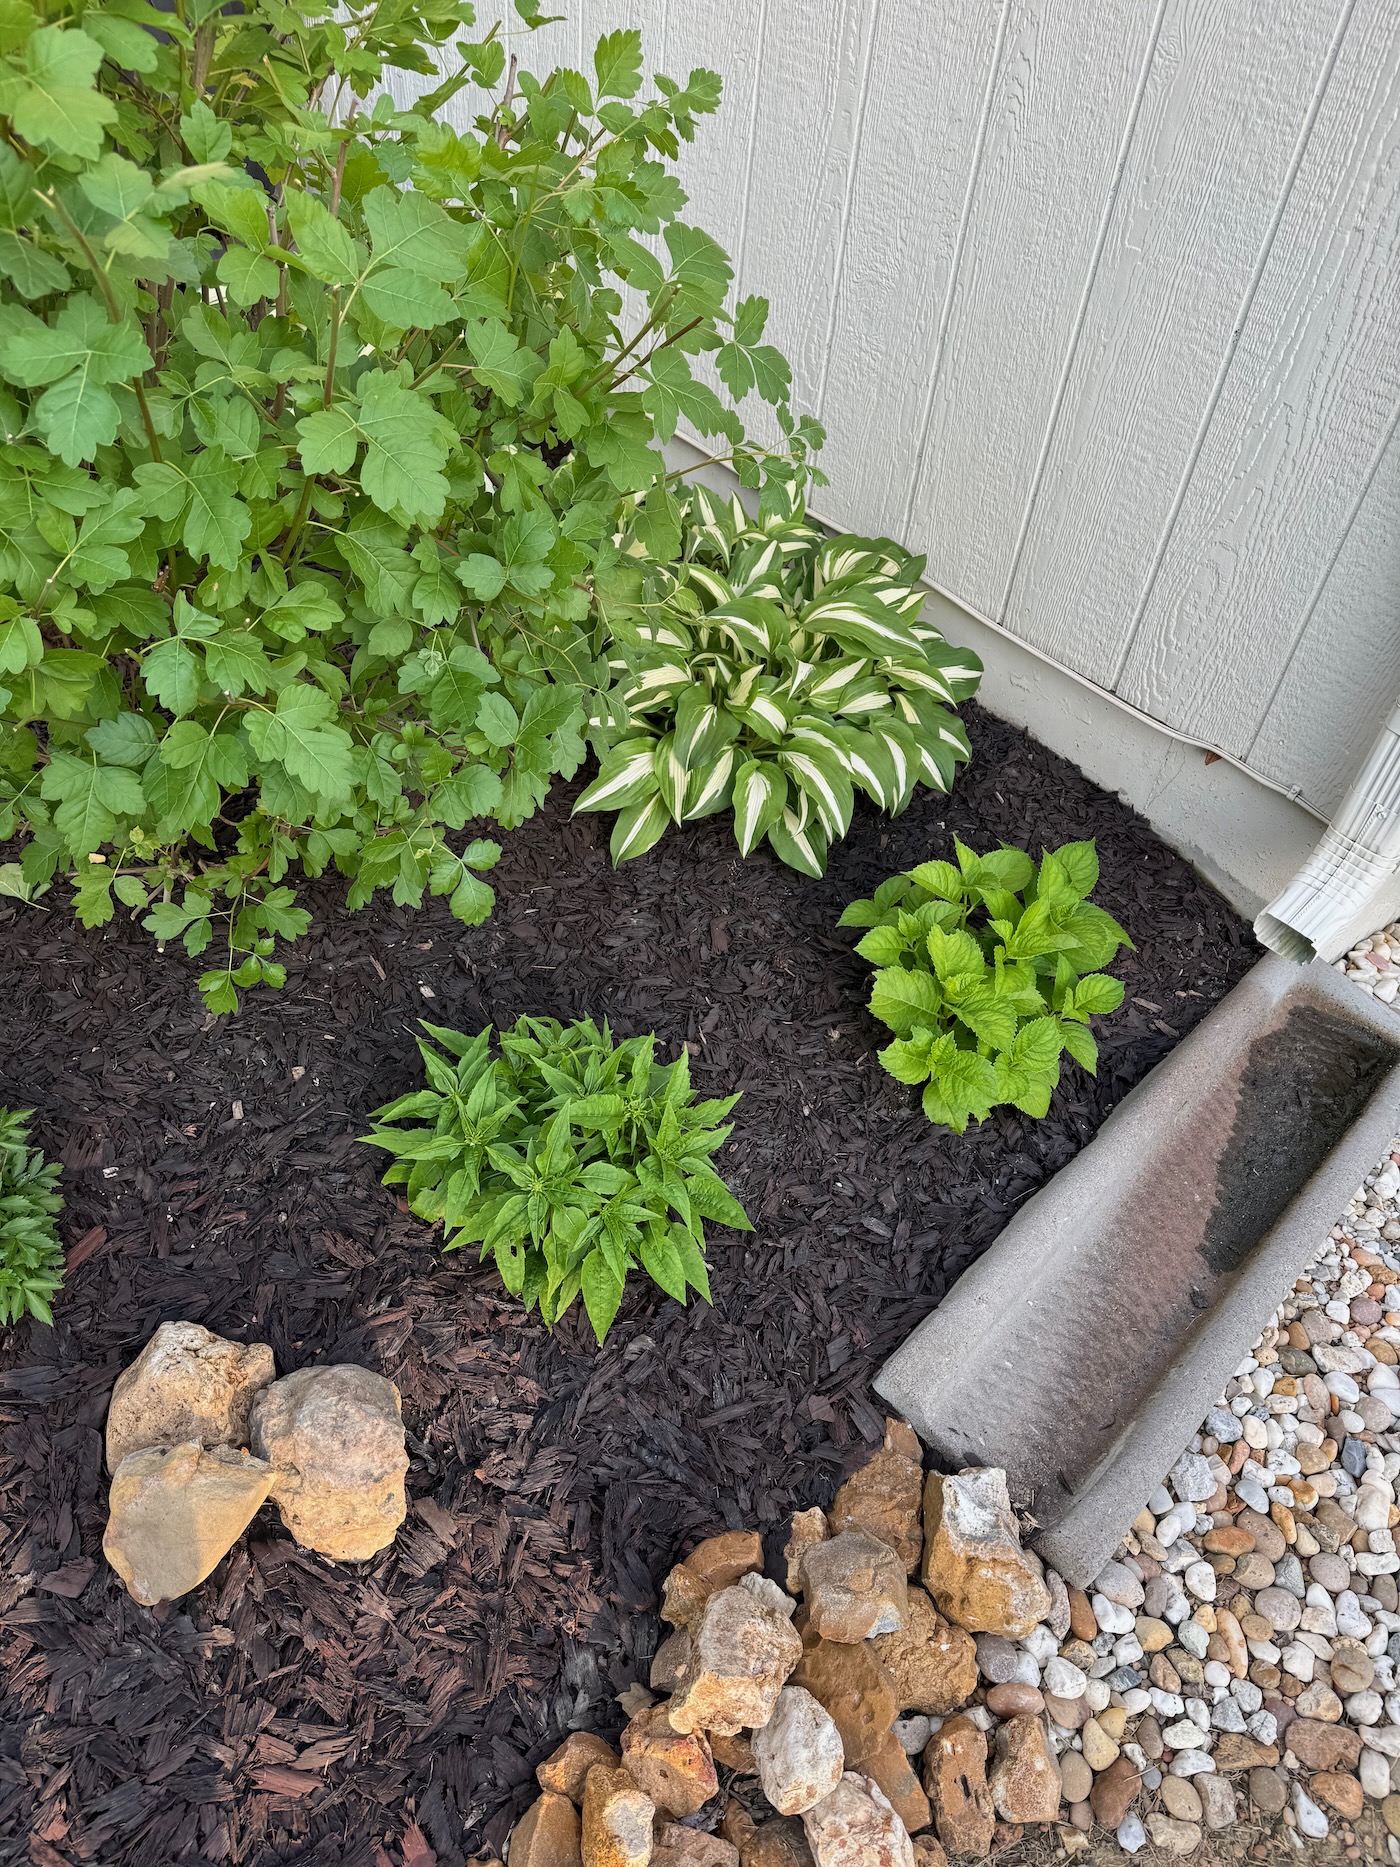
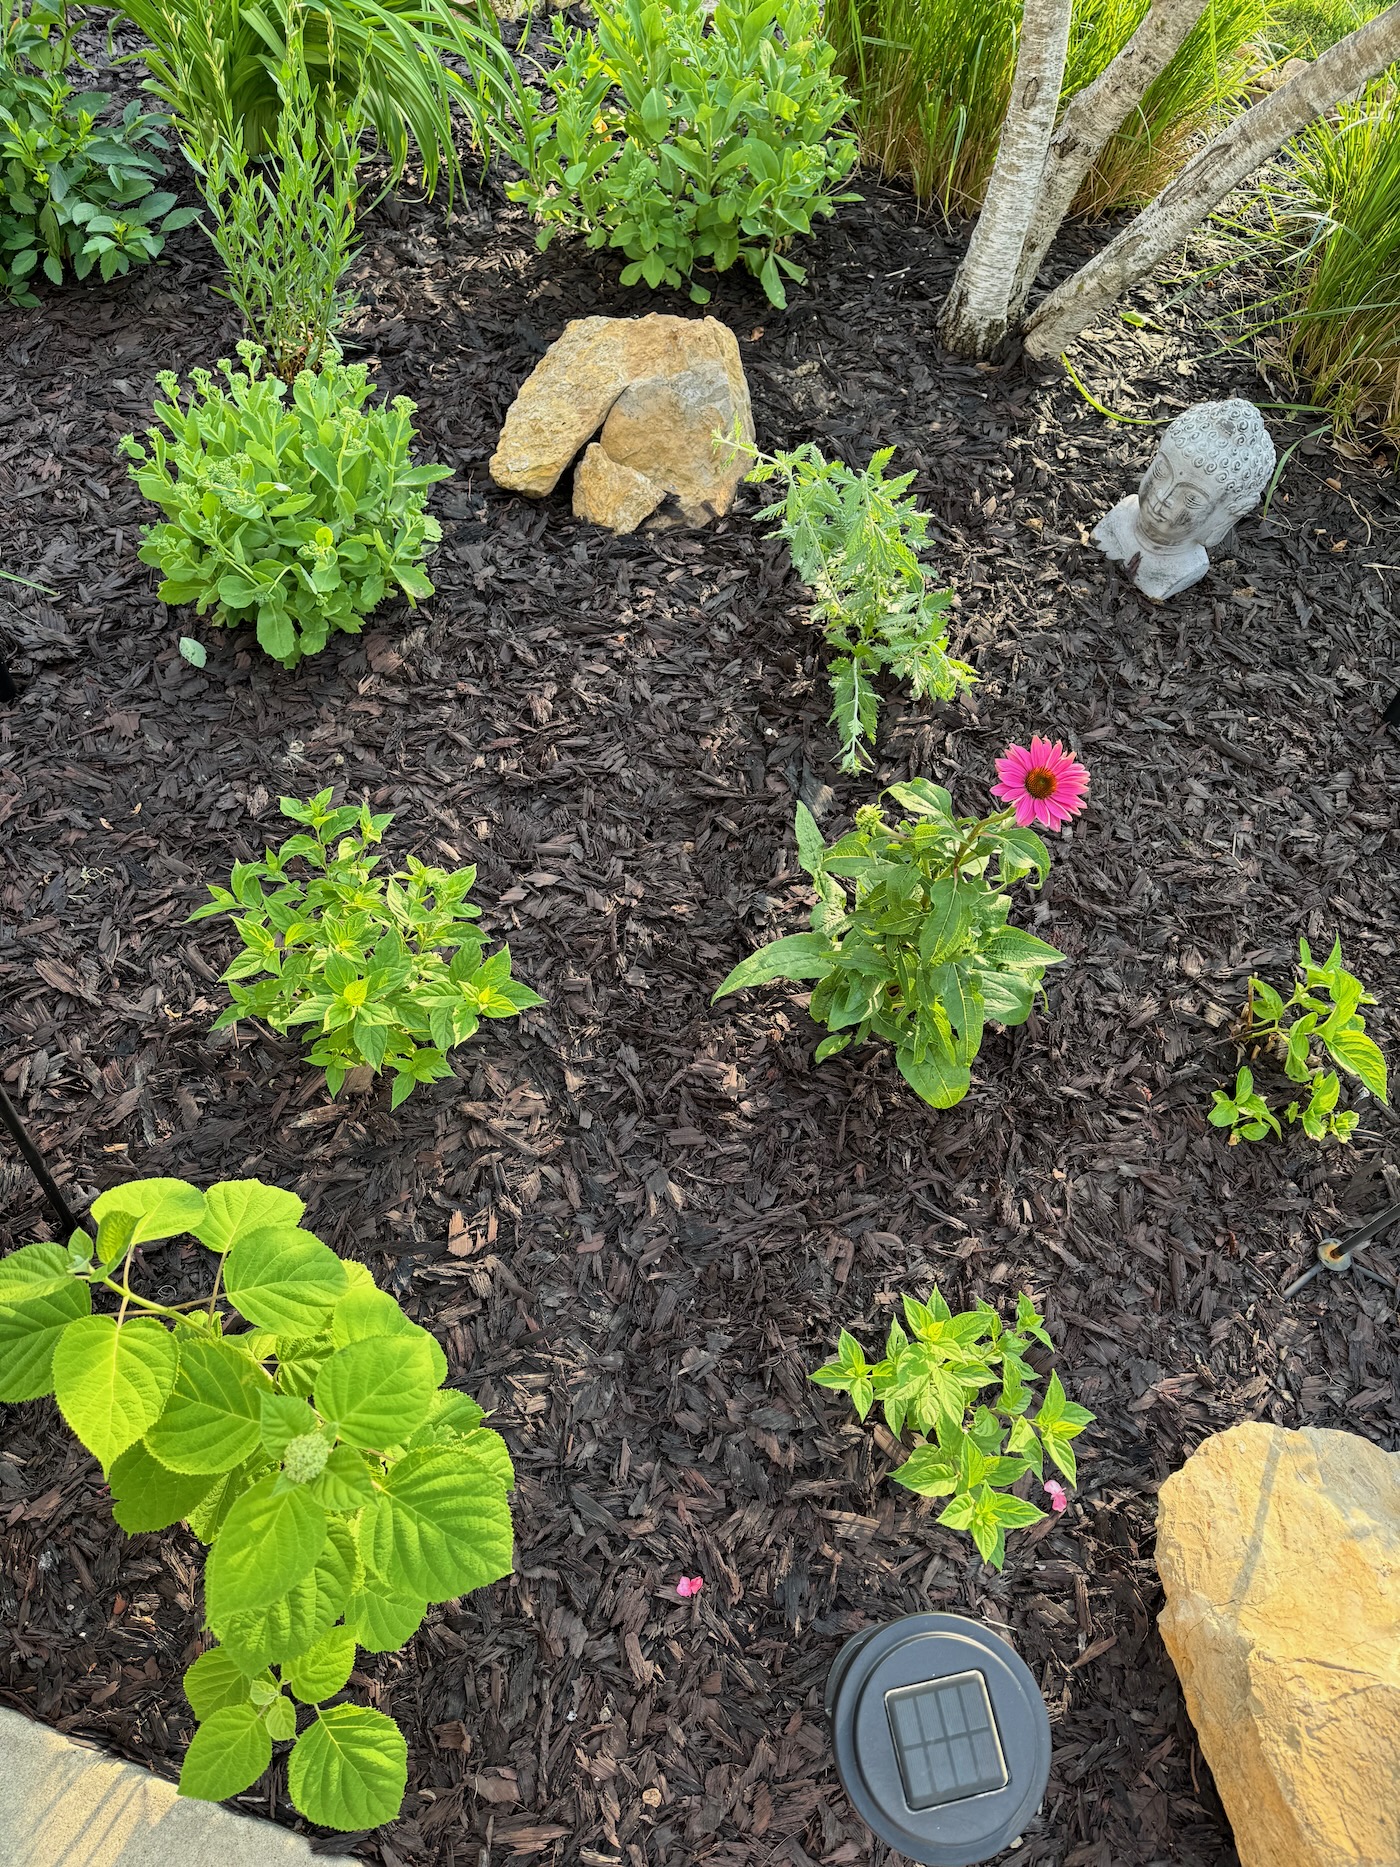
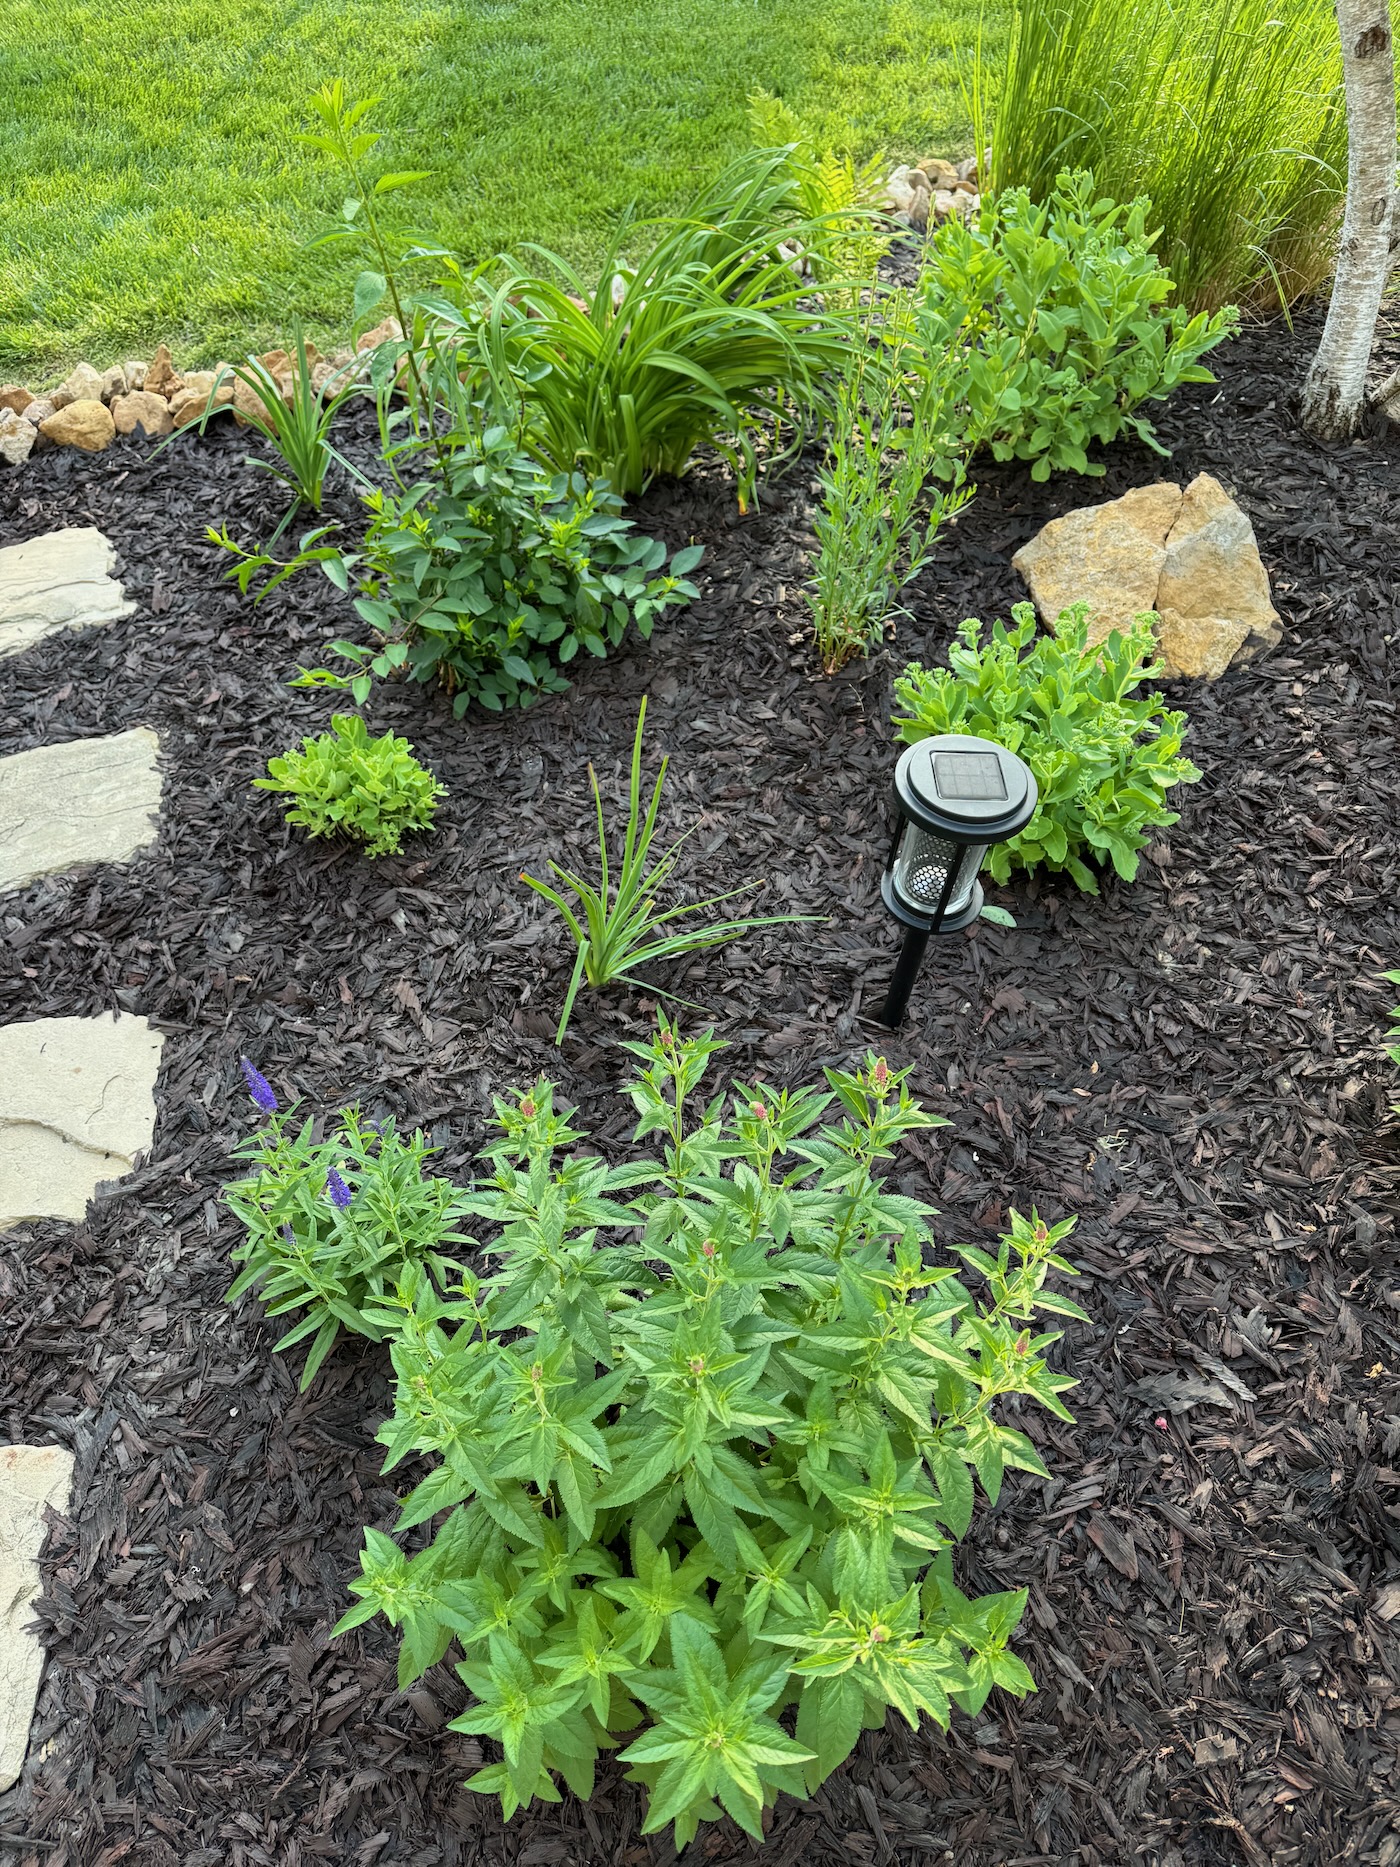
Perennials are plants that come back year after year. Adding different perennials into the bed becomes sort of a personal preference. I like the look of a filled in berm that isn’t super structured. It makes my life easier to just buy what I like and throw it in the ground! I am all about buying clearance perennials and adding in every single year. I move things if they get too large, split larger plants into two and replant. I’m resourceful because landscaping can be expensive!
I am aware of the light needs of the perennials I purchase, as well as the using varying heights and colors. Use differing heights and colors to create color and balance and texture. Mostly, the rule of thumb here is buy what I like and plant it! Simple! I have tweaked many things over the years. Some plants don’t do well or they are taking over, etc. Here is the view in 2020.
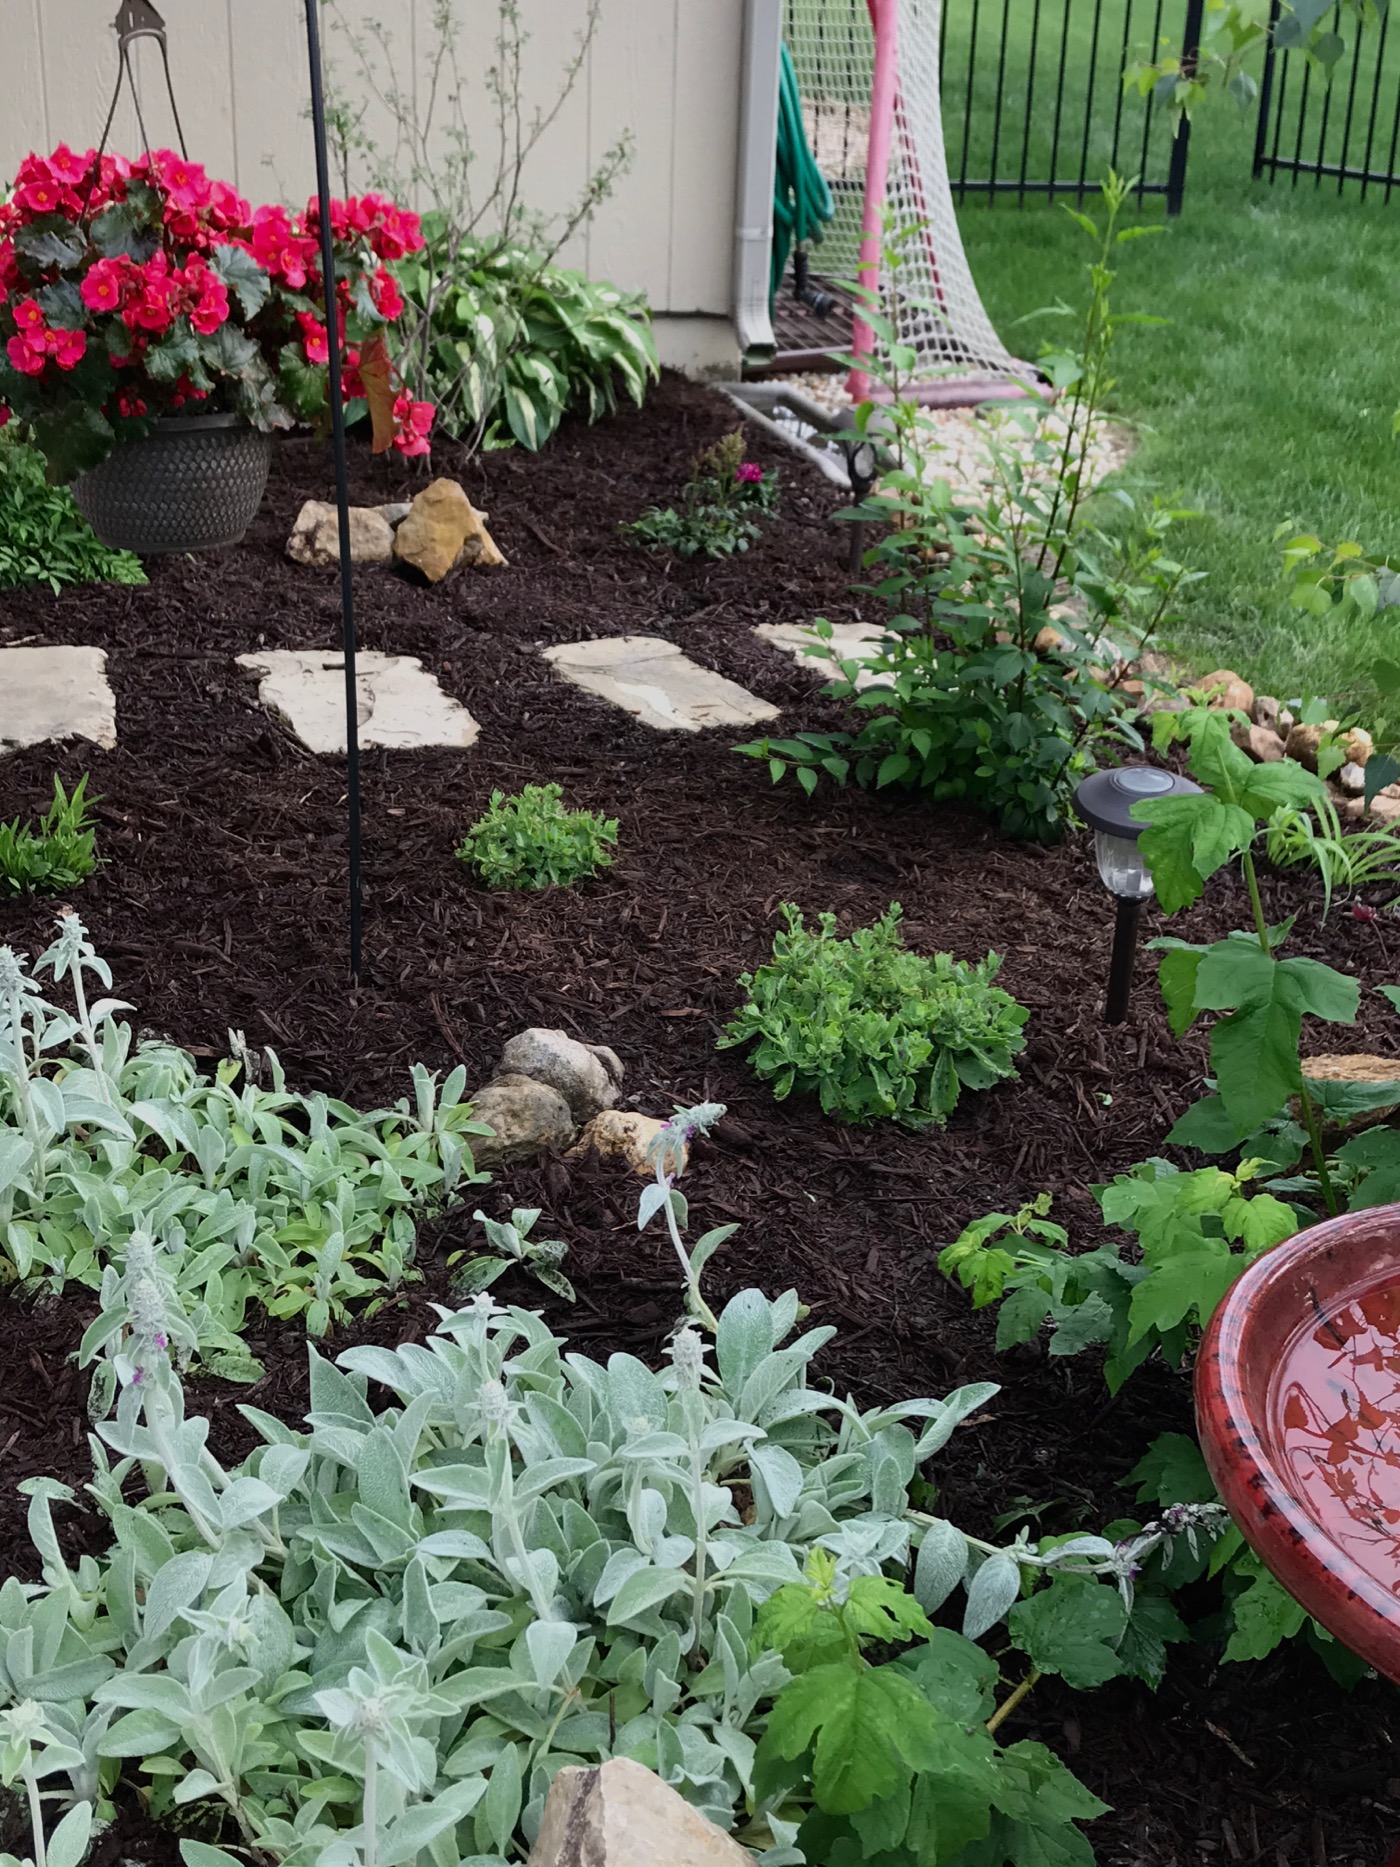
And here is what I have as of May 2024. This berm will never be “finished” as I’m constantly changing and tweaking. It keeps it fun for me. These photos are early in the season so not in bloom yet. I purchase perennials
Perennials Used (current)
- Astilbe
- Coneflower
- Hydrangea
- Allium
- Hosta
- I’m not sure what the large bush is, I got it as a free start from the Arboretum
Perennials Used (current)
- Red Hot Poker
- Forsythia bush
- Lily (I don’t love these because they make a mess, but I had a really established one I kept)
- Sedum
- Guara
- Speedwell
- Shasta daisy
- Hydrangea
- Lilac tree
- Grasses
- Russian Sage
- Coneflower
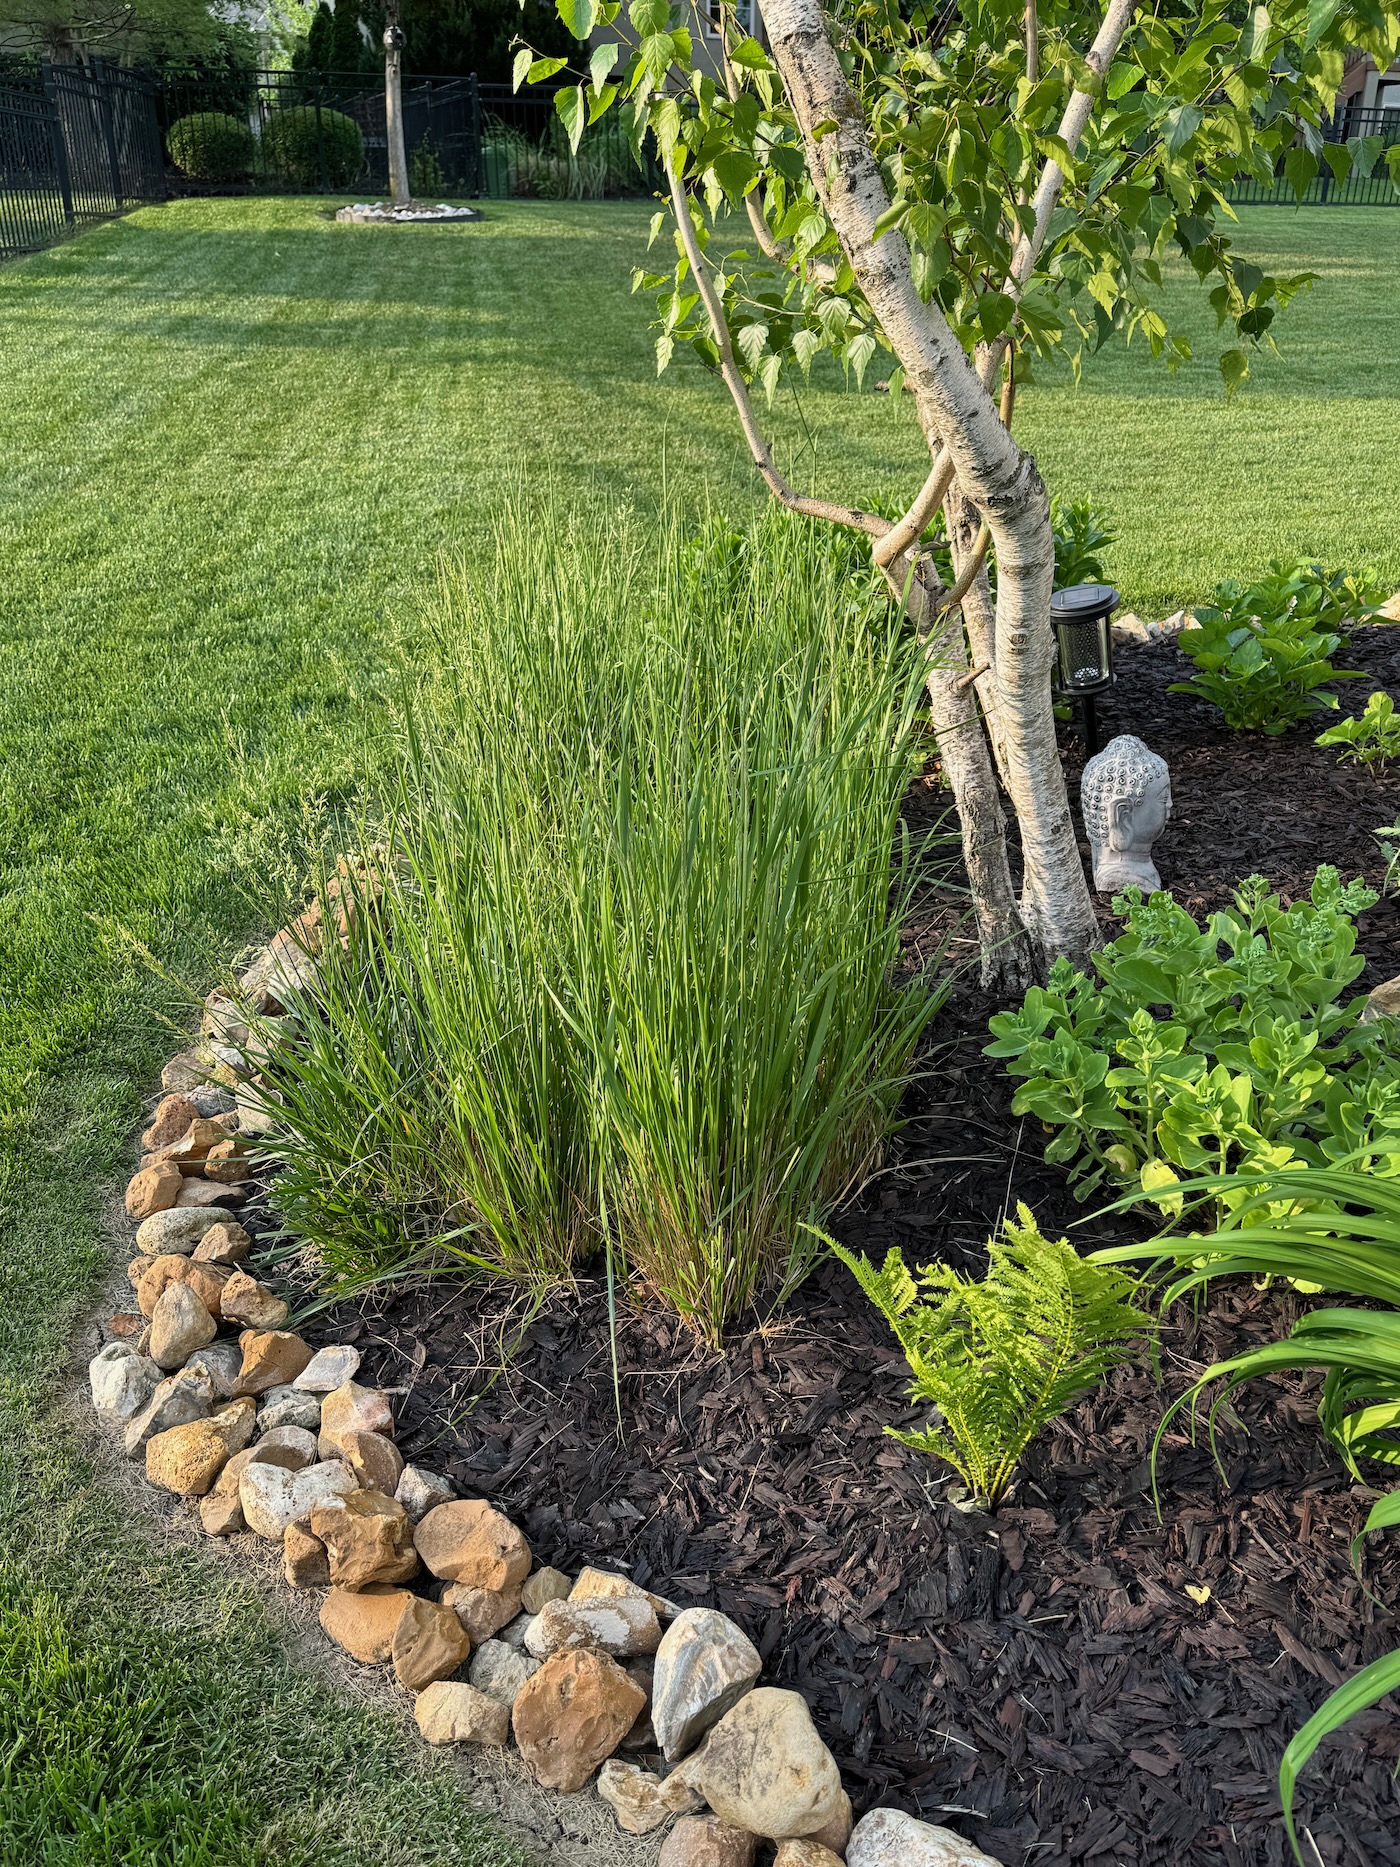
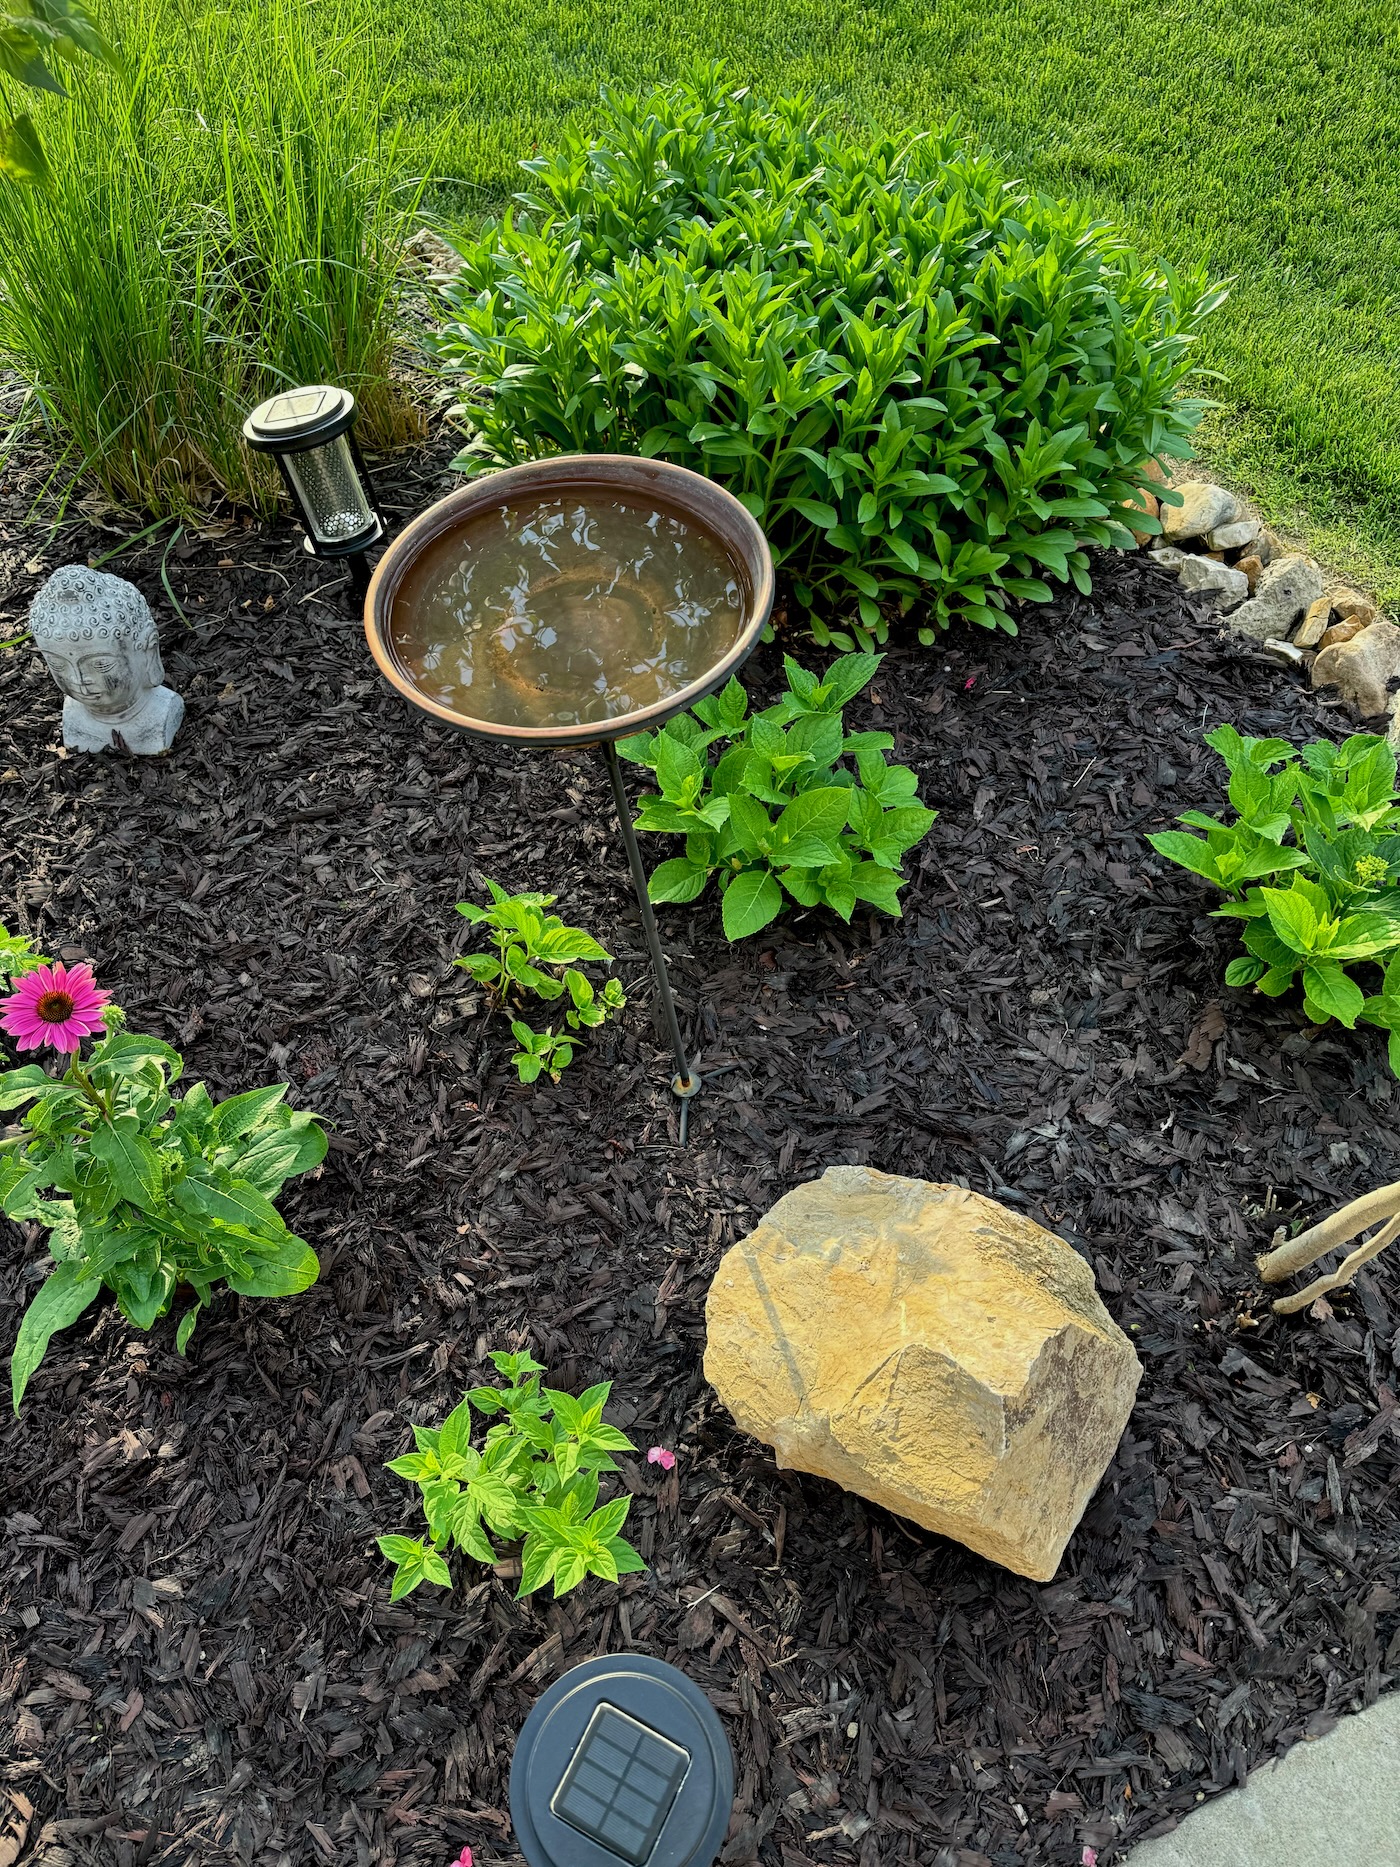
Bird Bath
Our office windows look directly out onto this flower bed. My mom gave me a bird bath for Christmas this year and I absolutely love it! The birds come every single day. I love the added height and color and texture as well. It makes it feel more like a garden oasis to me!
View in 2020.
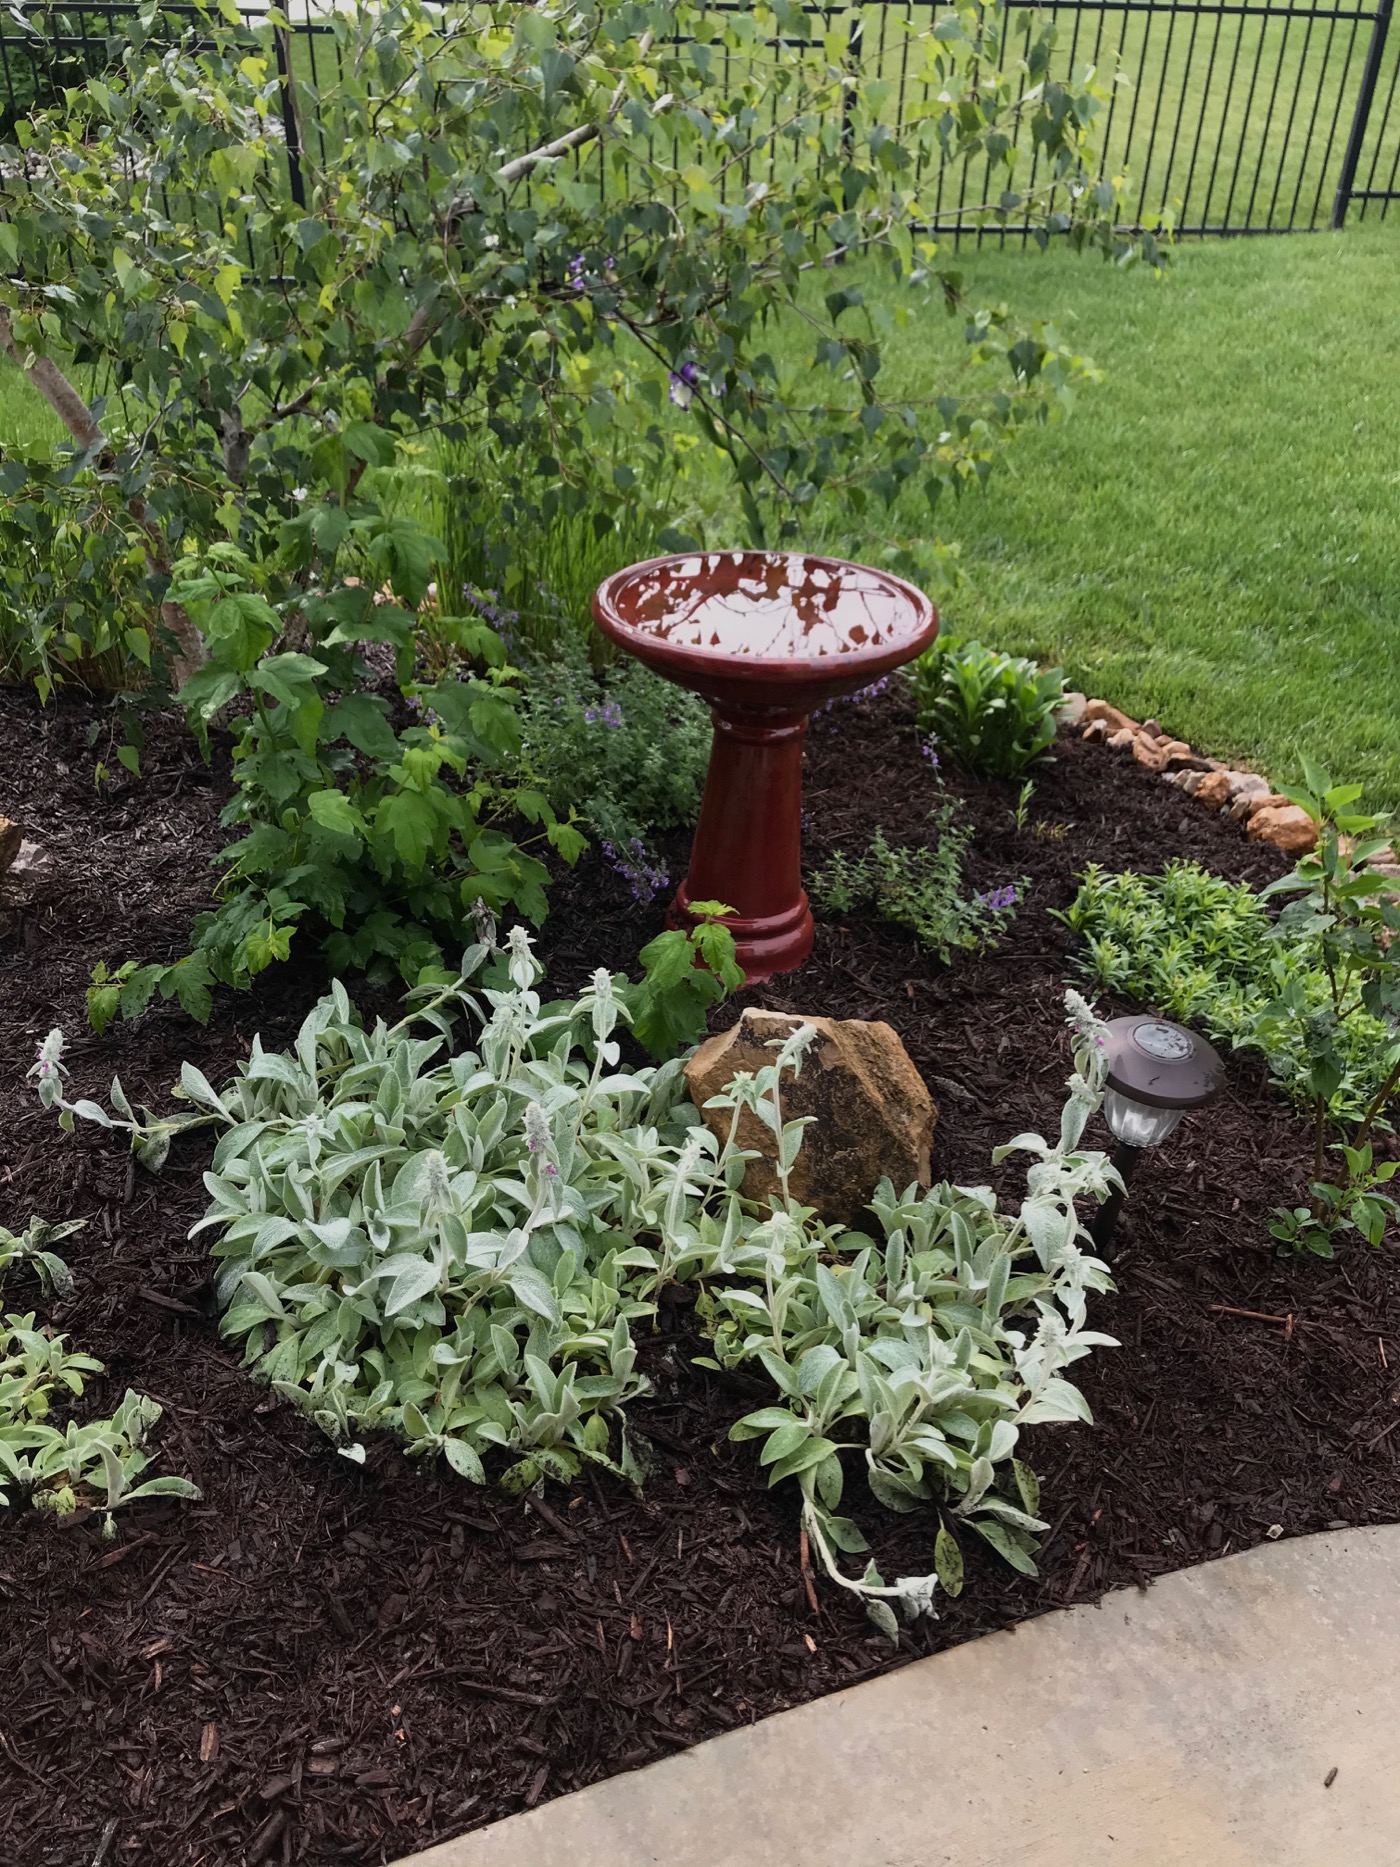
Still love my bird bath! I had to get a new one because the old one cracked over the winter. This copper one from Amazon is the perfect scale and we have so many birds drink and bathe every single day.
Solar Lights
Solar lights give the bed an added touch at night. I have a few spread throughout this berm. Solar lights are inexpensive and no maintenance! These were purchased from Costco. View in 2020.
We purchase new solar lights every few years. They are inexpensive and add so much!
Shepherd’s Hook
Add height and color with an inexpensive shepherd’s hook. This is your opportunity to add annuals to your beds without having to put them in the ground. This bright pink begonia is what my eye is drawn to when I look out here! Love! View in 2020.

I still use a shepherd’s hook every year with a hanging basket of annuals. Here is the link to the hook and the hanging planters I use.
Mulch
Lastly, every flower bed needs mulch or pine straw or whatever it is you like to ground the space. I use brown mulch for our beds. I have always bought bags of mulch and lay it myself. It’s a dirty and time consuming job, but I always feel better that the work done on our yard was done by me. And of course it’s a lot cheaper. I think I take more pride in my yard because I have done everything myself! Here is hte look with brown mulch in 2020.
Update 2024 – Rubber Mulch
In spring of 2023 I took the time to rake up most of the old mulch in all of my landscaping beds. I decided it was time to spend the money and effort to put down rubber mulch! In time, I plan to do a whole post on rubber mulch, but for the purpose of this post, here are some photos. The takeaway in early 2024 is that I LOVE the rubber mulch. It looks so great one year later. I am using about 3 bags to touch up some spots, but other than that, it has made my spring landscaping so easy!


I know that I got my love of gardening and working in the yard from my mom. She is the original plant lady in my life. My parents always had immaculate lawns and it stuck with me. I LOVE curb appeal. I think it’s like jewelry for a home. Transforming this little space over the years has been really fun and rewarding for me.

With time and effort, you can fill in a flowerbed with landscaping! Just go for it! Buy what you love. Add texture and color and dimension. I hope this helps a little bit! Happy planting! XO