It’s no secret I have a major obsession with my house plants! After my husband my kids, they are the other living things in my life that get the most attention! Over the years, I have propagated many plants and turned them into free plants to give away or to keep in my own home. Different plants propagate at different rates, and the fiddle leaf fig is one you need some patience for. But in due time, it works. And with little effort on your part. Here is how to propagate a Fiddle Leaf Fig cutting!
Step 1: Cutting the Fiddle Leaf Fig Stem
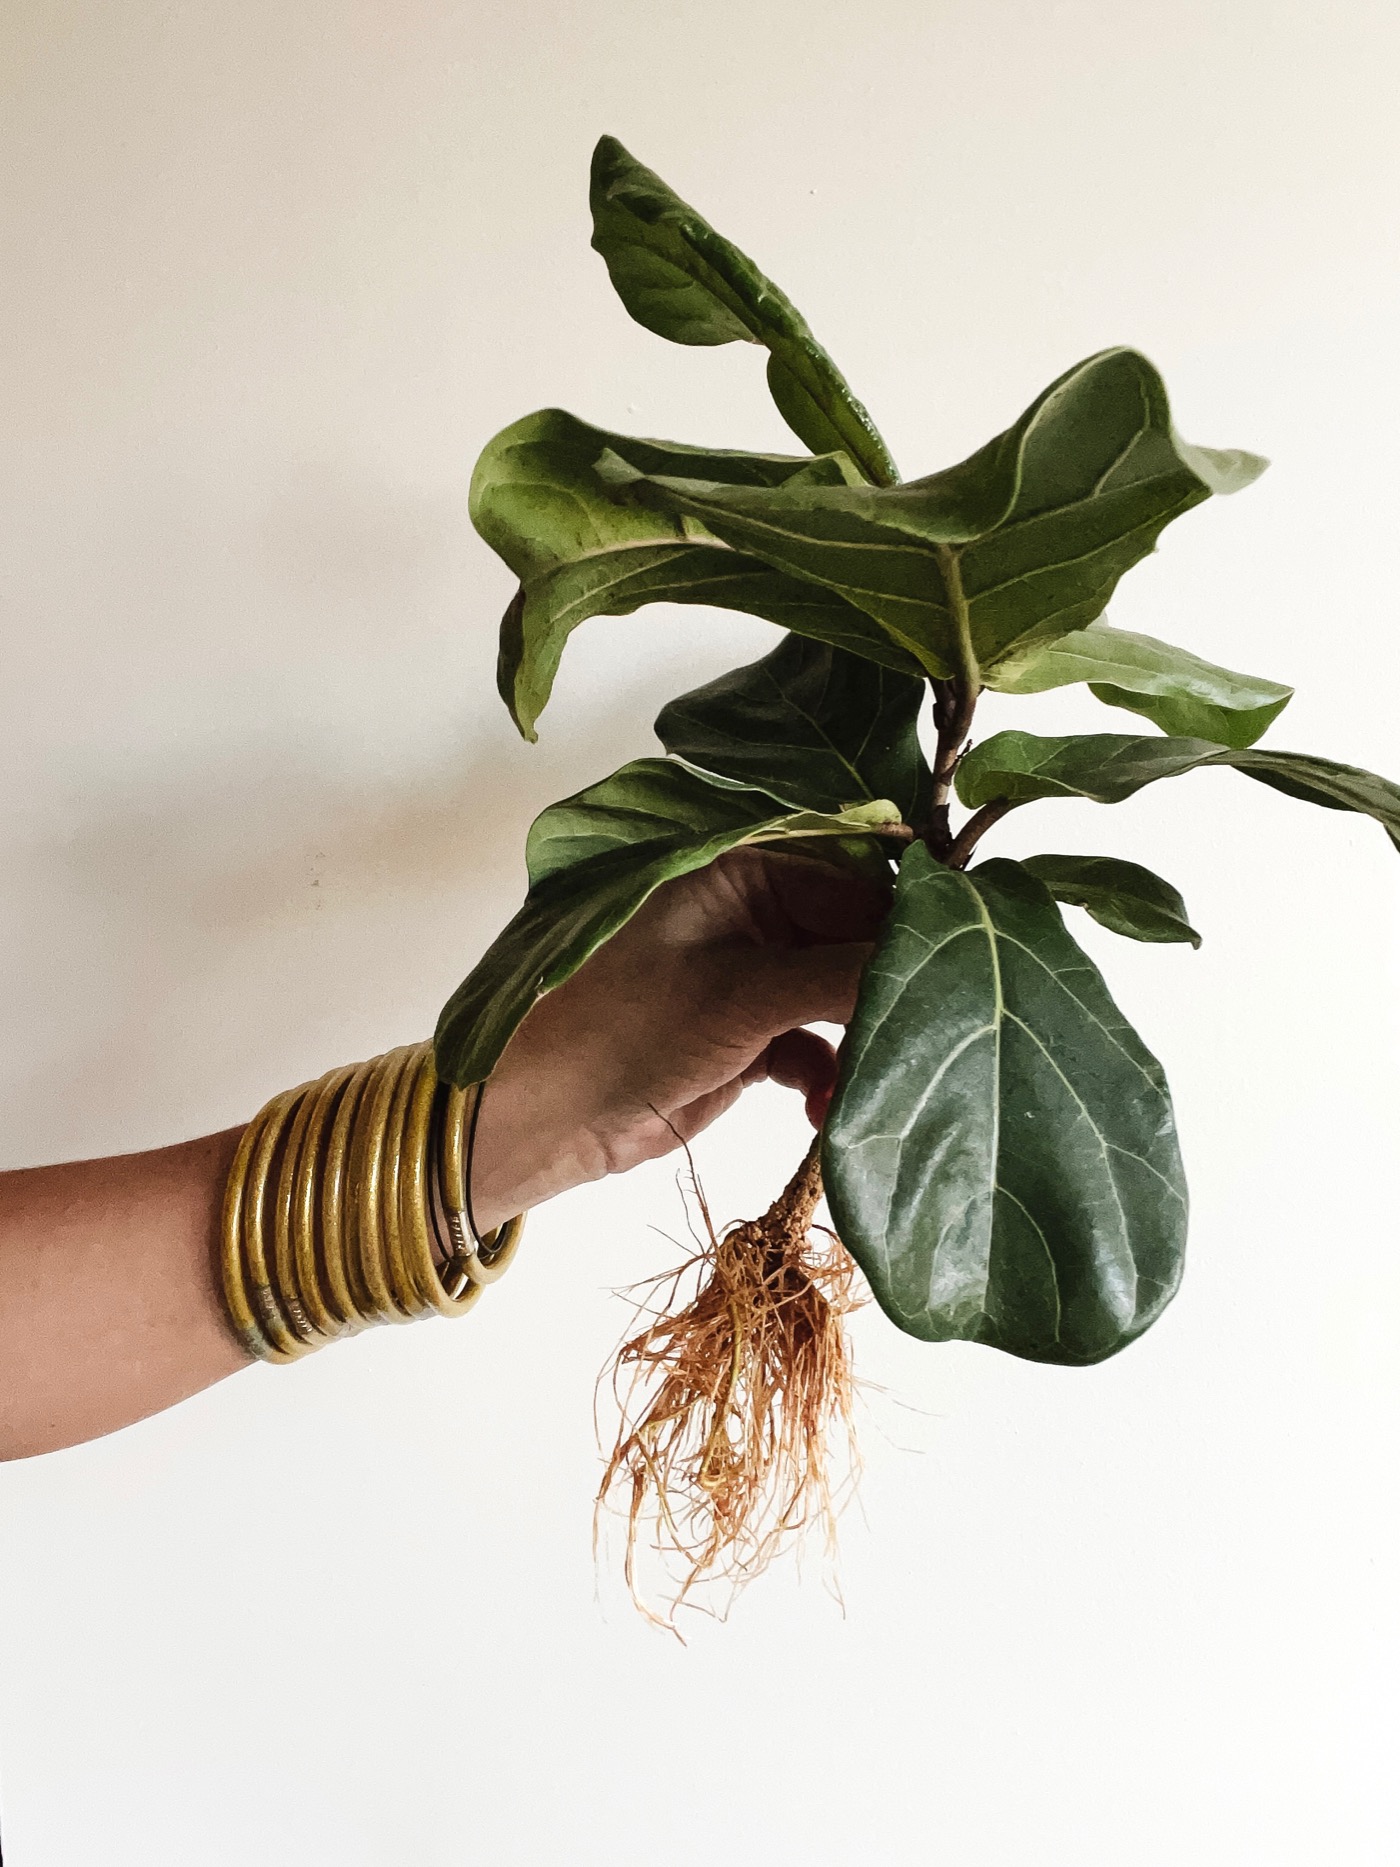
To be able to propagate a fiddle leaf fig cutting, you must first own a fiddle leaf fig tree or plant! I think I have (4) currently. I LOVE them, but it’s no secret they can be finicky, even for plant people like myself. Progagating new ones ensure yours will live on! You want to cut off a healthy stem from your FLF, as those leaves and stem will be the start of your new plant. It’s hard to just lop off a pretty part of the plant, but remember you’re making a new one!
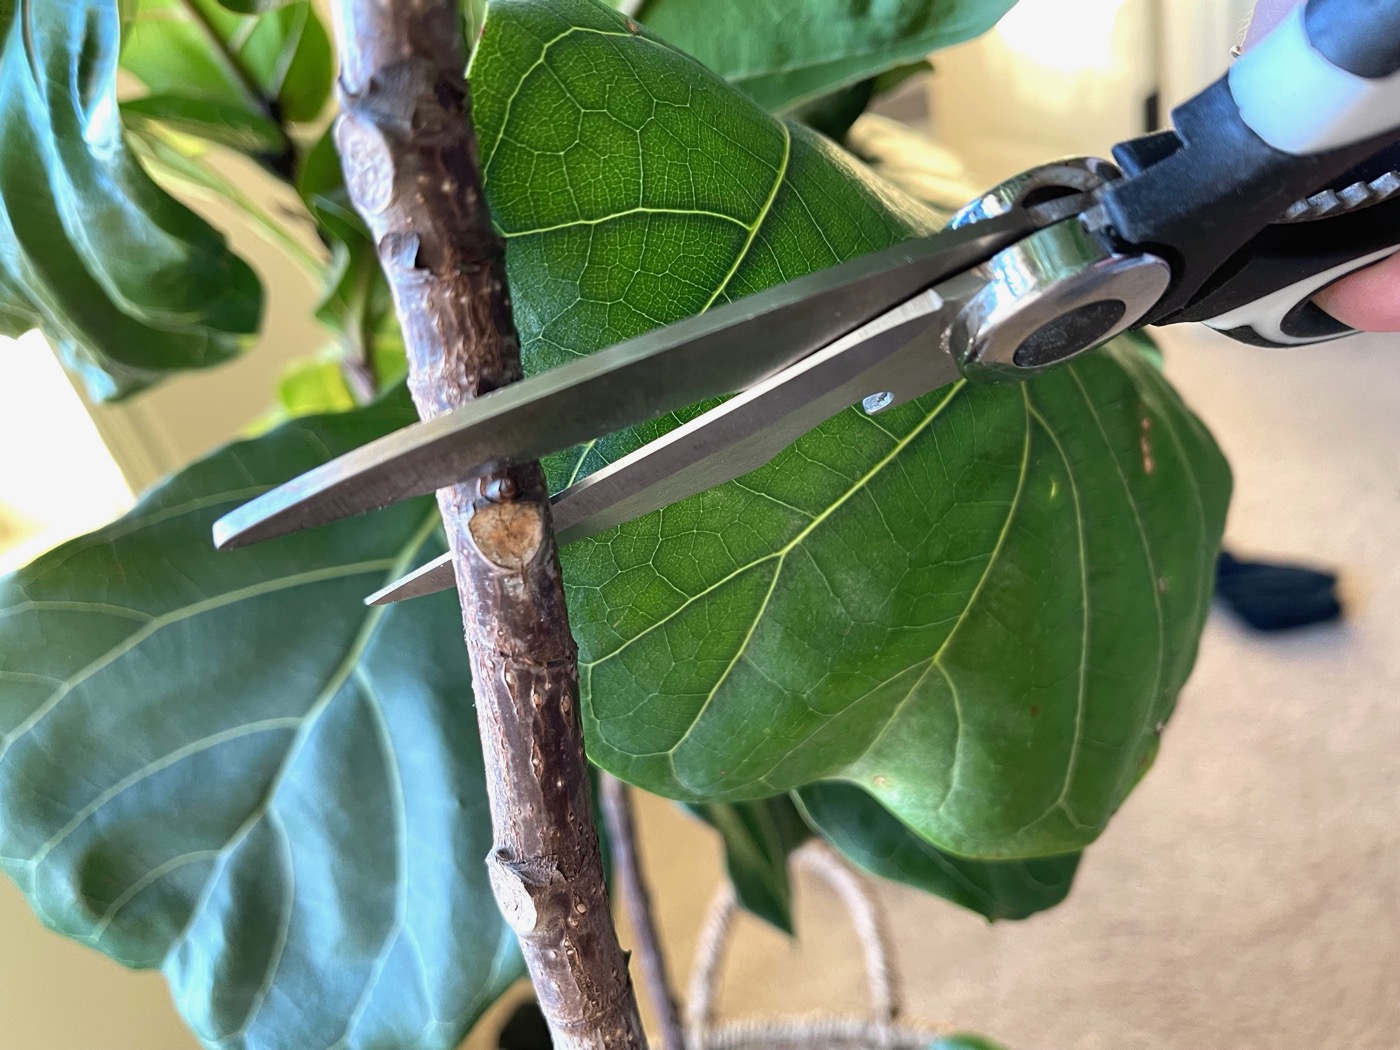
You will want to use clean shears to cut your stem. You can see here there is a little node right below my shears. If I was cutting this stem, I would cut here. This allows a long enough stem for the future plant to grow roots and it will look pleasant once planted with the longer stem. You can cut the stems shorter, you just won’t have as much room for the roots to grow and the plant will be shorter when you eventually pot it. You will have to study your FLF to see where the best place is to cut. With the one I recently propagated, there was a good cluster of leaves to cut.
Step 2: Find a Vessel for Your Cutting
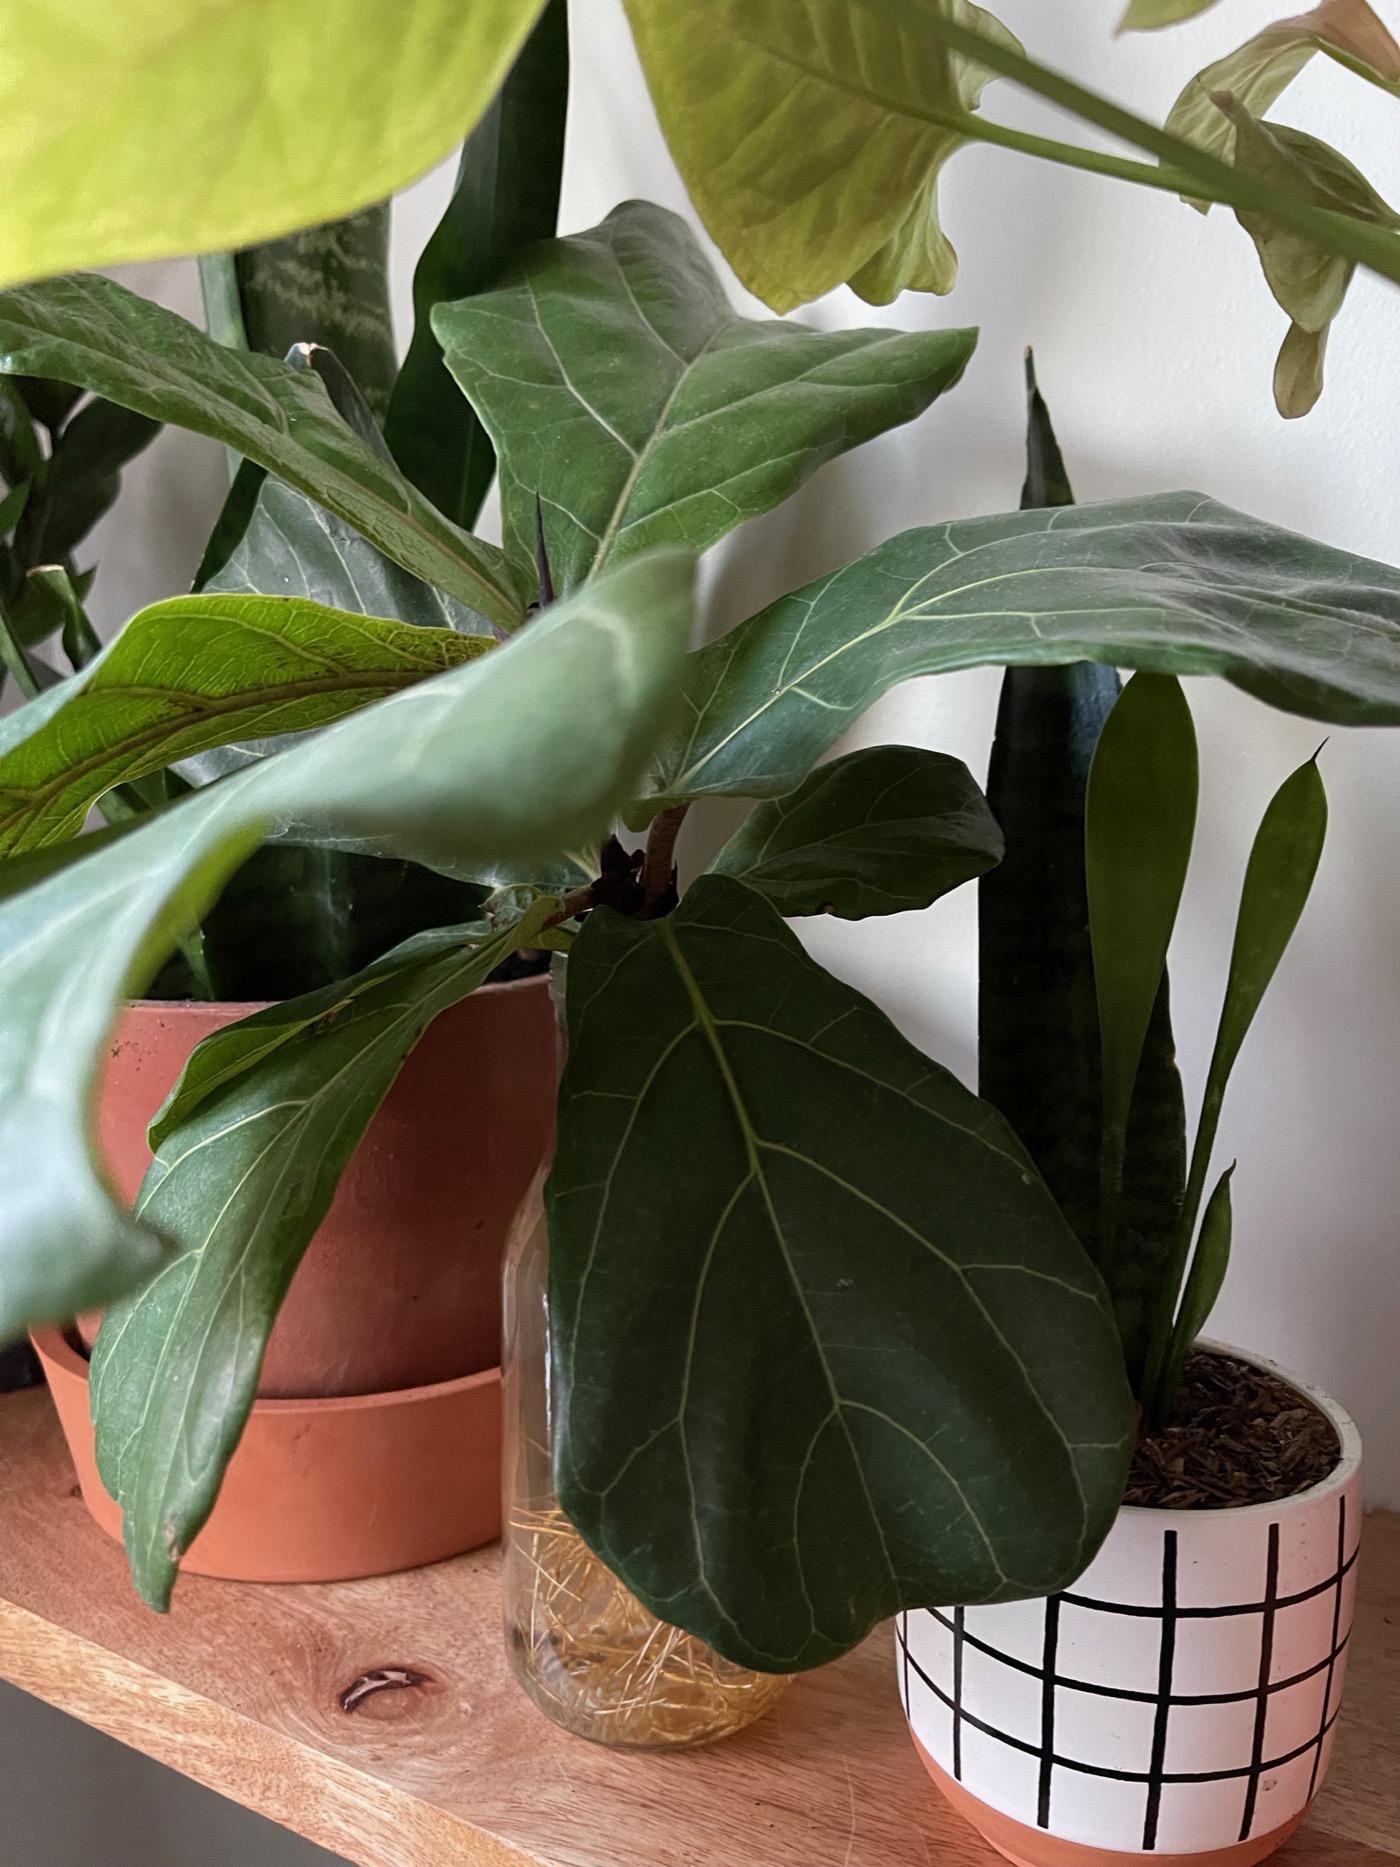
I have learned over the years that when propagating plants, a clear glass vessel is best to allow light to come through. You can literally use anything to propagate a plant…spaghetti jar, vase, bottles. As long as the stem has enough room to adequately grow and drink up the water, you are good! I keep many glass jars and vases for this purpose. Grab one and stick you cutting in it! This stem I’m using for this blog post was originally cut in April 2021.
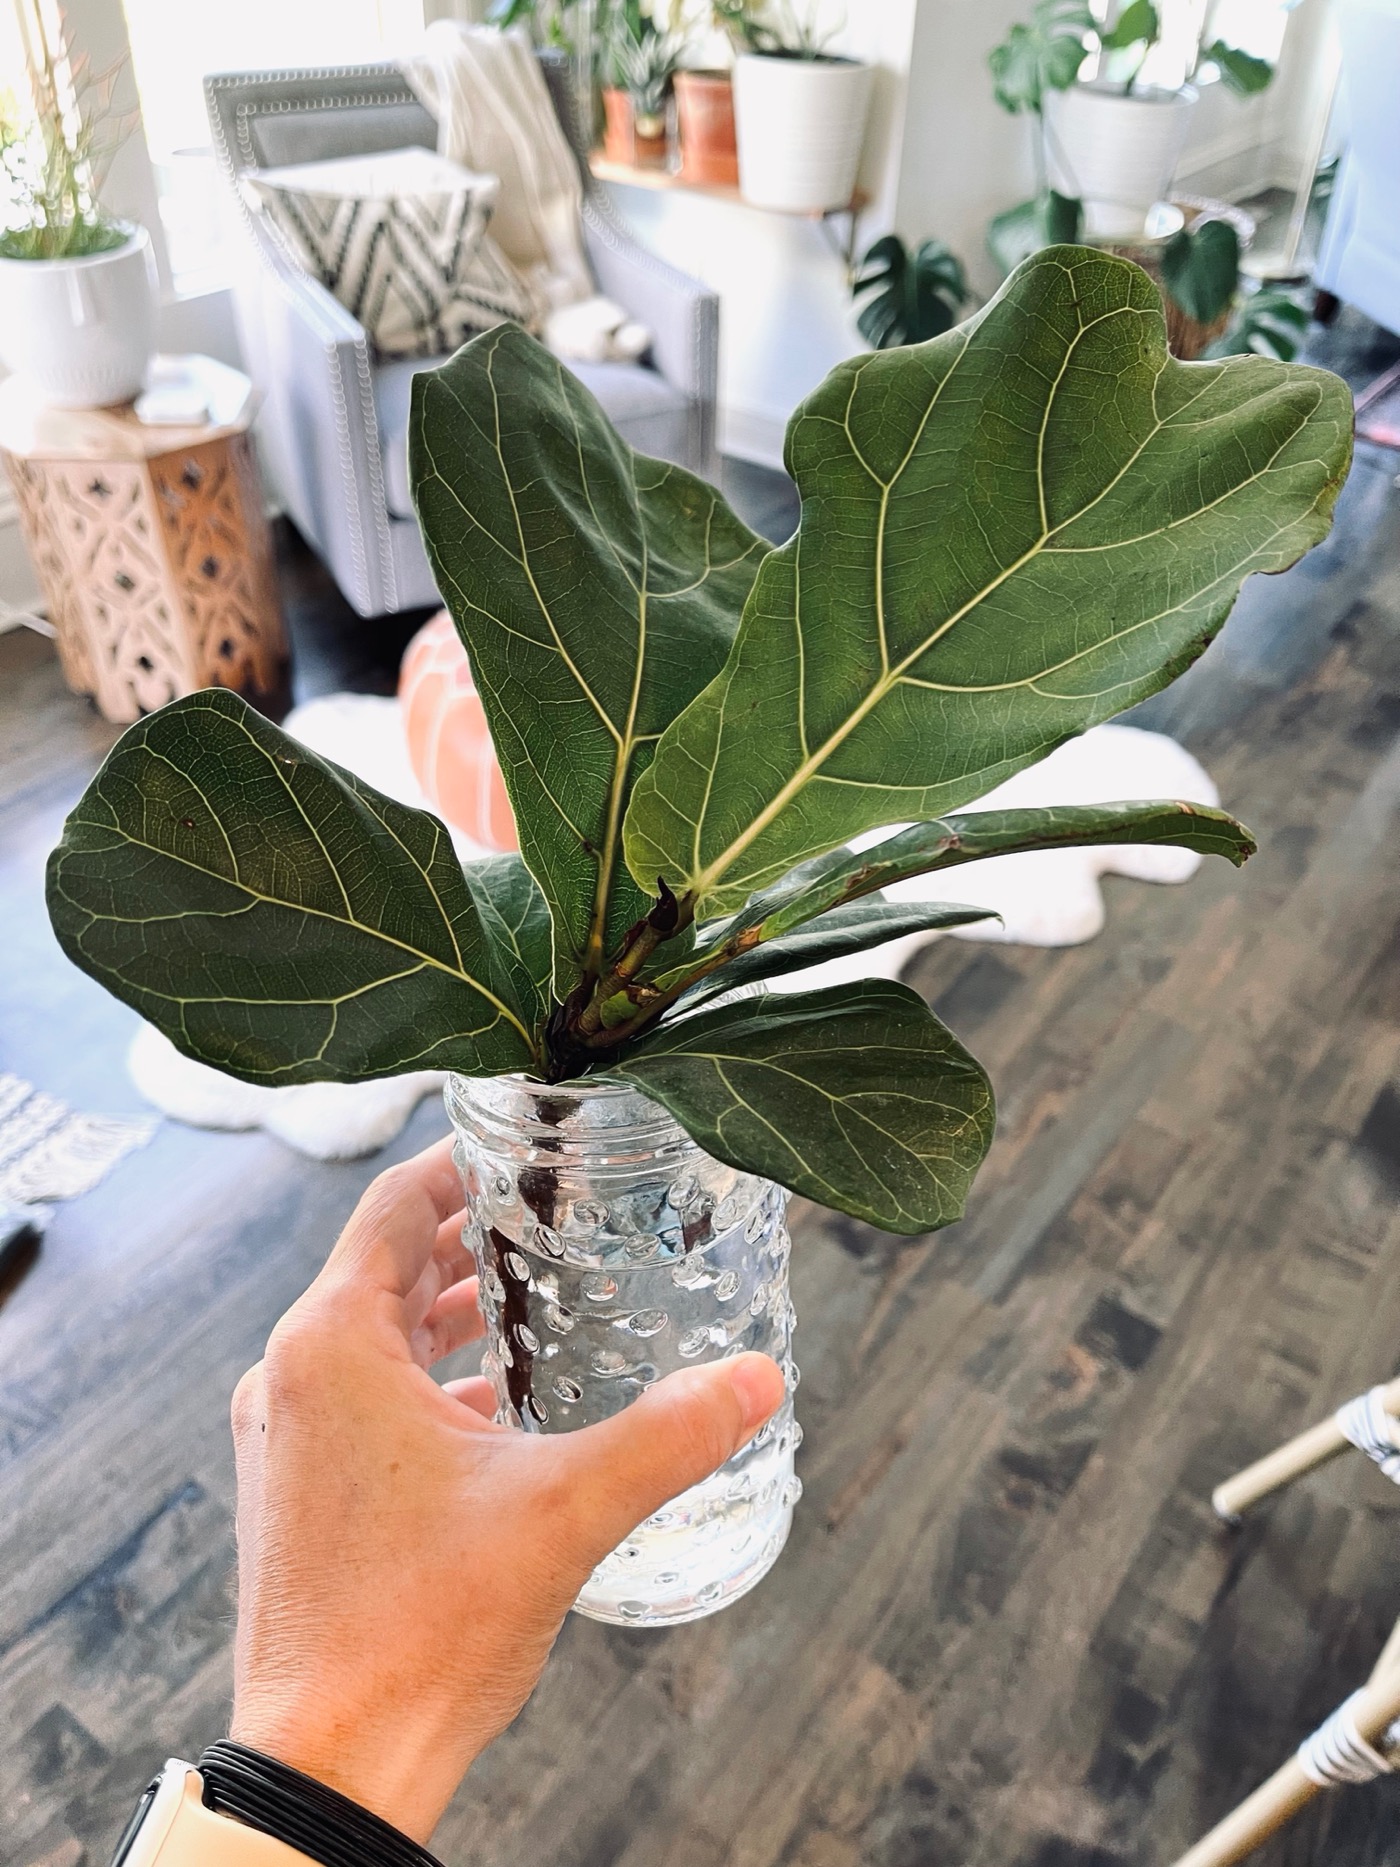
Step 3: Add Water to the Vessel
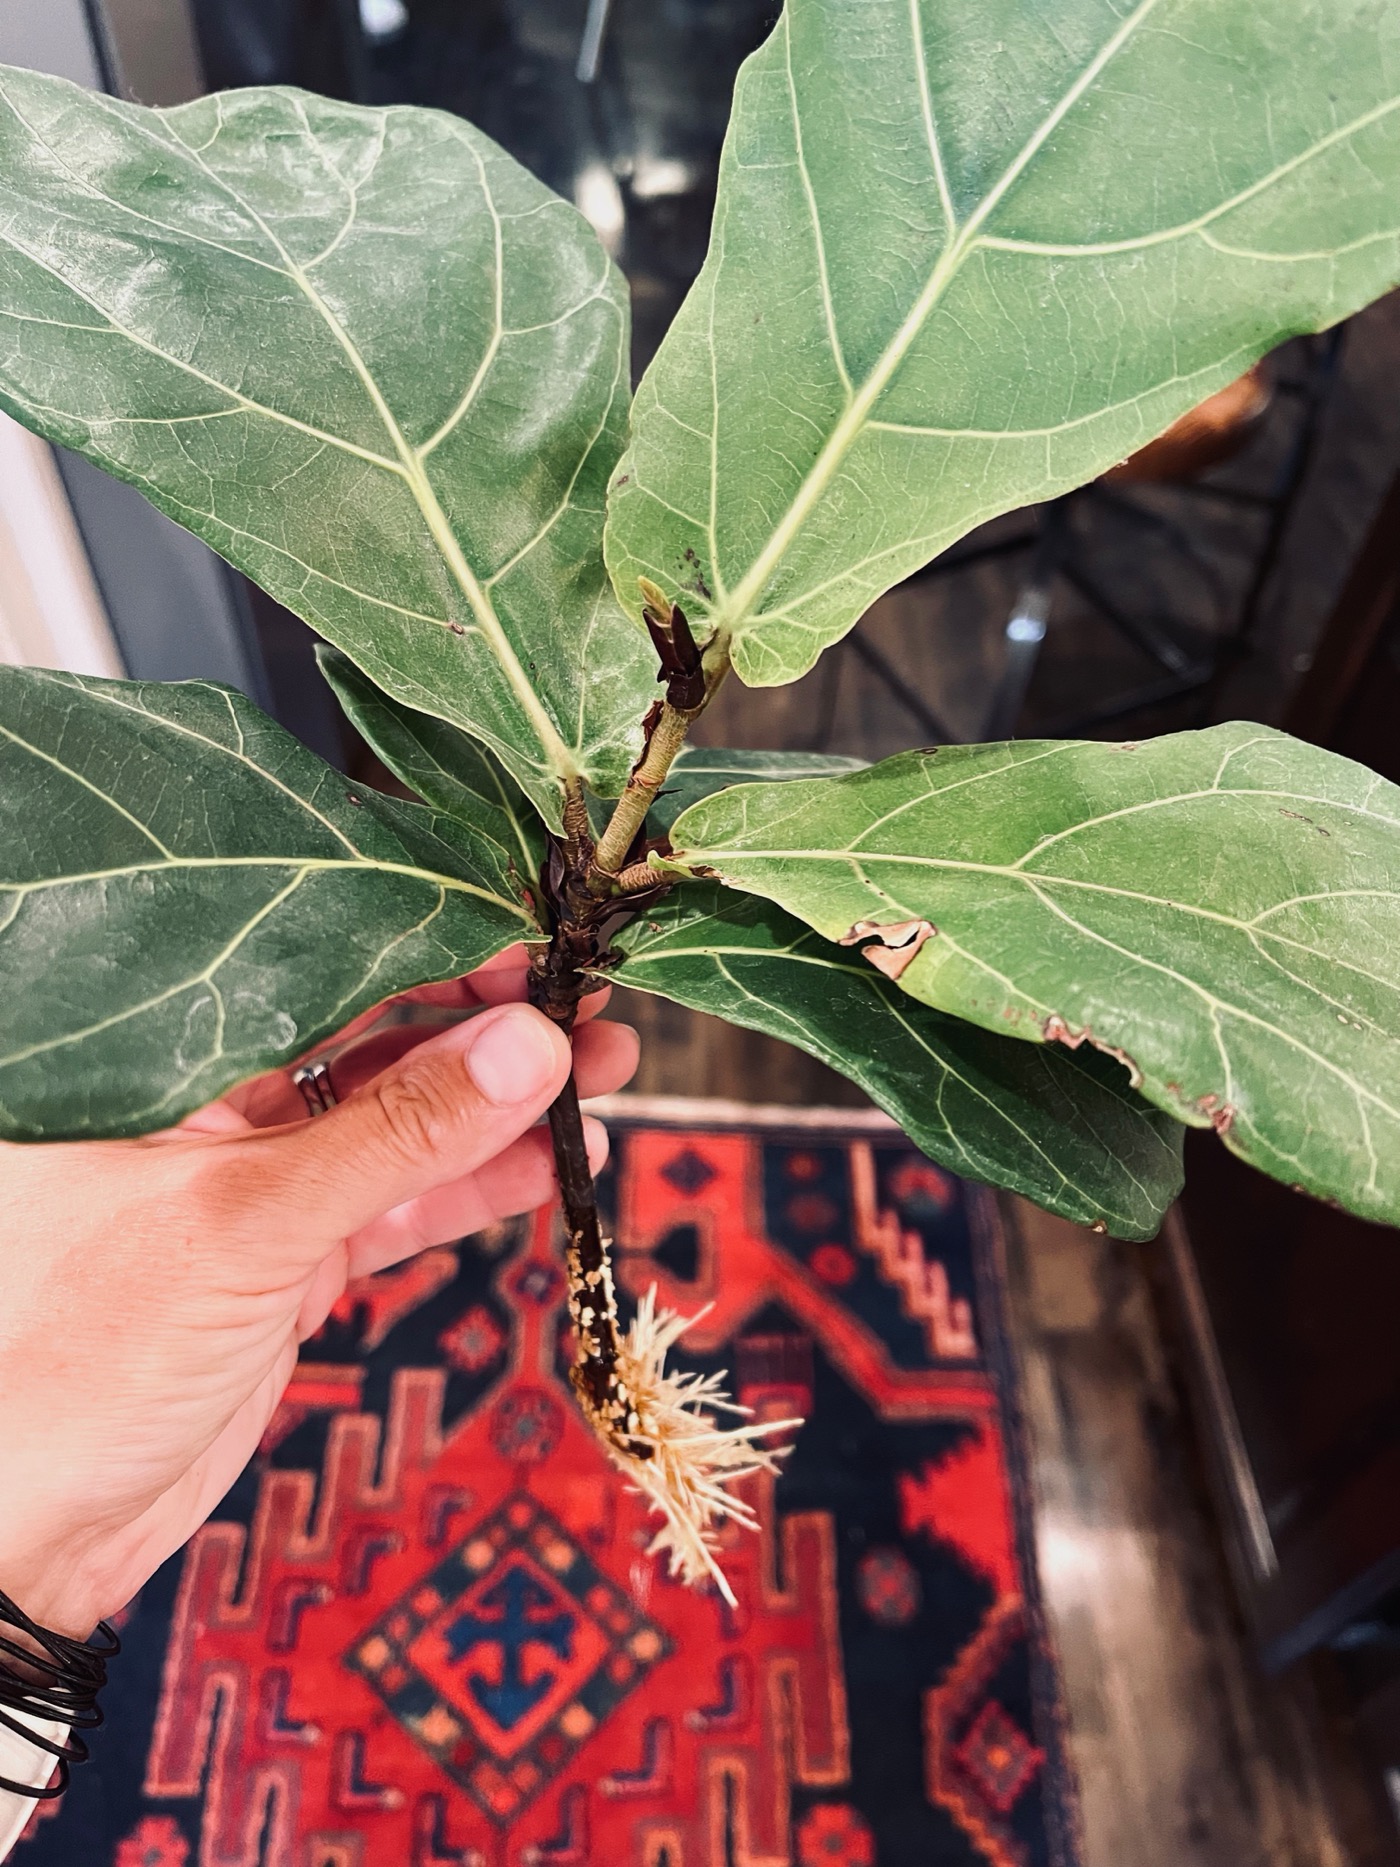
Once you have cut your stem and found a clear vase or jar, you simply add water to the vessel. I don’t use any special kind of water, but distilled or rain barrel water is best. Filling up the vessel allows roots to grow up the stem. I don’t add any anything to the water. The photo below is the same cutting from April 2021, but this photo was taken in July 2021. You can see that in 3 months time, roots are already starting to develop! It’s such a fun science experiment! You can change the water whenever you water your other plants, but admittedly I’m not very good about this! I usually just leave the original water in the jar and keep adding new water to it if I see it’s starting to get low.
Step 4: Stick Cutting in a Sunny Spot
Once you have your water in your jar, find a sunny spot to place it. Set and forget, basically! This cutting was in my kitchen windowsill for awhile, and then I moved it to my plant shelf.
Step 5: Exercise Patience and Plant your New Fiddle Leaf Fig!
Here are some current photos of the same cutting from April 2021. This is what it looks like today, 9 months after it was first cut. You can see how much the roots have taken off! So fun, right?! And you didn’t even really have to do anything, it’s that easy!


I hope you can see how easy it is to propagate a Fiddle Leaf Fig cutting! This one is ready to plant in some soil! It takes patience and time, but once you start to see roots developing, it’s totally worth it! Time to grab my shears and go find another stem to cut! xo