I’ve been collecting and caring for houseplants for many years. I mostly learn by just doing! And asking my mom! I’ve turned into quite the collector of plants simply because I love them so very much and because I have the time to care for them all. Money well spent in my opinion. In this post I will show you how to propagate a rubber plant from a mother plant. The process is sooooo simple, the only thing required is patience!
Step 1: Find your Mother Plant
In order to propagate any plant, you first need to start with purchasing a plant that is already growing in soil, which will become your “mother plant”. For this post, I’ve propagated a rubber plant, which I purchased a few years ago. I keep this rubber plant in pretty low light. It’s forgiving and has new growth all year long! I water when the top part of the soil is dry. Be sure to dust the leaves, but other than that, they are EASY beginner plants. You can find a rubber plant at all nurseries, and I’ve even seen them at Lowes, Home Depot, and Walmart.
Step 2: Cut a Section to Propagate
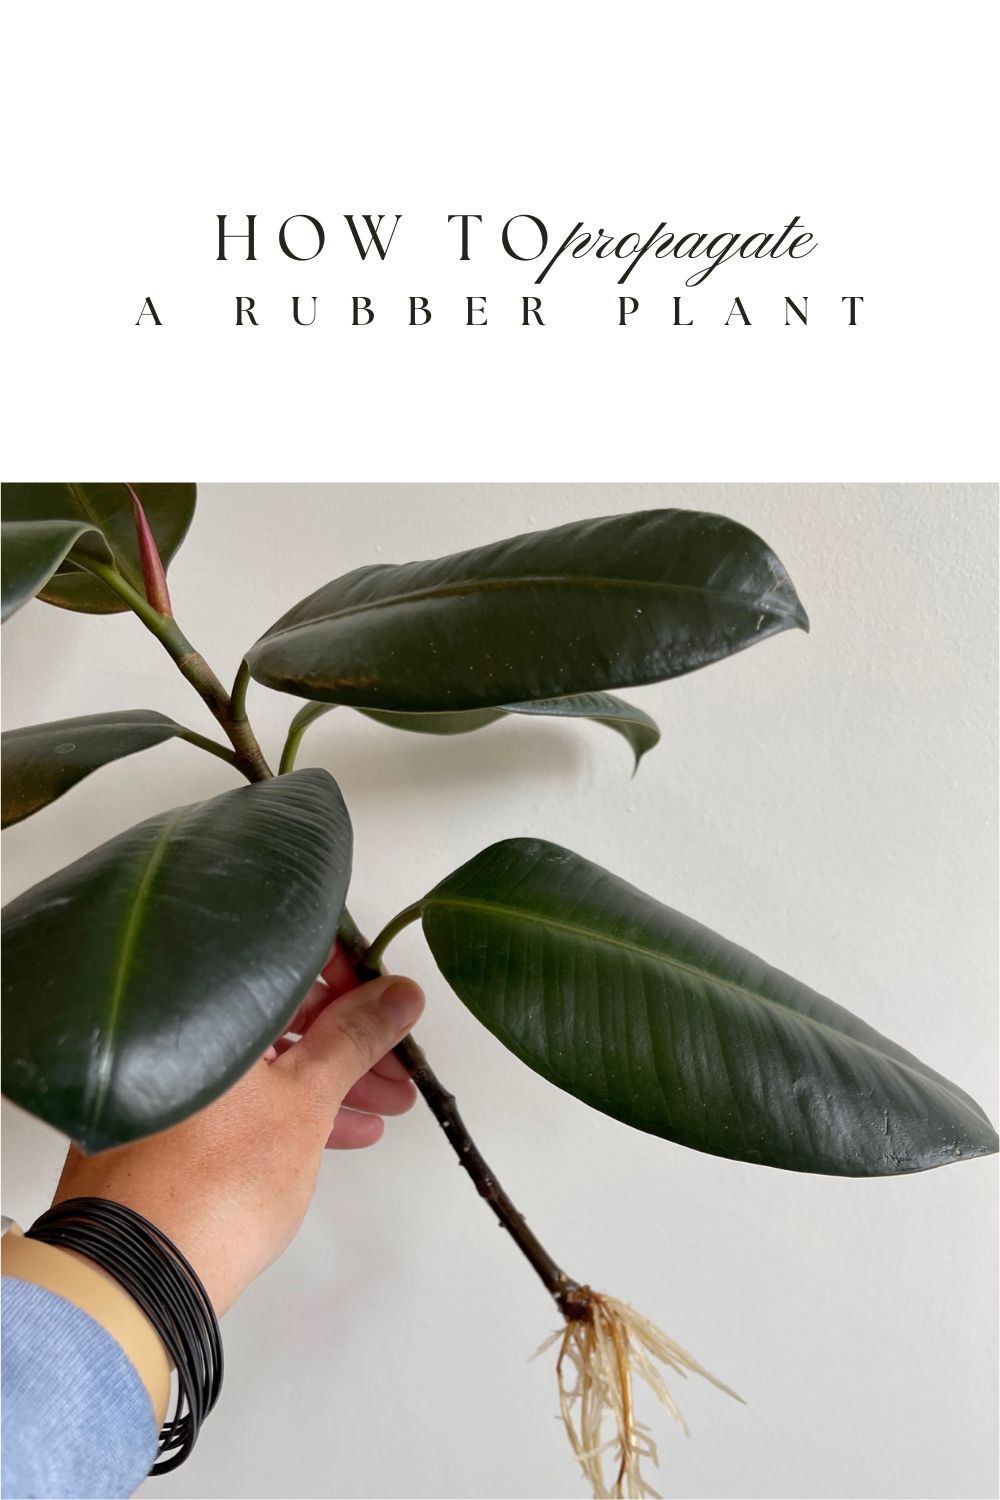
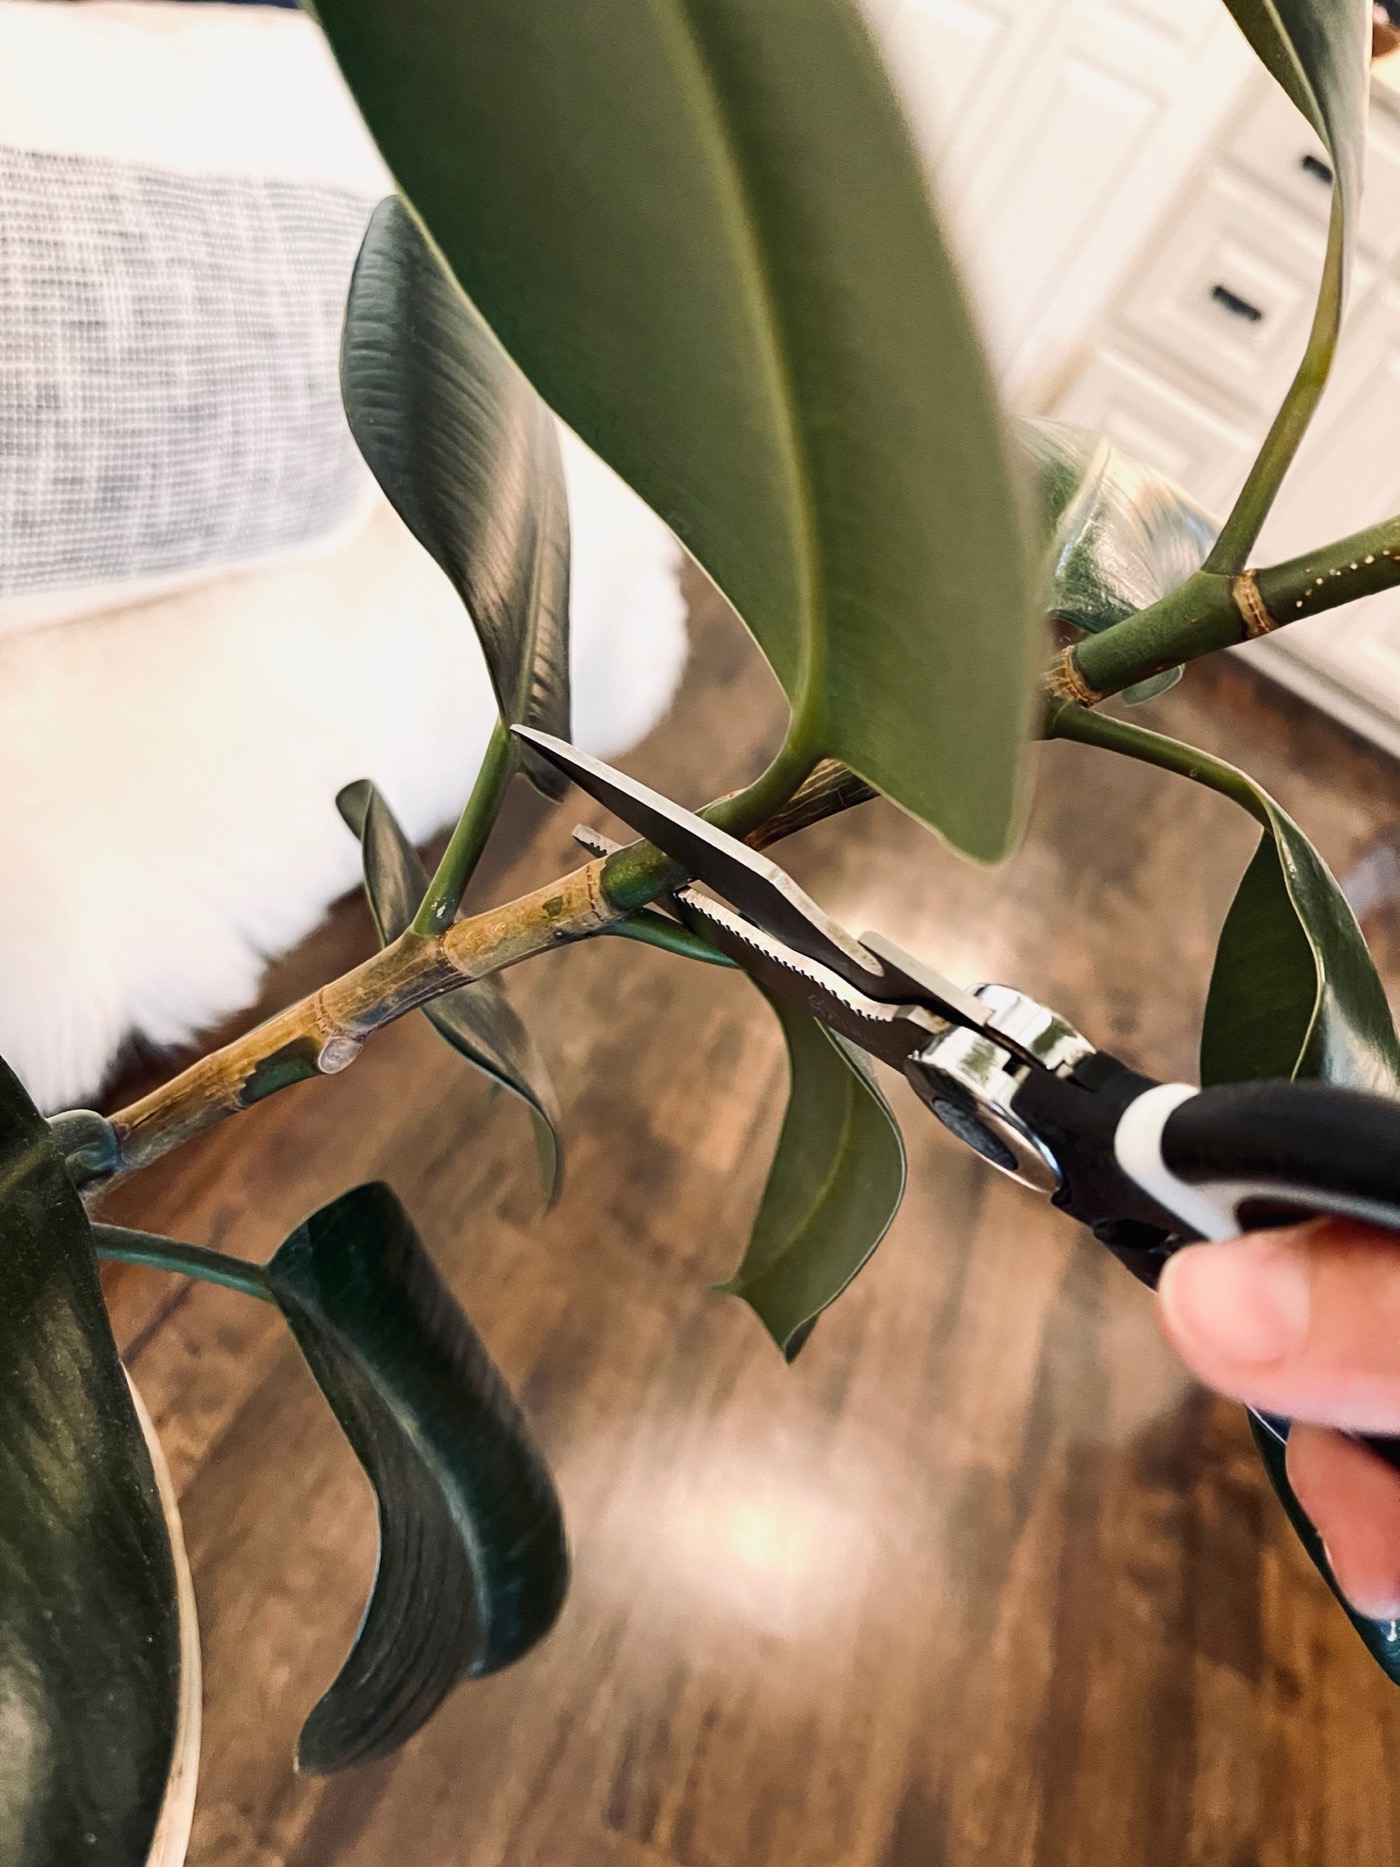
Whenever I want to propagate a plant, I simply use clean kitchen shears to cut off a piece of the plant. I always cut right above a leaf at a diagonal. You want to make sure you have enough length that the newly propagated plant will look good when eventually potted in soil. Once cut, remove any leaves towards the bottom of the stem so as they are not sitting in the water.
Step 3: Stick in Water
This is the easiest part! Simply find a clear vase in your stash, or even an old spaghetti jar! Clear vases seem to do better for me, as the light can penetrate easier. Fill vase or jar with room temperature water and place your cut stem into the water. I fill the vase all the way to the top (removing any leaves below). Put on a shelf in a sunny spot and forget! Seriously, the best part about propagating is they require no maintenance! I will check the water levels occasionally and refill as needed, but I don’t change the water on a regular basis. Easy, right?!

Step 4: Wait for Roots to Form
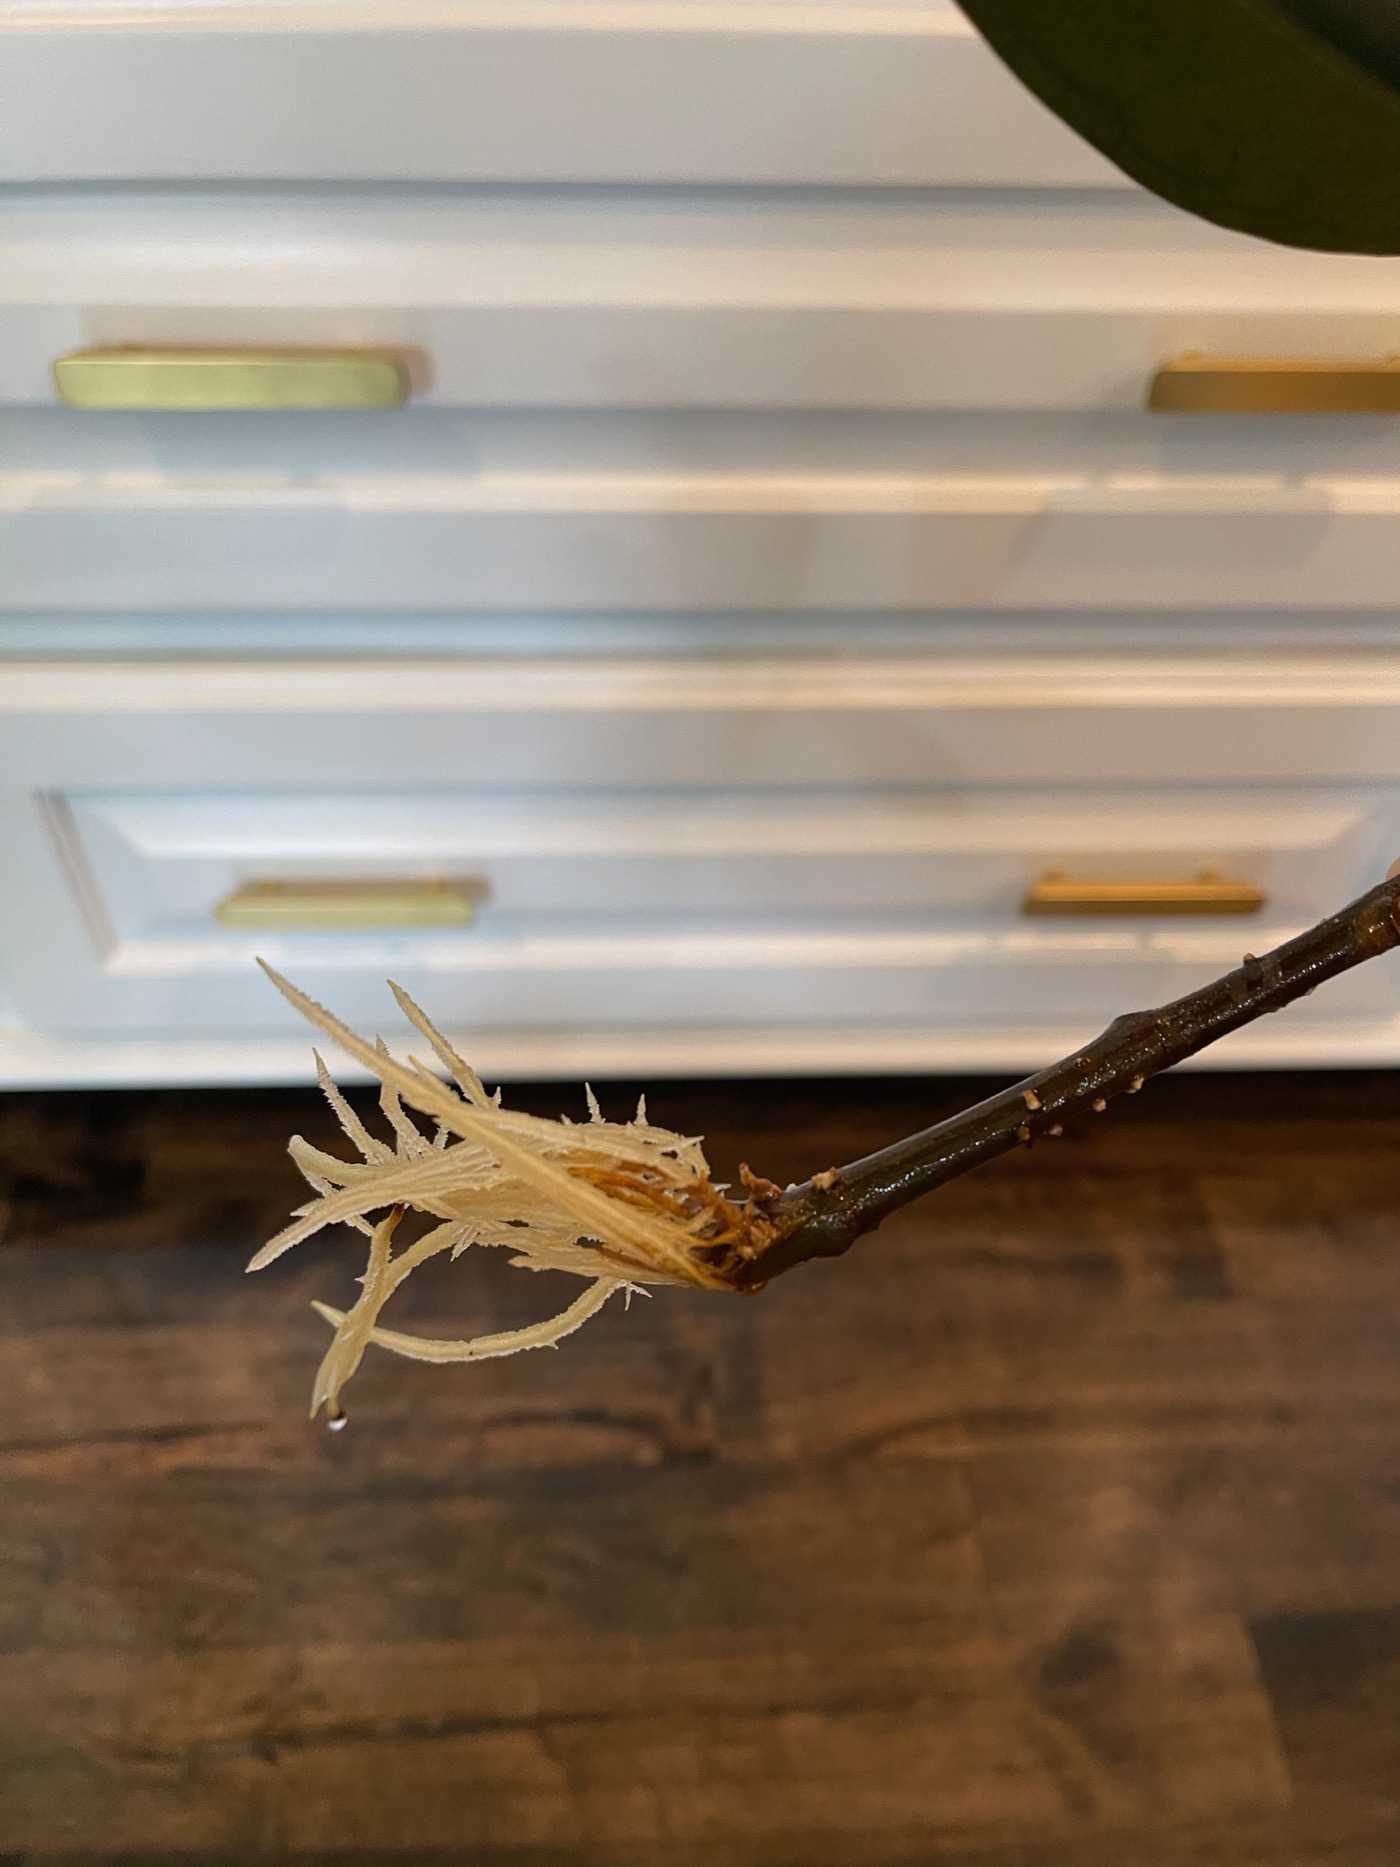
Every plant is different, but you should start to see root growth within a month. But it might not be ready for planting for several months! This is where the patience comes in! Once you see established roots forming, and they have become full and thick, it’s time to start thinking about potting in soil.
Step 5: Plant Propagated Rubber Plant Stem in Soil
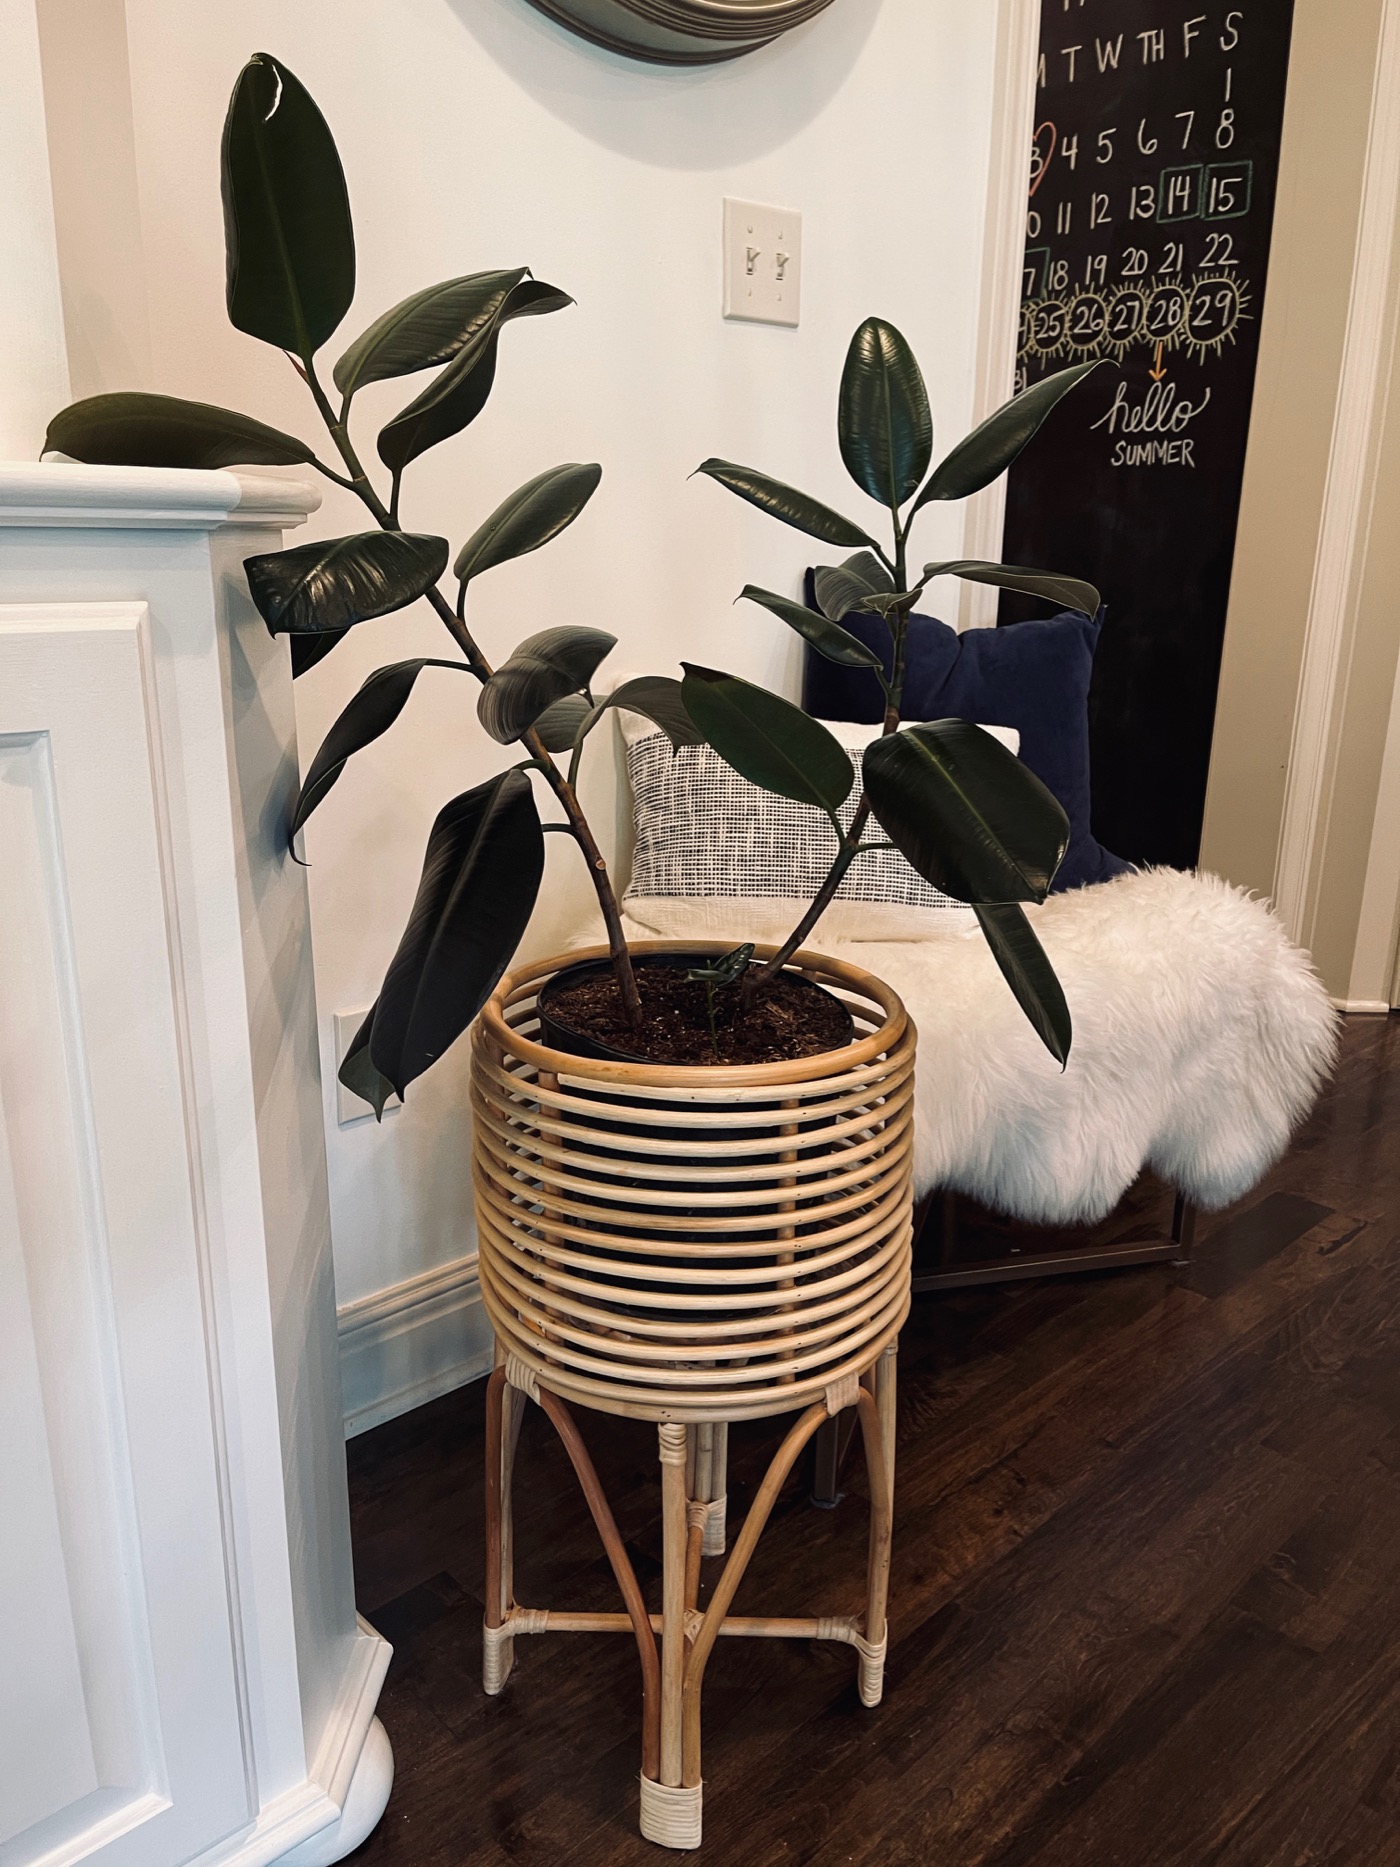
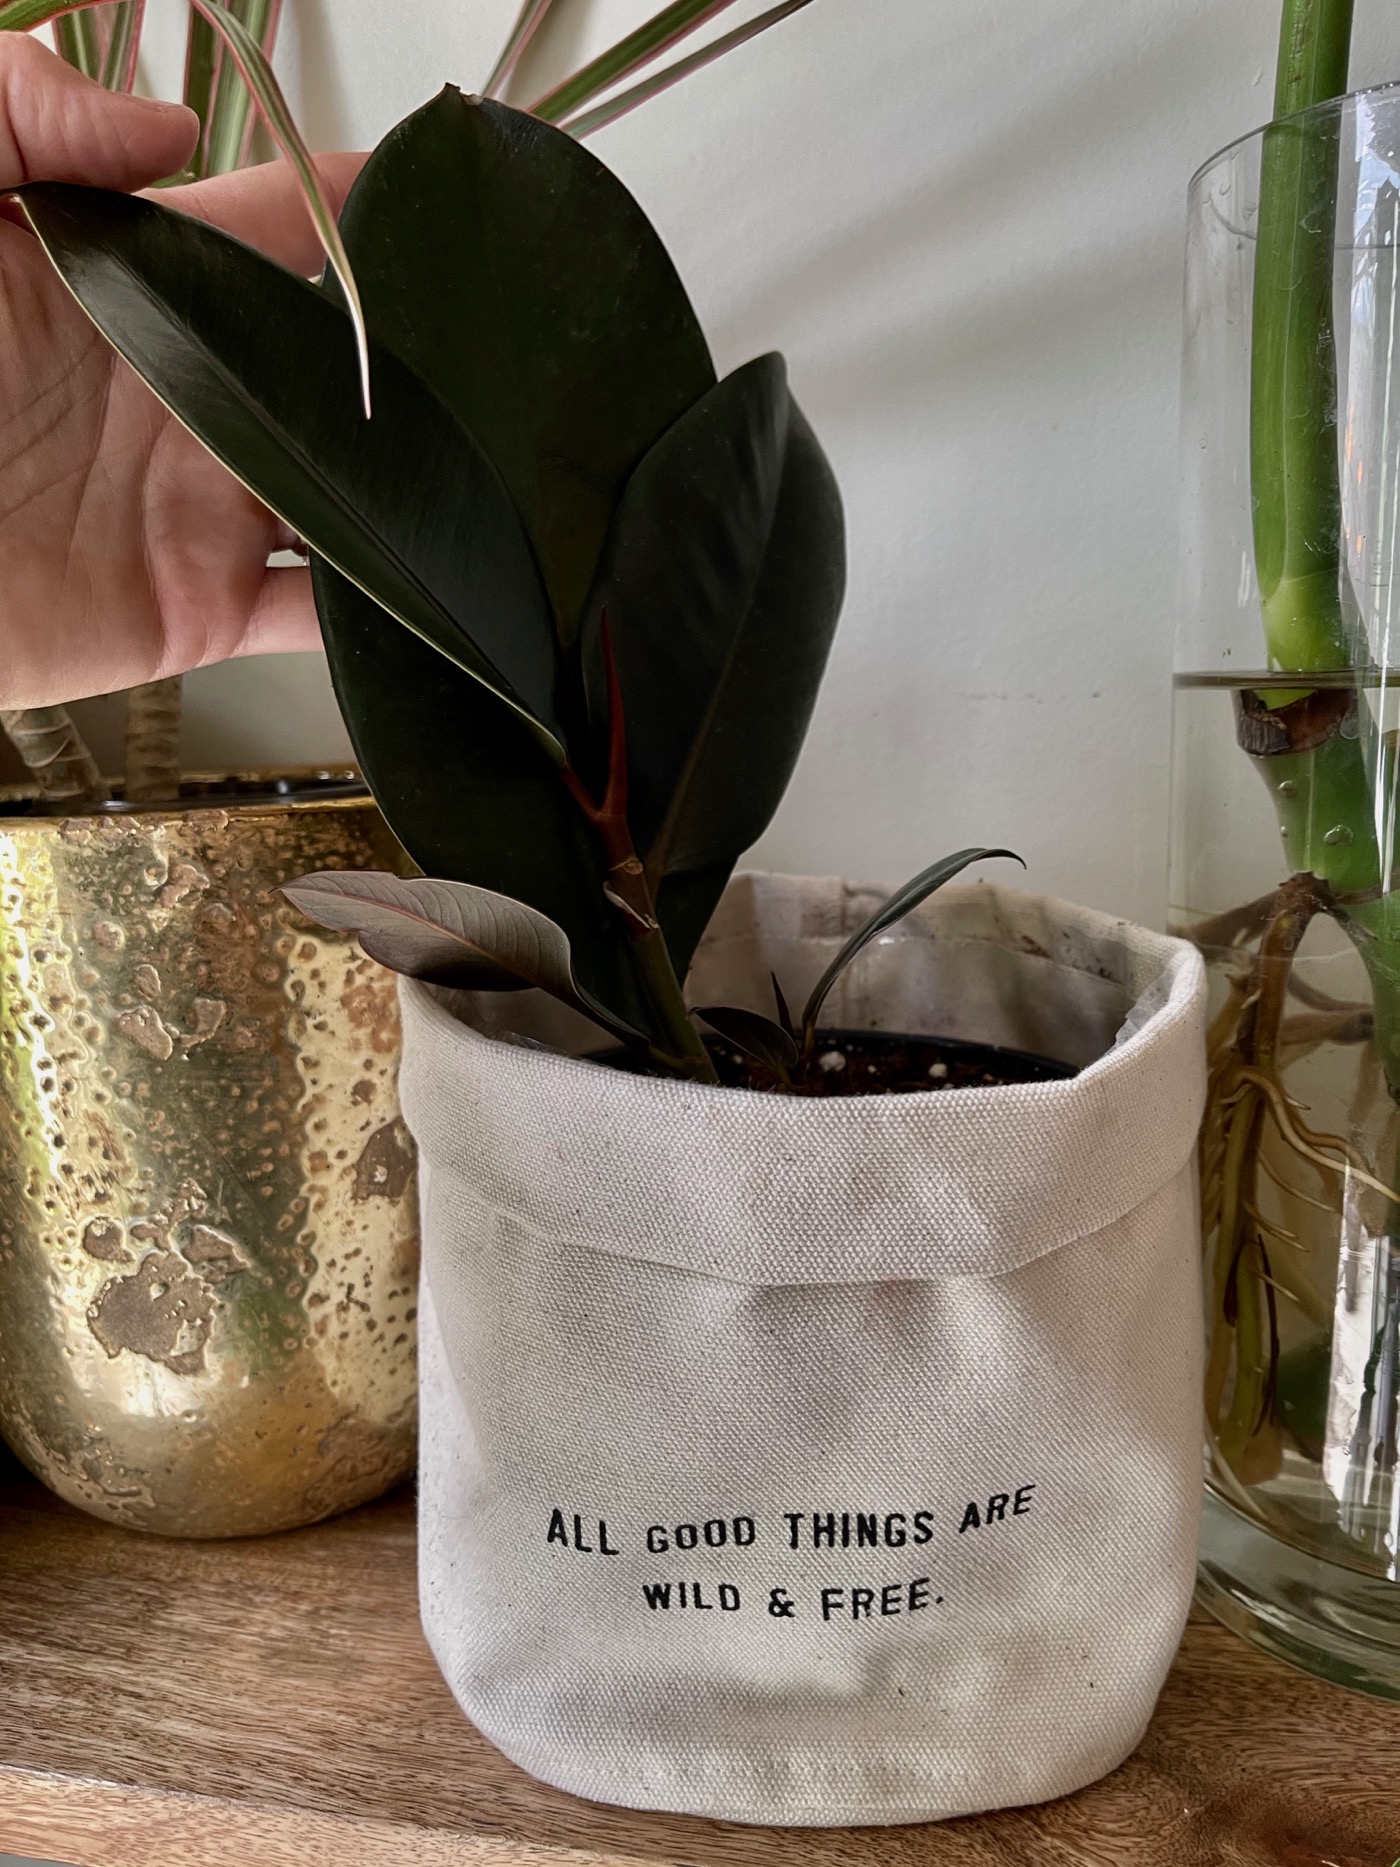
The photo below is of a previously propagated rubber plant stem. I planted in soil and it continues to get new growth! It will take a while for it to grow into another mother plant size, but plants are all about patience! With this third propagated stem that I just worked on, I’ll now have four rubber plants (and three of them were free)! Propagated plants are perfect to give as gifts too! Don’t you think this pot is just perfect (wild & FREE)?! You can also see another plant propagating right next to it to the right – a split leaf philodendron that is ready to be planted!
I hope you found this helpful in seeing how easy it is to propagate a rubber plant! Experimenting with propagation of all my plants is a real hobby of mine! You can never have too many plants! XO