Drew moved into a big boy bed right around age two. I managed two cribs in the nursery for awhile (our kids 15 months apart remember!), but I finally felt Drew needed his own space. He was crawling out of his crib at this point and nap time was becoming an issue. We already had a queen sized bed for guests, which we transitioned him into. The bed was just a mattress and bed frame with no headboard or footboard. I decided to go ahead and make a headboard for him. Here’s how to make a DIY upholstered headboard.

Materials Needed for DIY Upholstered Headboard
- a piece of MDF the length of the bed (you can have this cut right at the hardware store for you)
- foam padding/sheet
- batting
- fabric of choice
- spray adhesive
- staple gun/staples
Assembling the Headboard
- Have a piece of MDF cut to the length and height you desire. The length should be the length of your bed frame. Height is a personal preference!
- Cut the foam piece to exact size of the MDF.
- Spray the adhesive onto the wood and adhere the foam piece.
- Add batting around the foam and MDF and secure with a heavy duty staple gun. Be sure to pull taught! It helps to have a helper here!
- Cut fabric to length (with some extra around all sides) and wrap fabric around the headboard and secure with more staples. Choosing stripes probably wasn’t the best idea, because I had to be extra careful to keep them straight! Tug and pull and make this really tight before stapling. You can wrap the corners like you would wrapping paper on a gift.
- Add hardware to the back of the MDF. We used hooks in each corner and added anchors to the wall using a laser level.
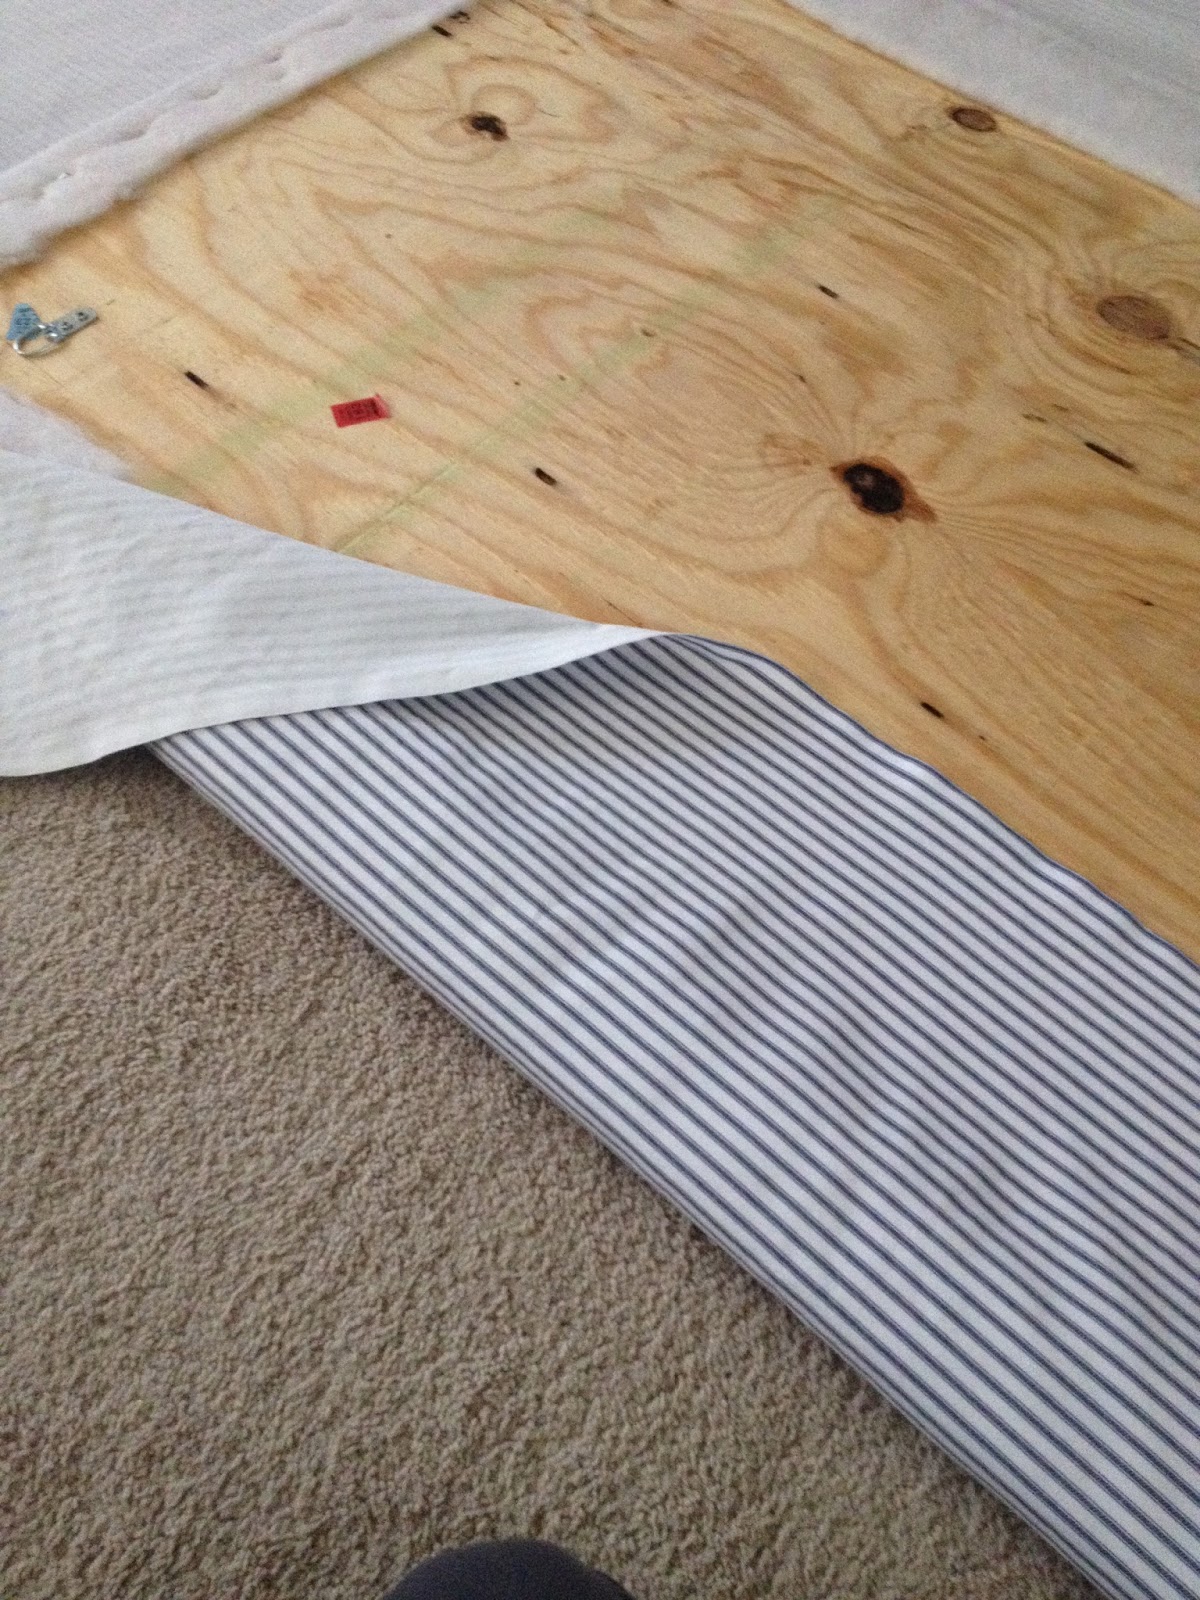

This is the story of my life. These little moving stickers are on the back of everything we own since we moved six times in twelve years! You can see in the photo the hardware we use to hang this big guy. Make sure you use strong anchors that can hold a good amount of weight!

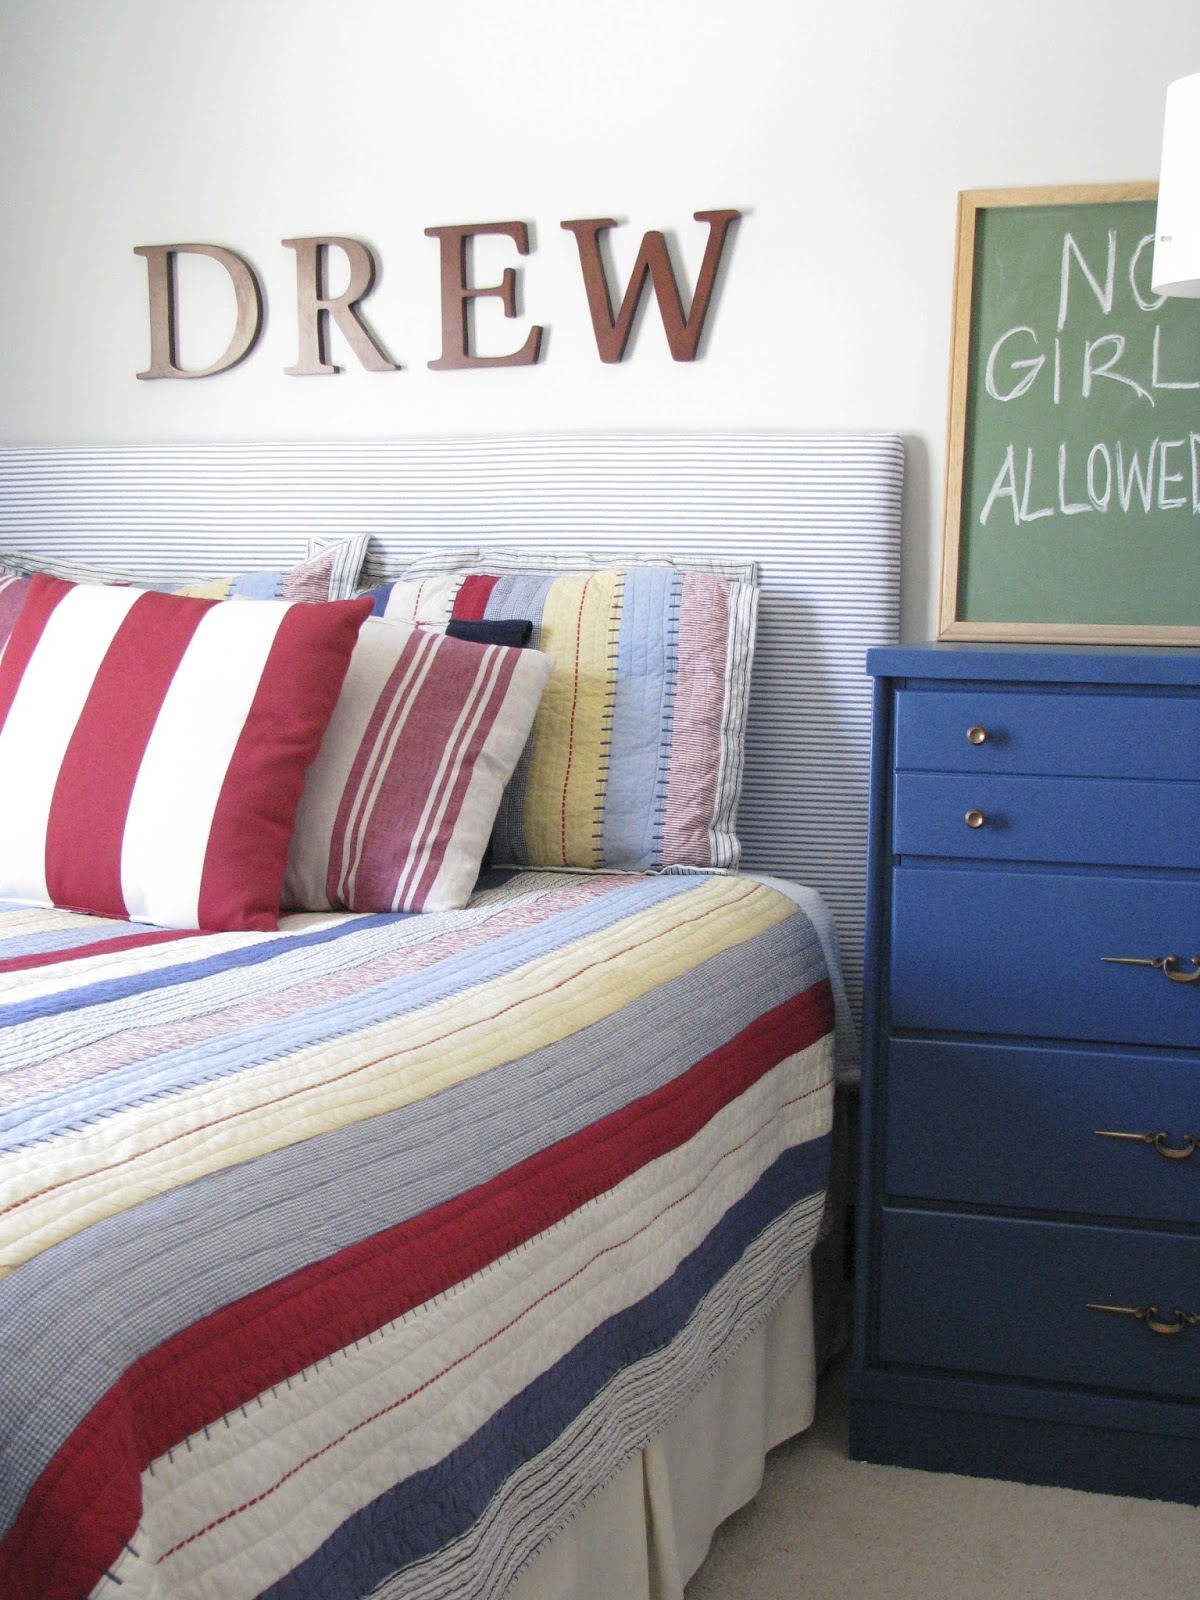
Do you like the finished product?! This is an inexpensive way to create a soft headboard. Kate sleeps in a twin, so Drew’s bed is the one we all pile into at night for reading time. The large, soft headboard is perfect for lounging and reading! The best part is, if you get sick of the fabric, or if it gets dirty/dingy, just change it! XO
I love the mix of all of the stripes! It's so fun and definitely boy-ish.
You are one of my favorite bloggers so each day I don't see a post I get more concerned about you! Hoping you are just enjoying some time away!!
Brenda, you are so sweet! Thank you for thinking of me during my "absence" from the blogosphere. We have had some company, and I just needed a mental break from the ins and outs of blogging. I am actually sitting down to write a new post as we speak. Thank you for being a loyal reader! xo