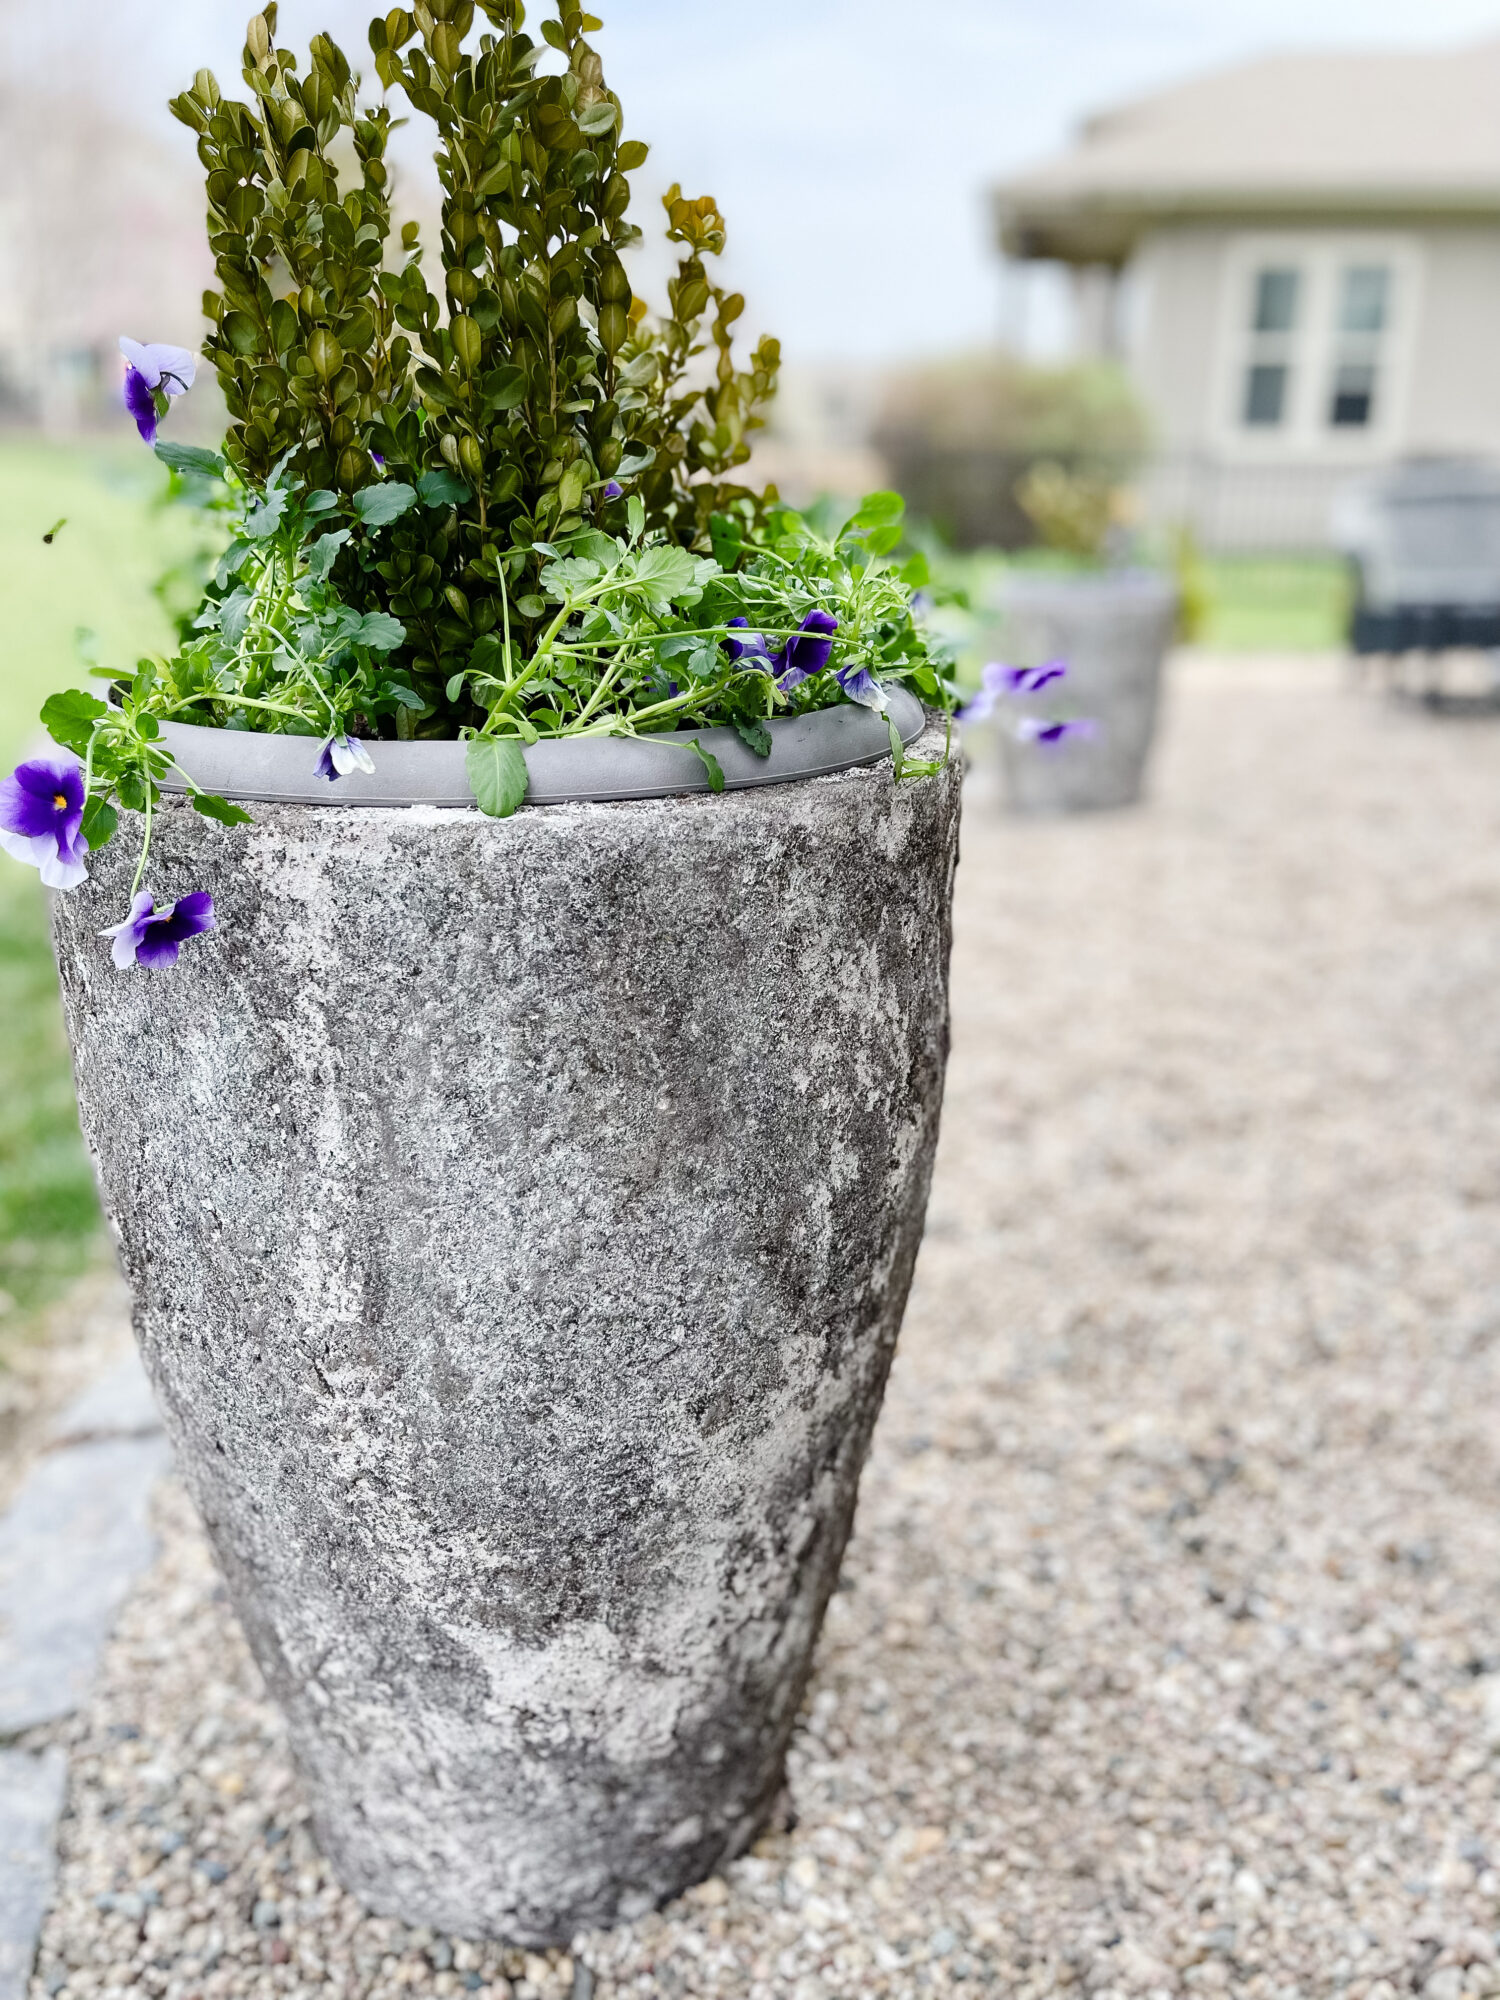
I have longingly looked at the same outdoor pots at my local nursery for years! They are textured and worn looking in all the right ways. Of course, they are super expensive too! After seeing a tutorial from Jenna Sue Design, I knew I wanted to try this technique on three large pots I already had. In 2021, I attempted a different technique. They were great in the beginning, but the paint really chipped after rain, sprinklers hitting them, and staying out all winter. So, far this technique looks more like how I wanted them to look and I’ve experienced no chipping so far! Here’s how to make DIY textured outdoor planters using stucco. This photo is right after I made them, adding a boxwood and pansies in April.
Inspiration Planters
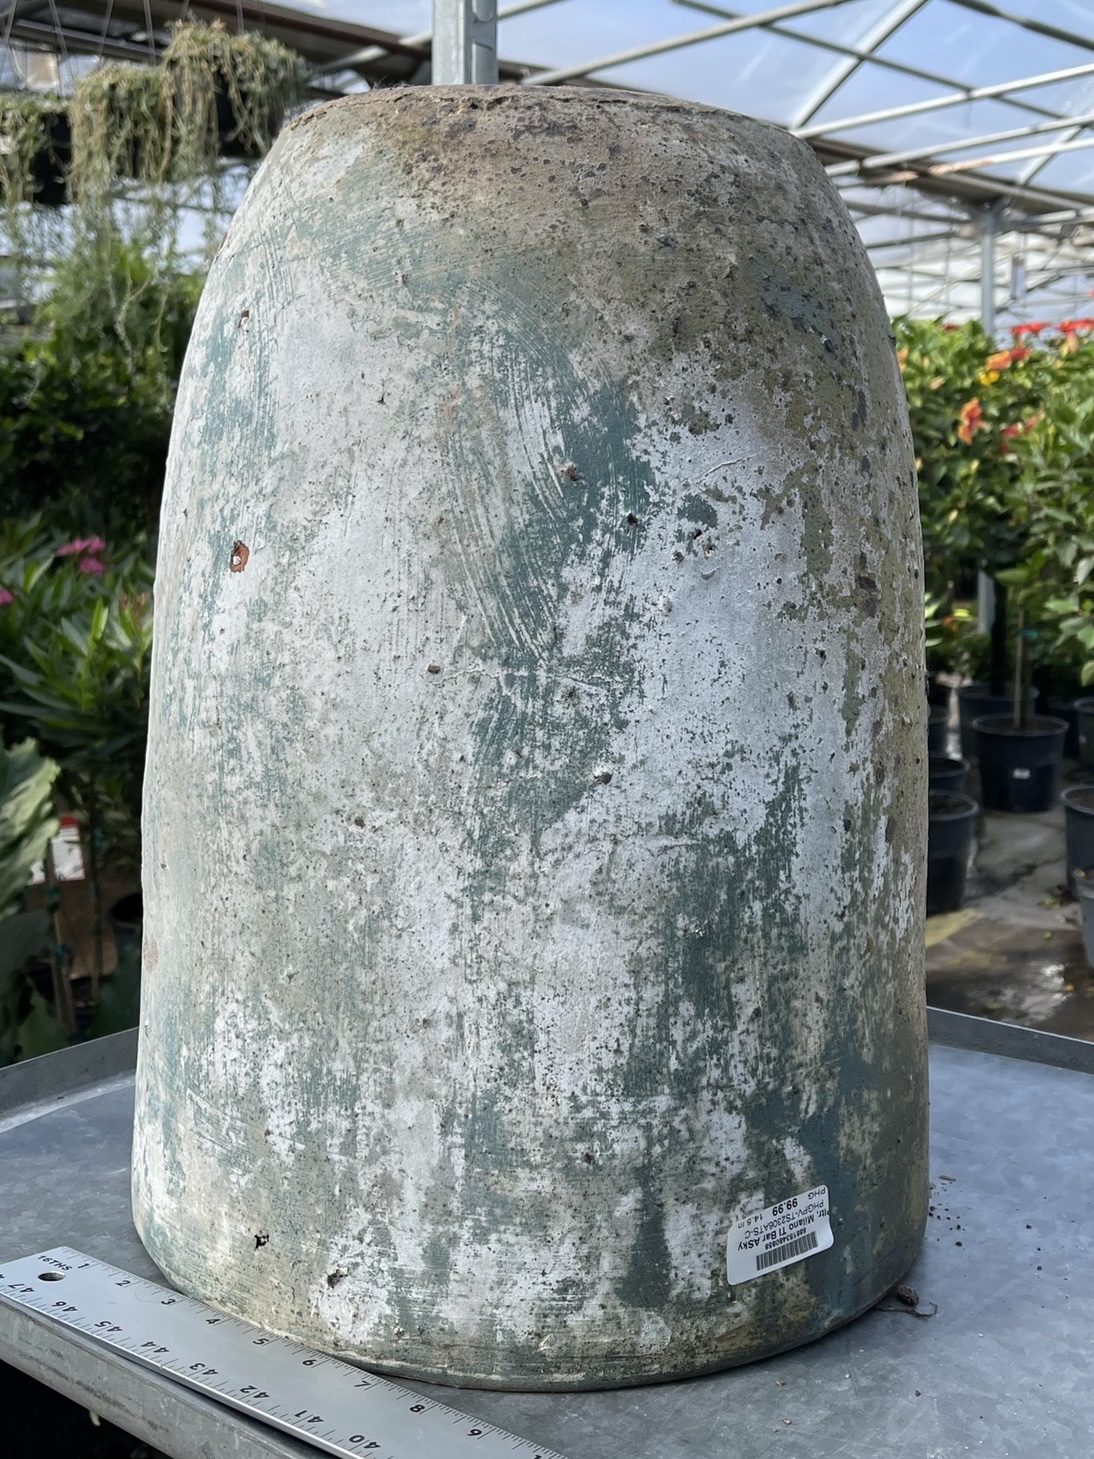
These are the planters I always look at when I go to my local nursery. There is something very rustic, classic, and European about these planters that I love! They are $100. I use three large pots on our pea gravel patio, so buying three of these would be expensive.
Planters Before
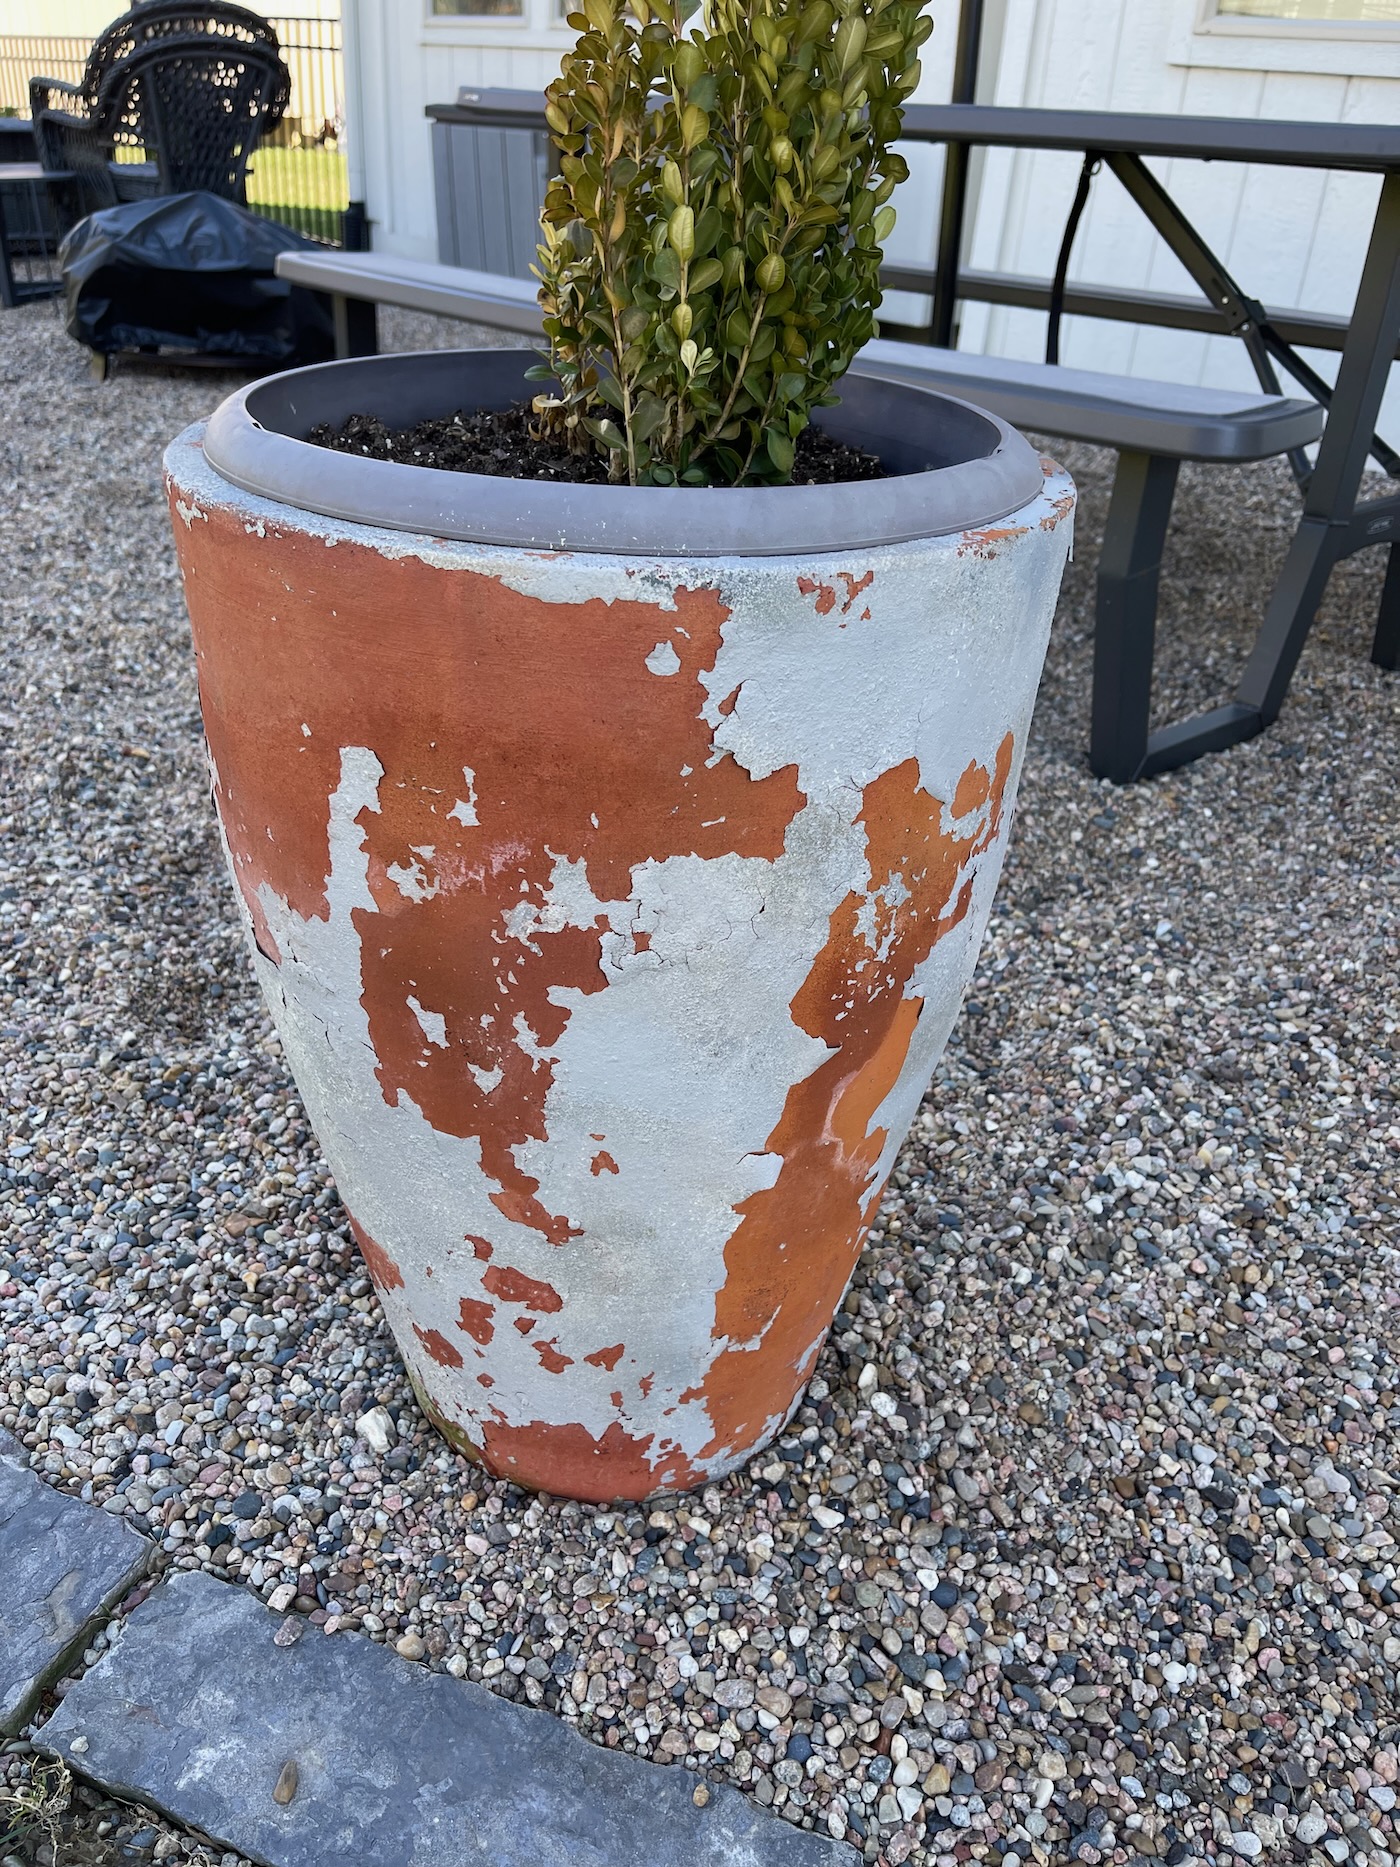
I already had three similar sized terra cotta pots that Steve picked up for me one day at a shop near his old office. They were having a sale and he loaded them up for me. Since I’ve had them, I’ve spray painted them and tried to age them. Both times, they got really chipped. So, crossing my fingers this technique with adding stucco will be super durable! Here is what they looked like after my attempt in 2021 – not good! The original terra cotta was so pretty, but all three didn’t match and it wasn’t the vibe I was going for.
Supplies Needed
- Planter of choice (mine are terra cotta but the tutorial used galvanized)
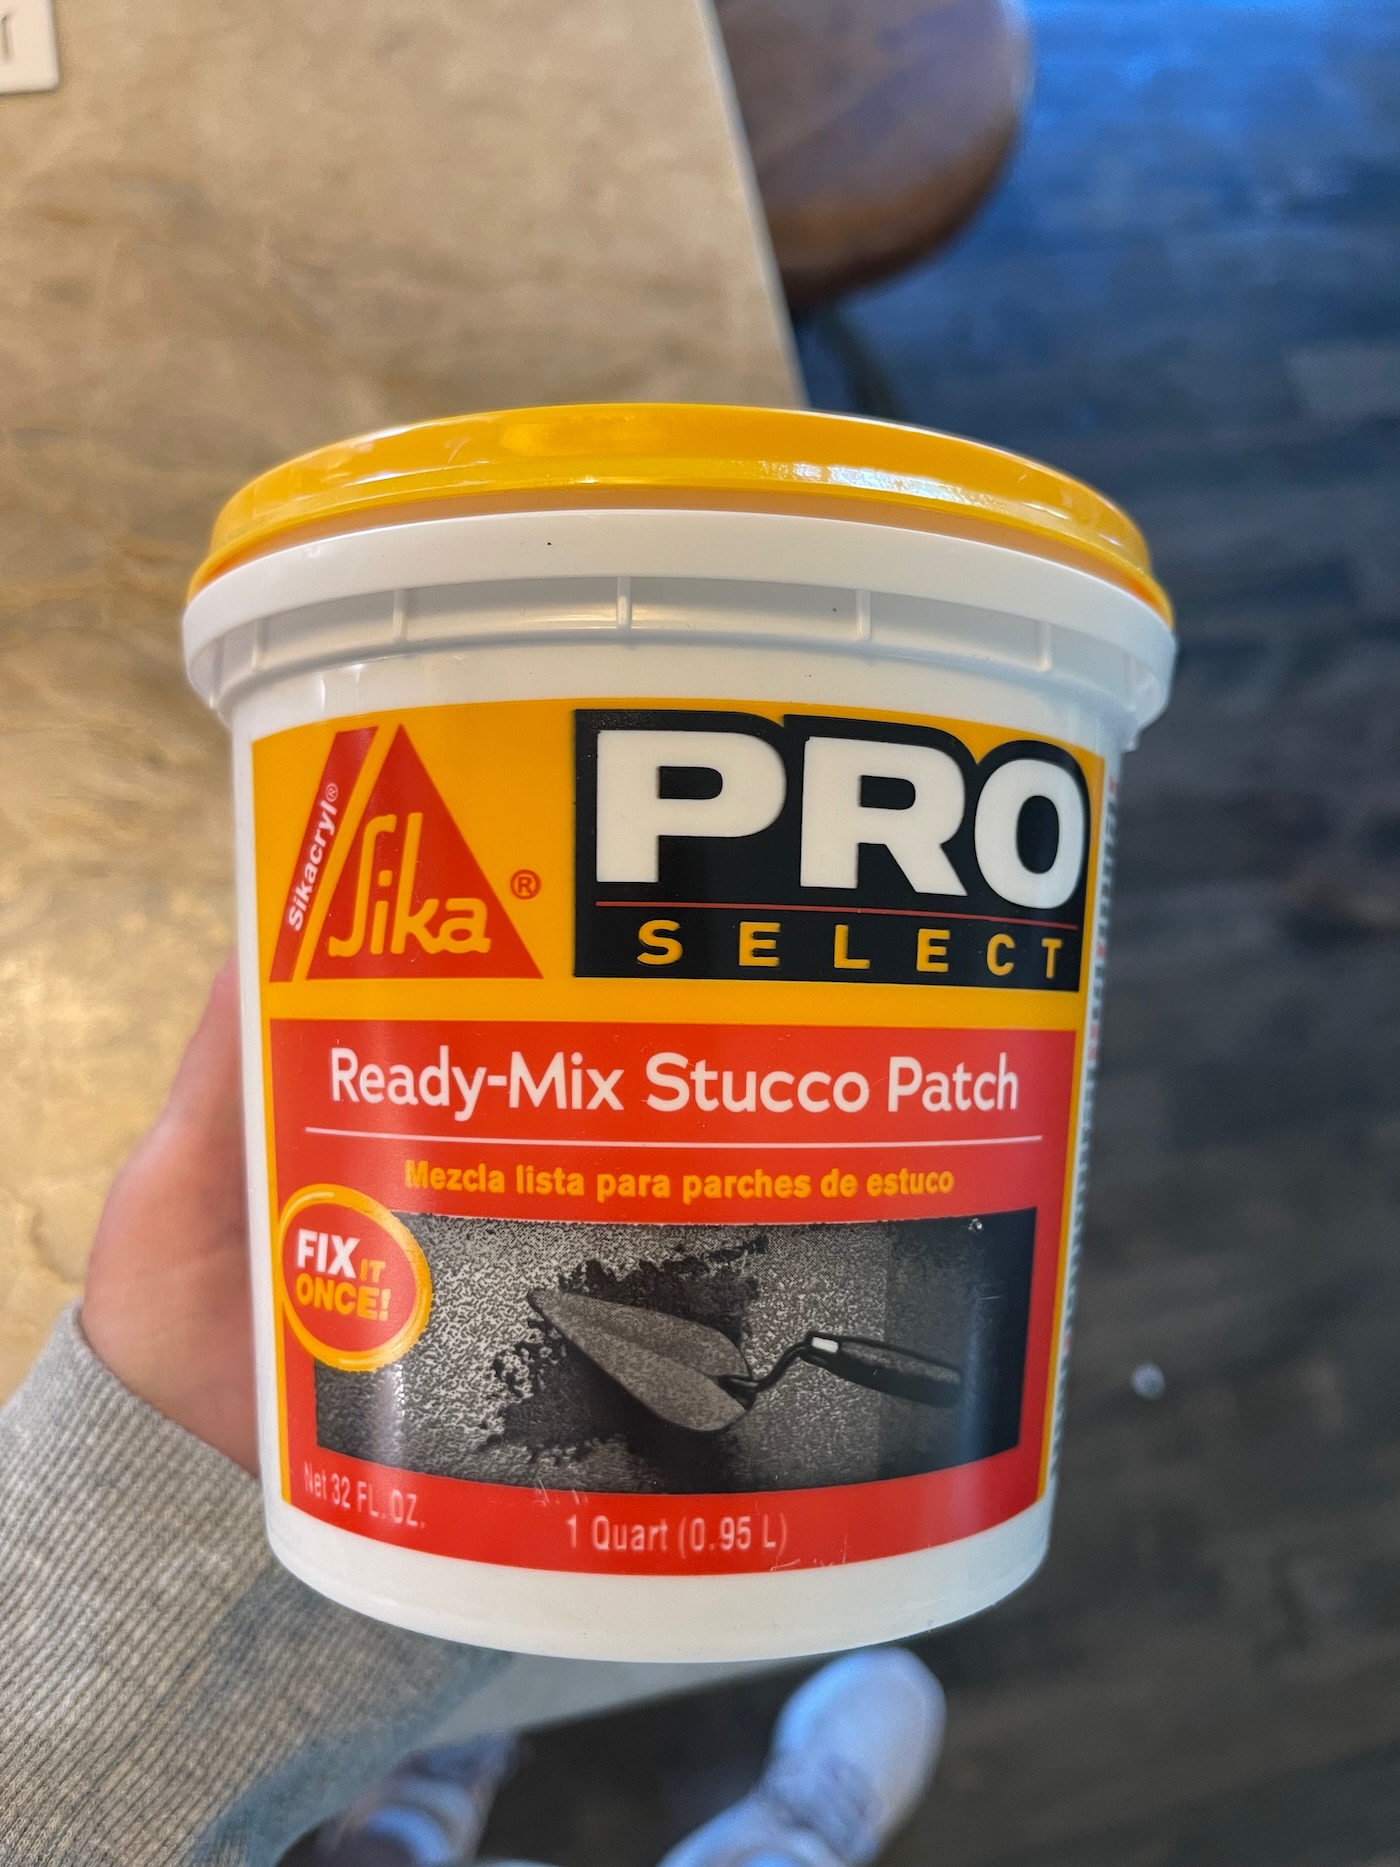
- Ready Mix Stucco Patch (I used two tubs for 3 planters)
- Old rags
- Paint
- Dirt/soil
How to Create DIY Textured Planters
Adding Stucco
First off all, I did not prep the chipped planters, I just got started. I’ve never worked with stucco patch before. It is a soft texture that dries/hardens pretty quickly after opening, so you’ll want to work fairly quickly. In the tutorial I used, the blogger used a paint brush to apply the stucco. I found that grabbing it with an old rag and sort of smashing onto the planter worked best for me. You can purchase this product at any hardware store.
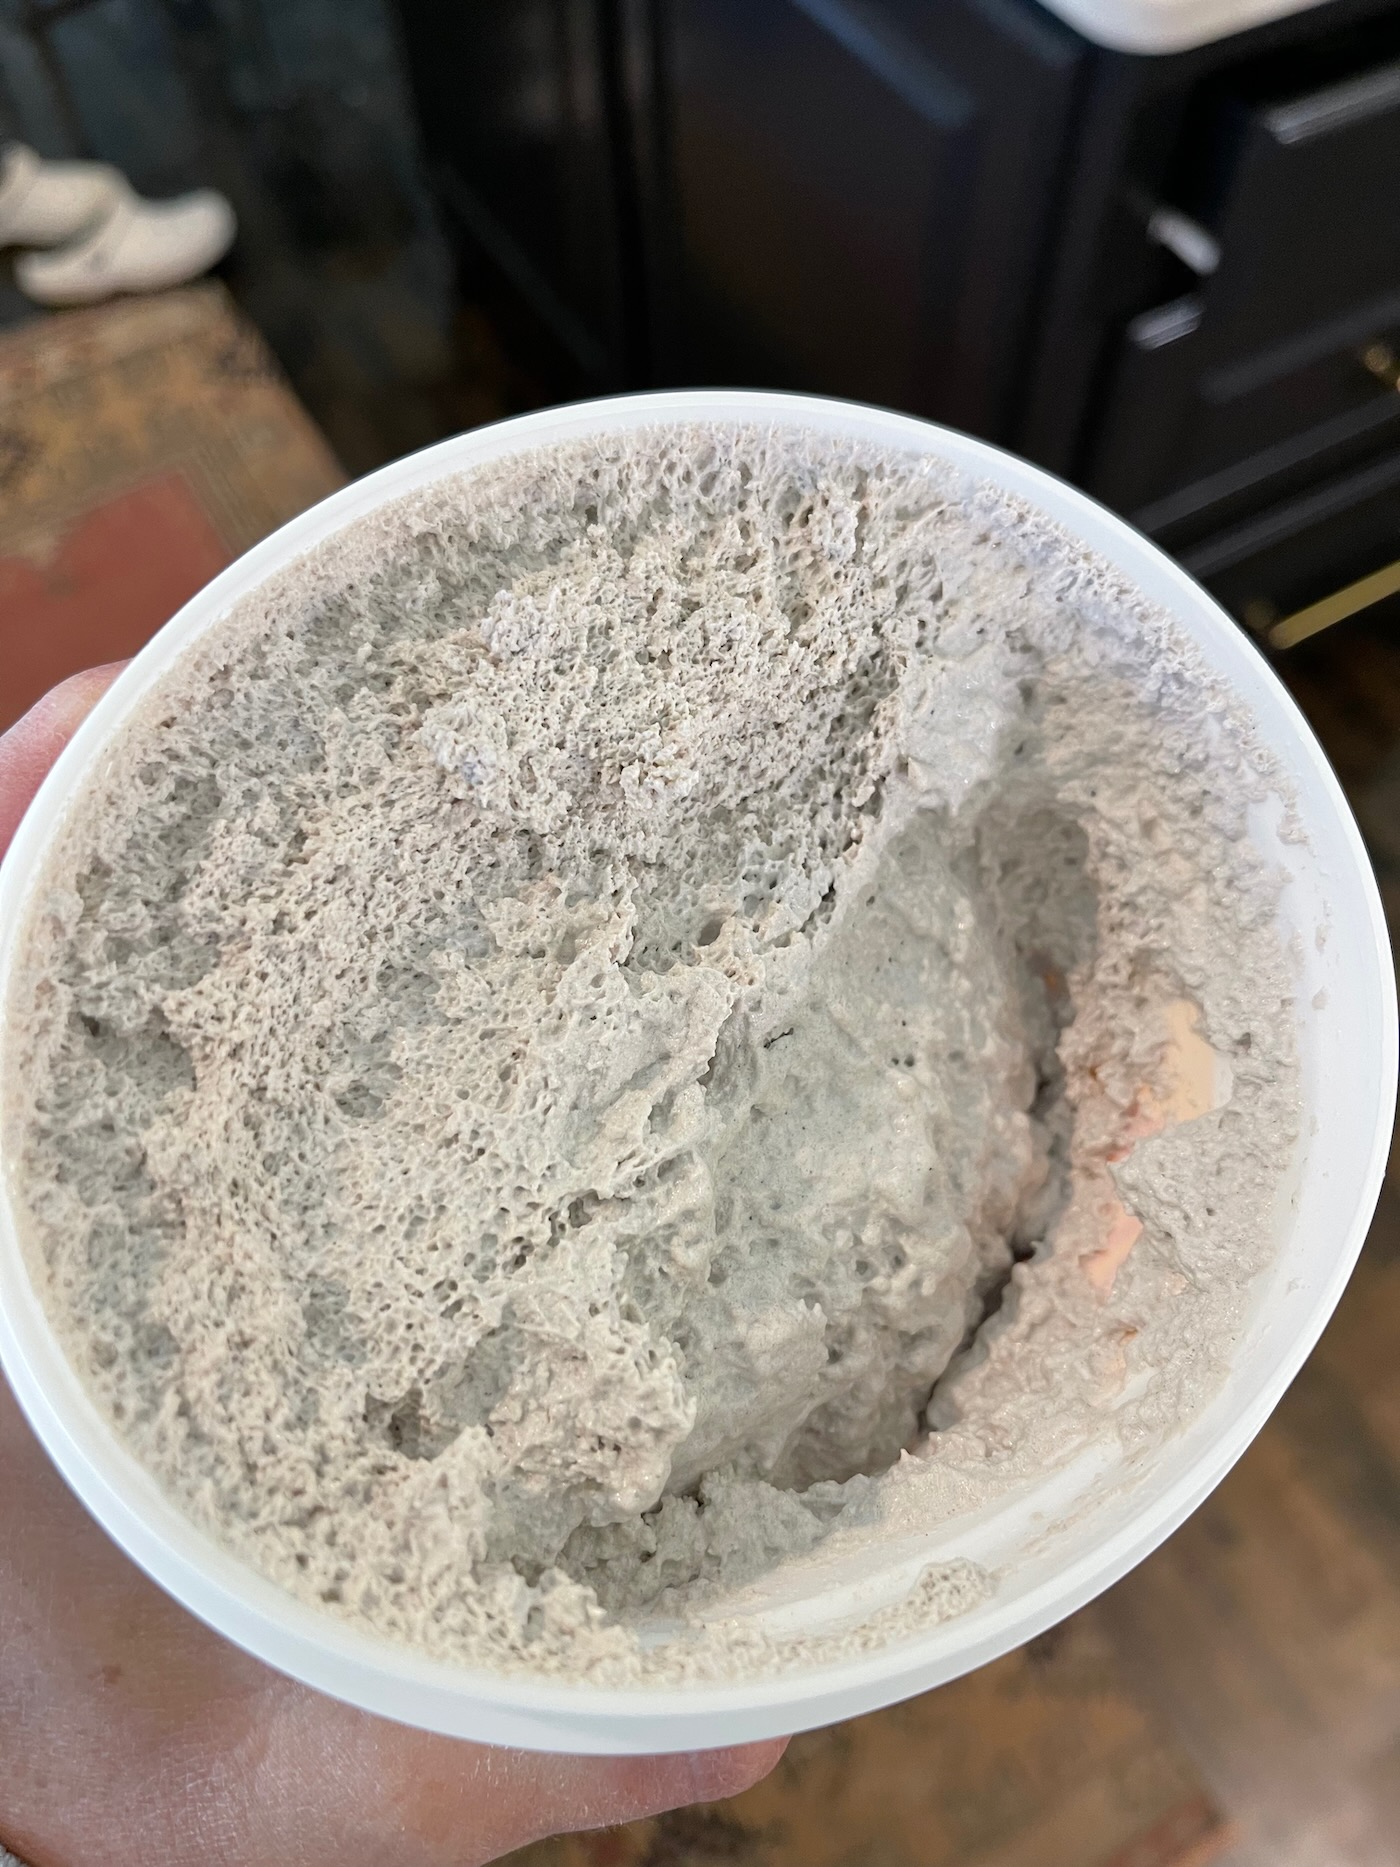
There is no rhyme or reason to how I applied the stucco. Just grab and start slathering on. You want it to look textured so having jagged edges is a good thing! The best part is, you cannot screw this up! Just make sure you have good coverage. I only wanted to go over this one time with stucco, so I took my time in making sure the planters were covered. This is one pot completely covered in stucco patch.
Once all your planters are covered in stucco, they will harden fairly quickly. Now you’re ready for the final steps!
Adding Paint and Dirt
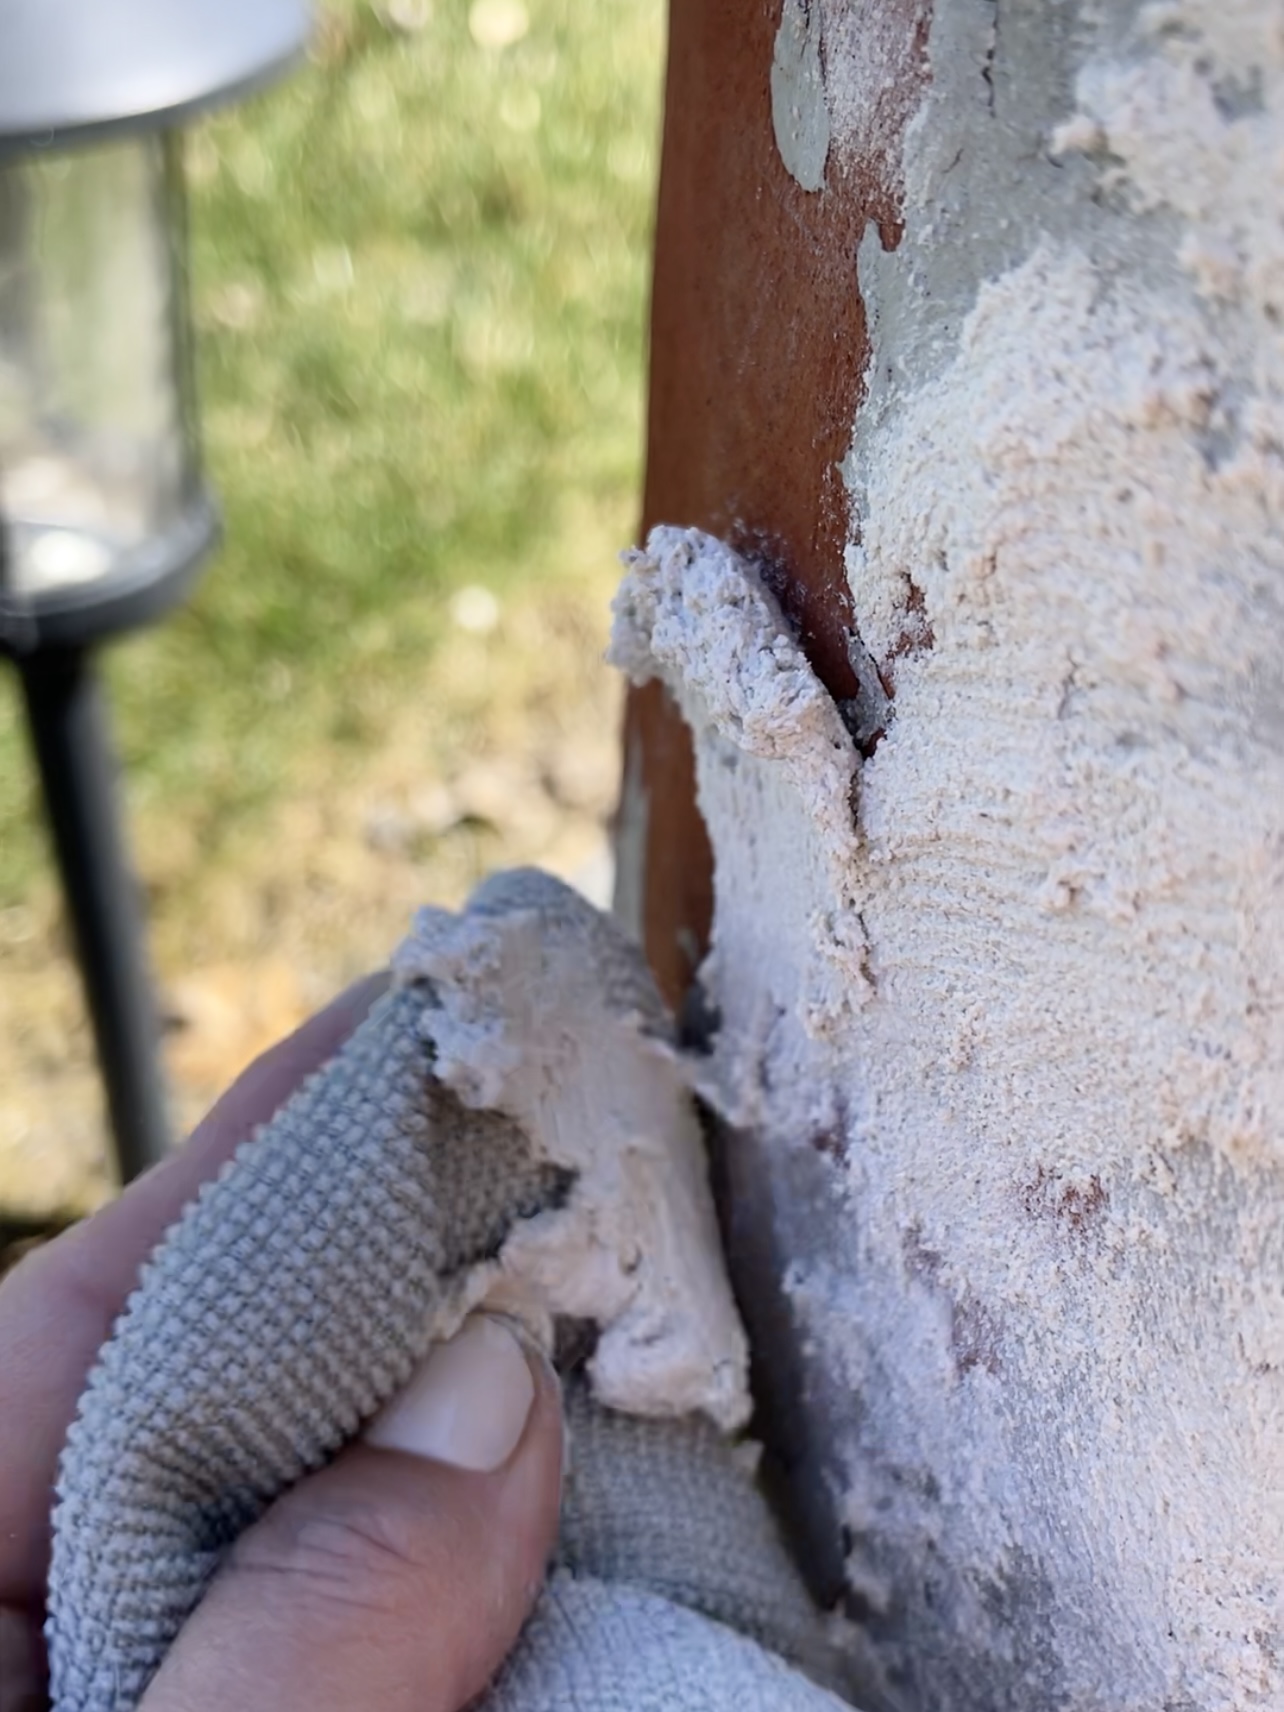
The next step is to make these planters looked aged with a little paint and dirt. I just grabbed some neutral beige/white paints I had in my stash, but you could grab whatever you want. The inspiration planters have a little greenish/teal color. I wanted to keep mine super neutral and ended up using 3 small jars of paint in different but very similar shades.
Using a paint brush, I applied small sections of paint. While the paint is wet, I used my hand to grab dirt and spread it over the paint so it gets mixed in. Yes, this is a messy job! I preferred to just use my hands and it is a little rough over the stucco. Repeat this process until entire planter is covered.
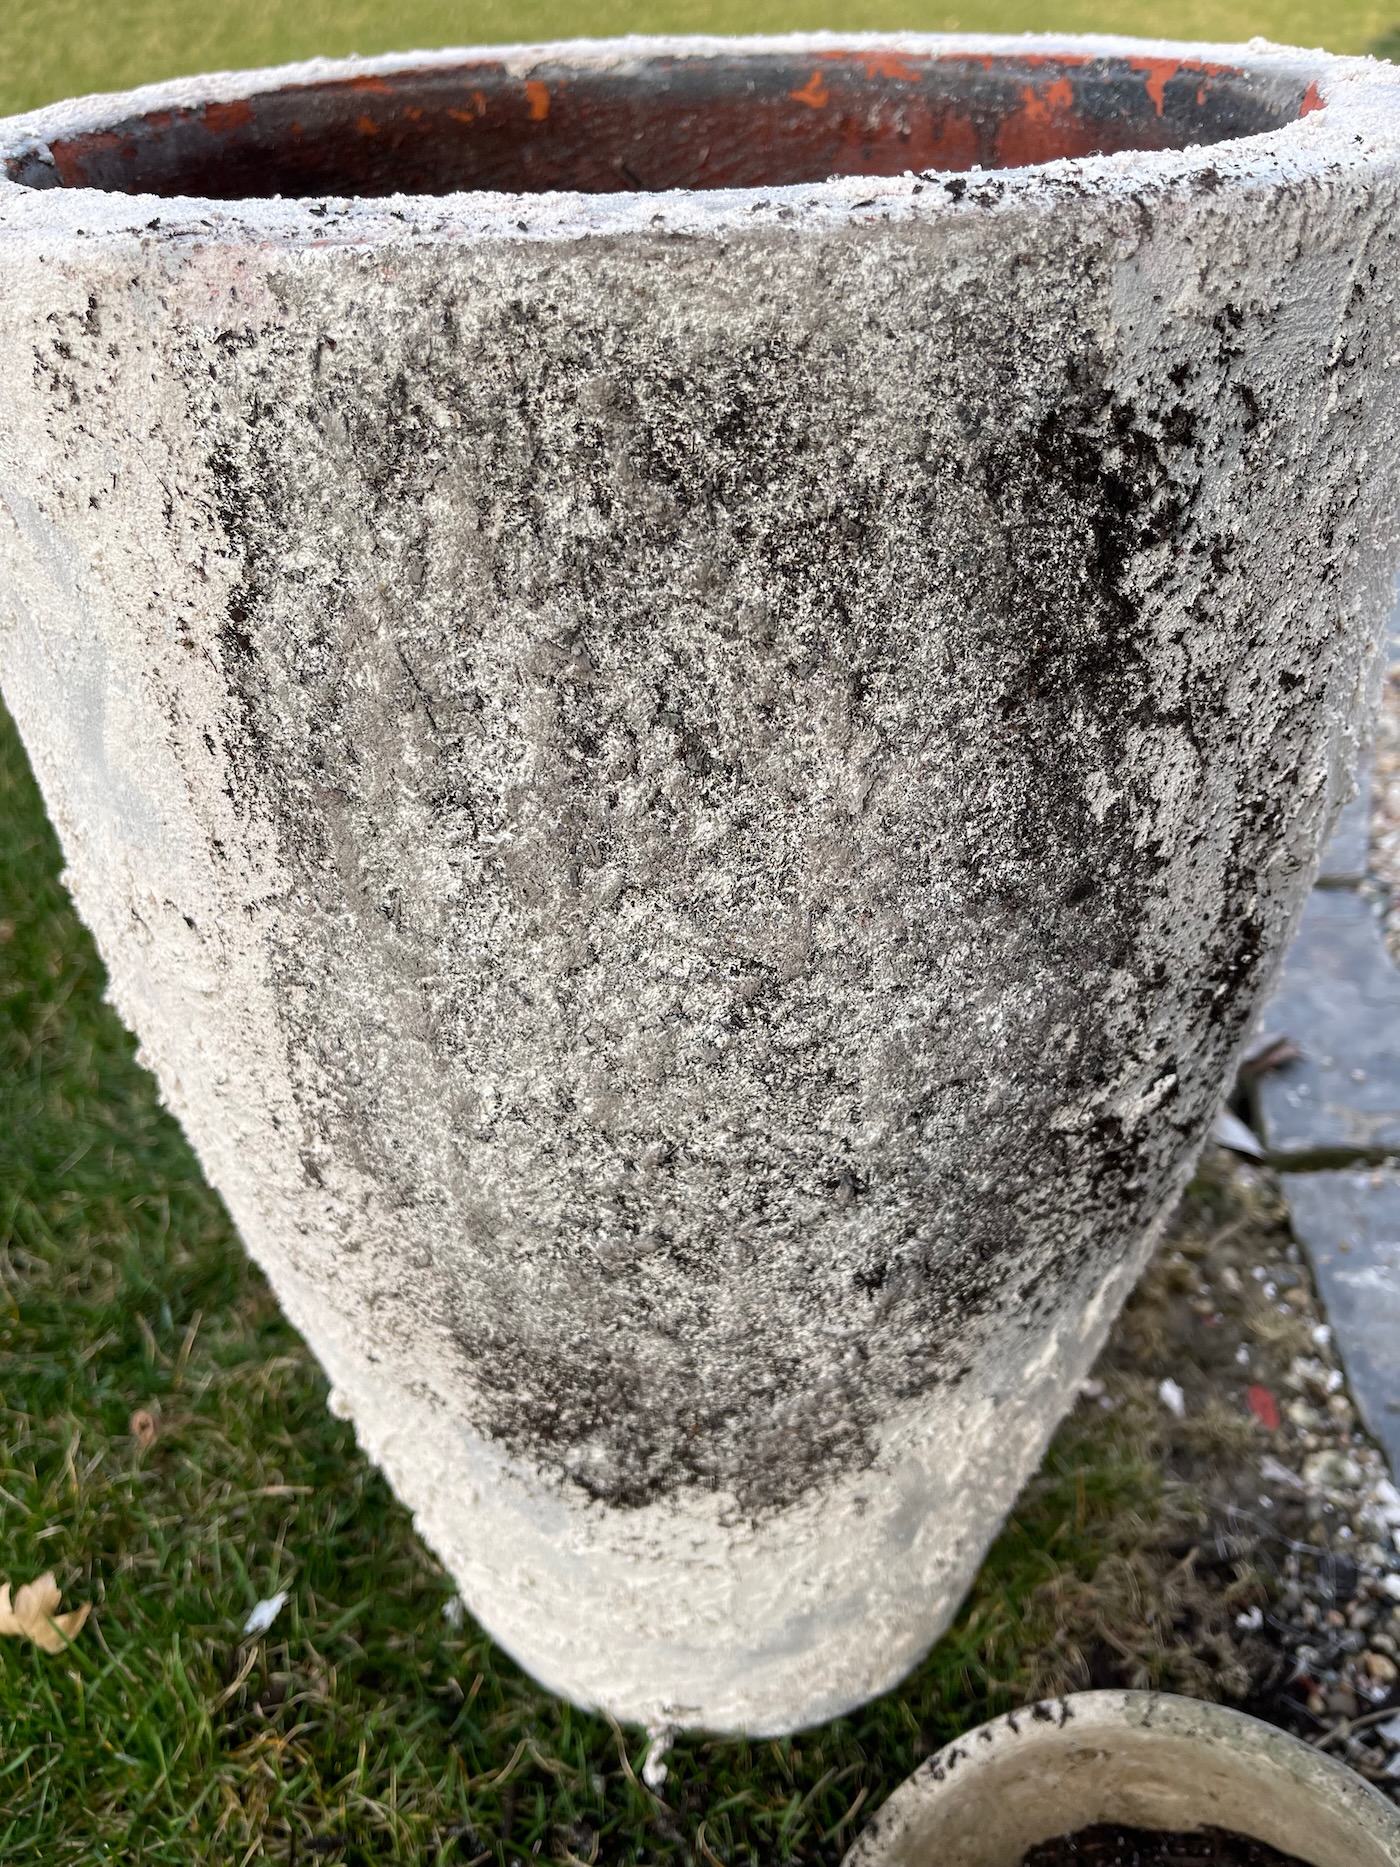
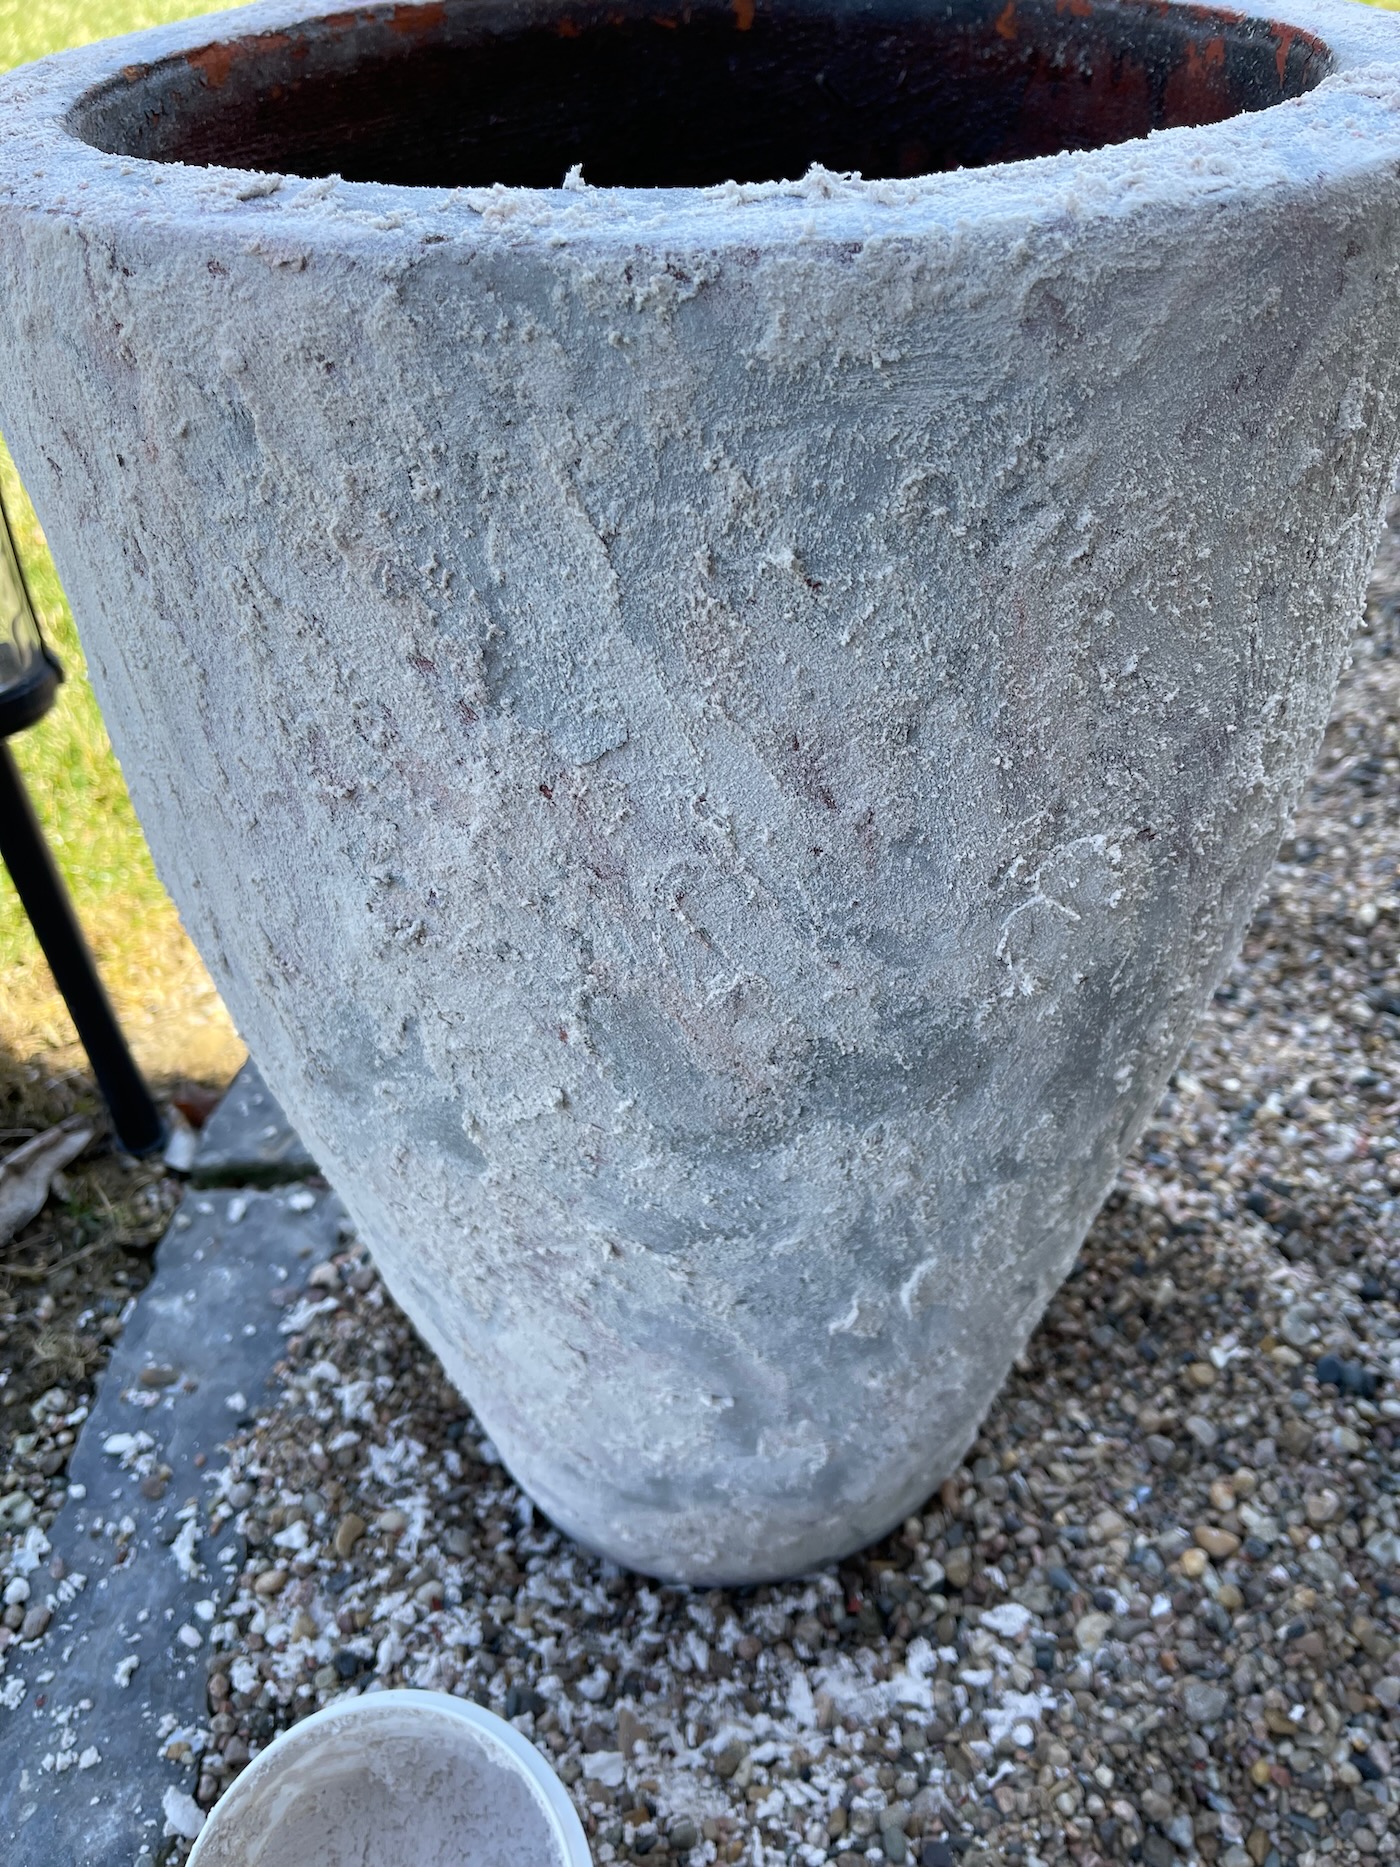
You can sand down some of the dirt if it’s too dark for you. This also exposes some of the white of the stucco. Again, there is no right or wrong here! The point is for them to look aged and textured and worn.
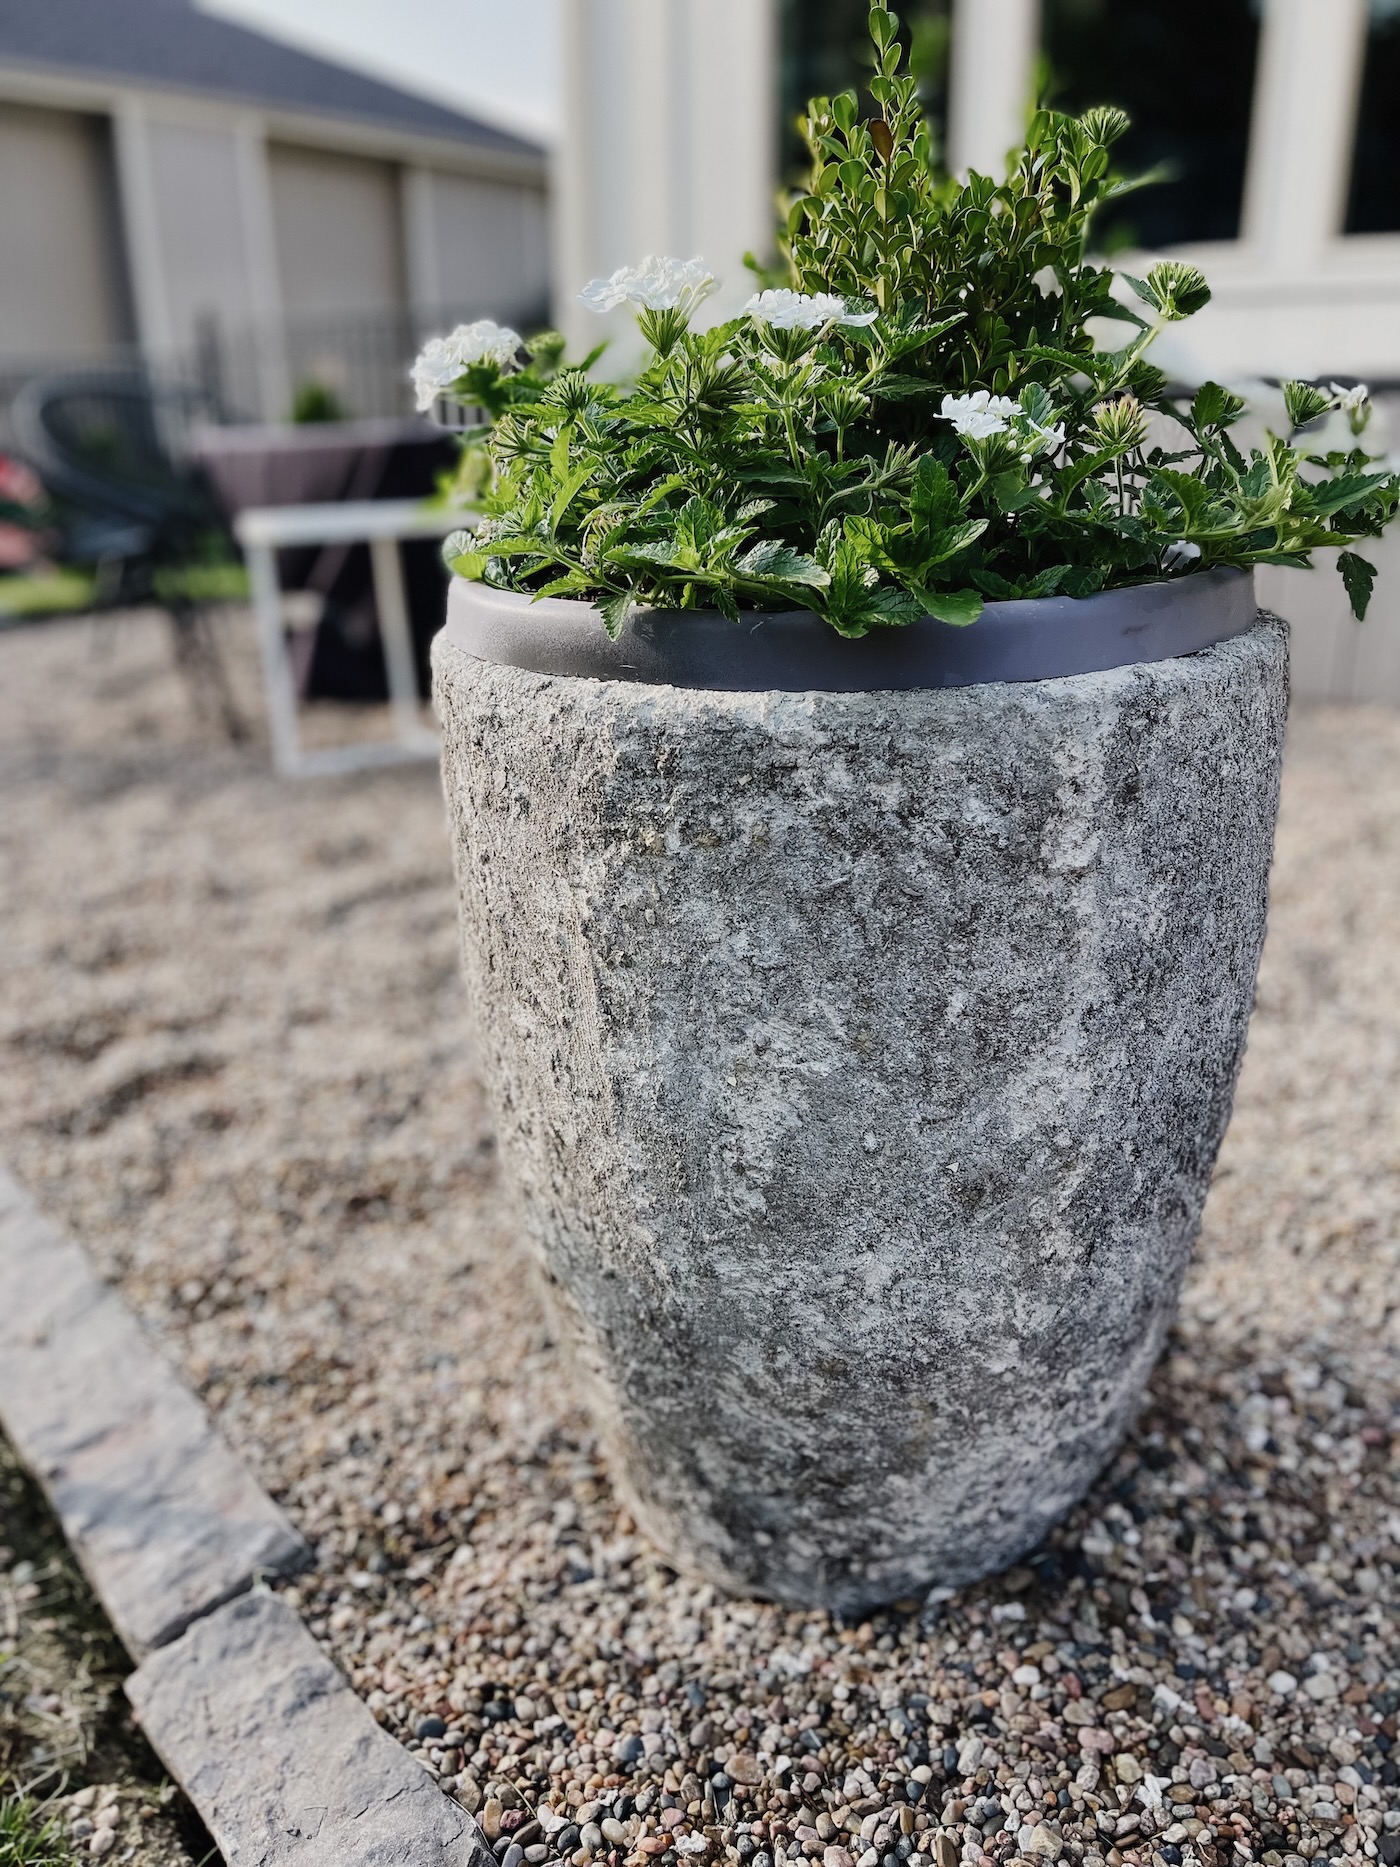
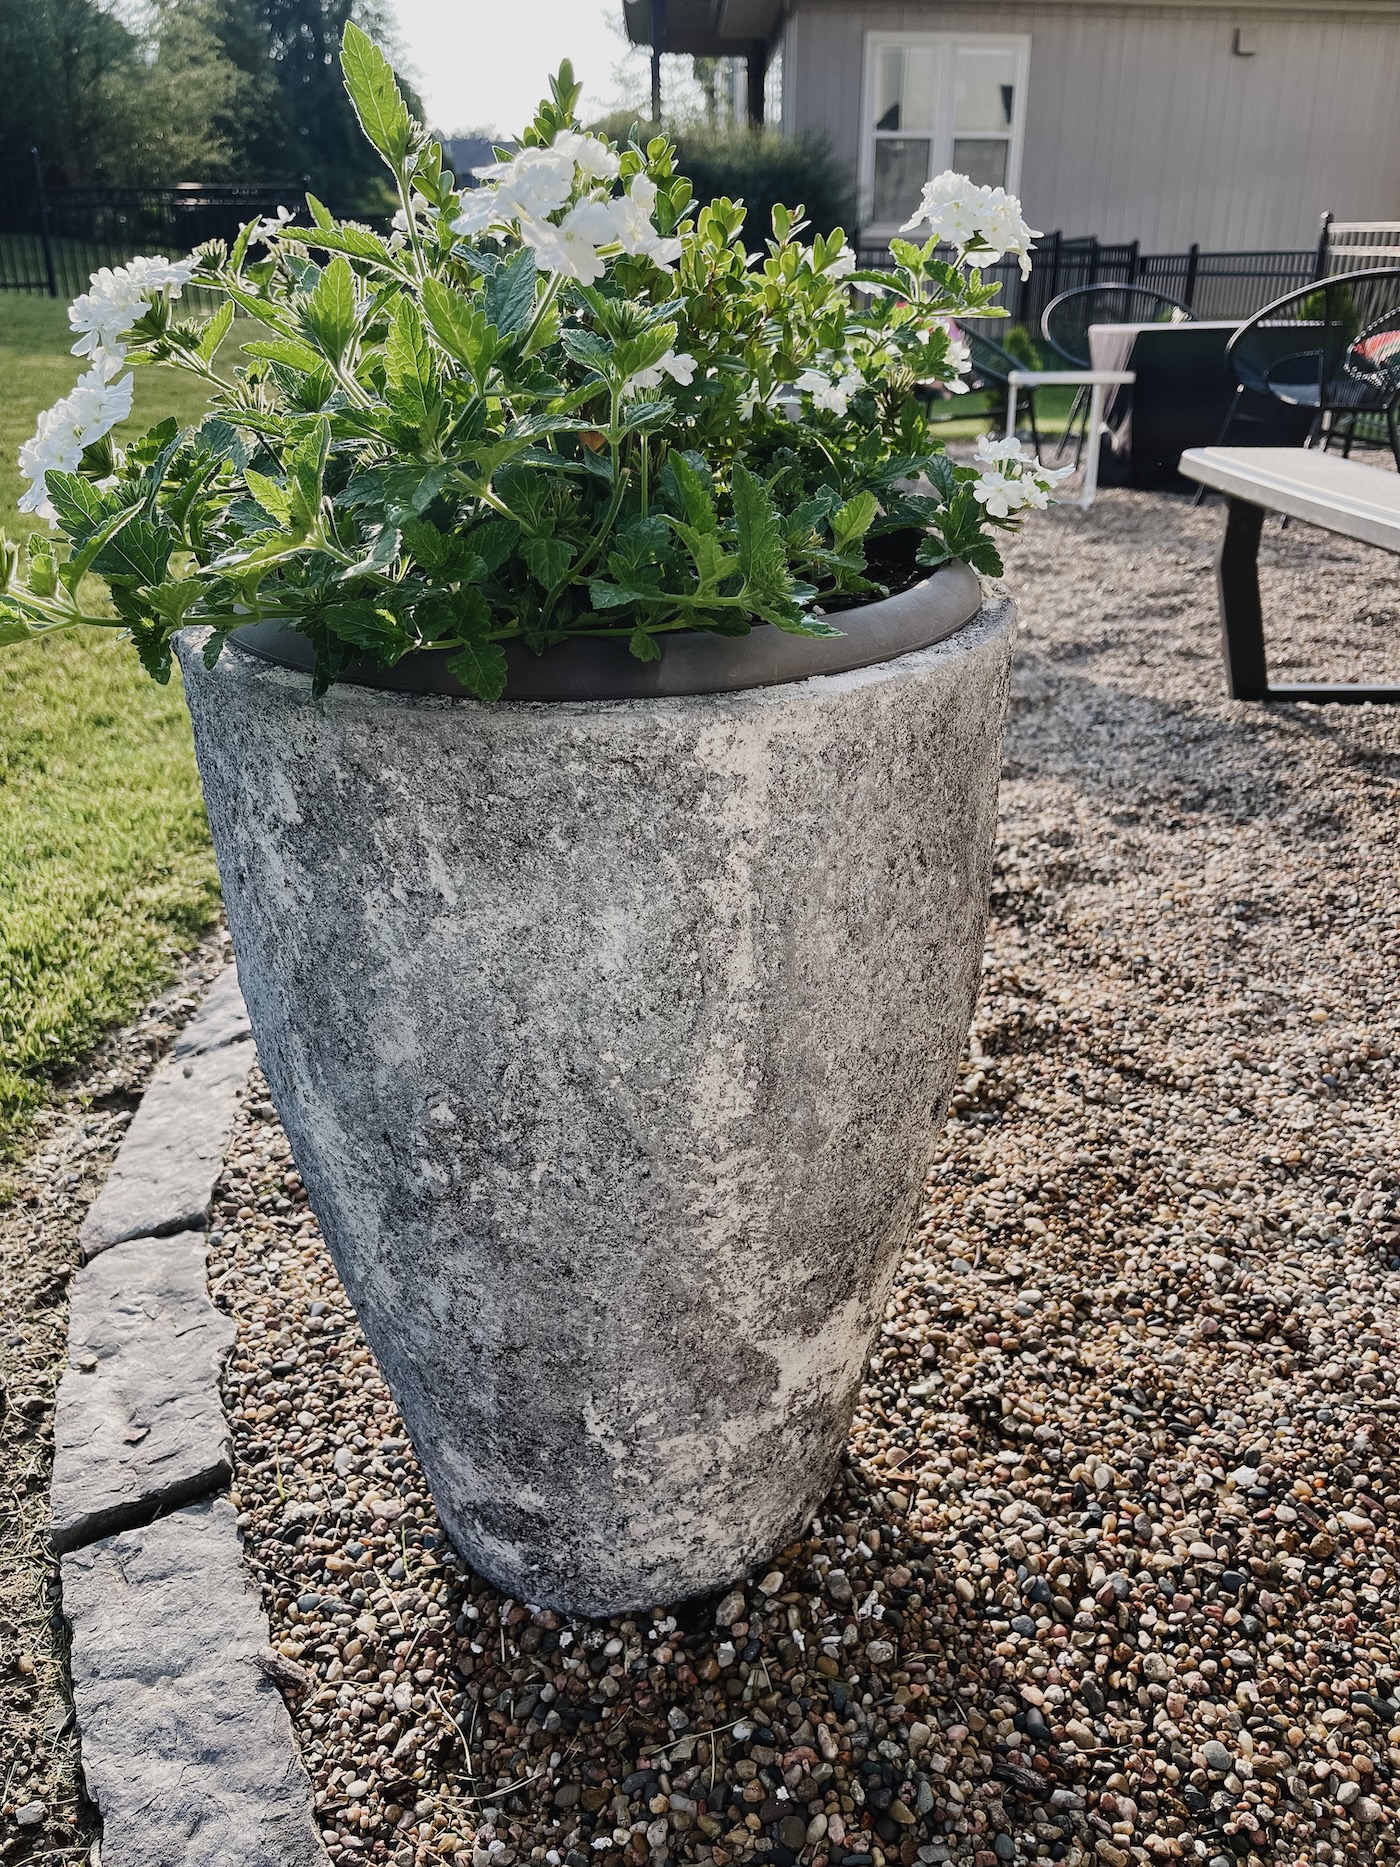
That is it! I did not seal these or do anything else to them. This project was done on April 2, and as I type this on July 7th, they still look the same! Holding up well. Crossing my fingers they last throughout the winter as I don’t typically store these inside. I figure the maintenance will be easy enough with the stucco patch. If I end up with some chipped parts, I will simply add some stucco to cover it up.
Textured Planters Spring vs. Summer
As mentioned above, I planted a boxwood inside each planter. In April, I added pansies and in the summer I added white Verbena around the boxwood. I love the classic look with the aged planters.

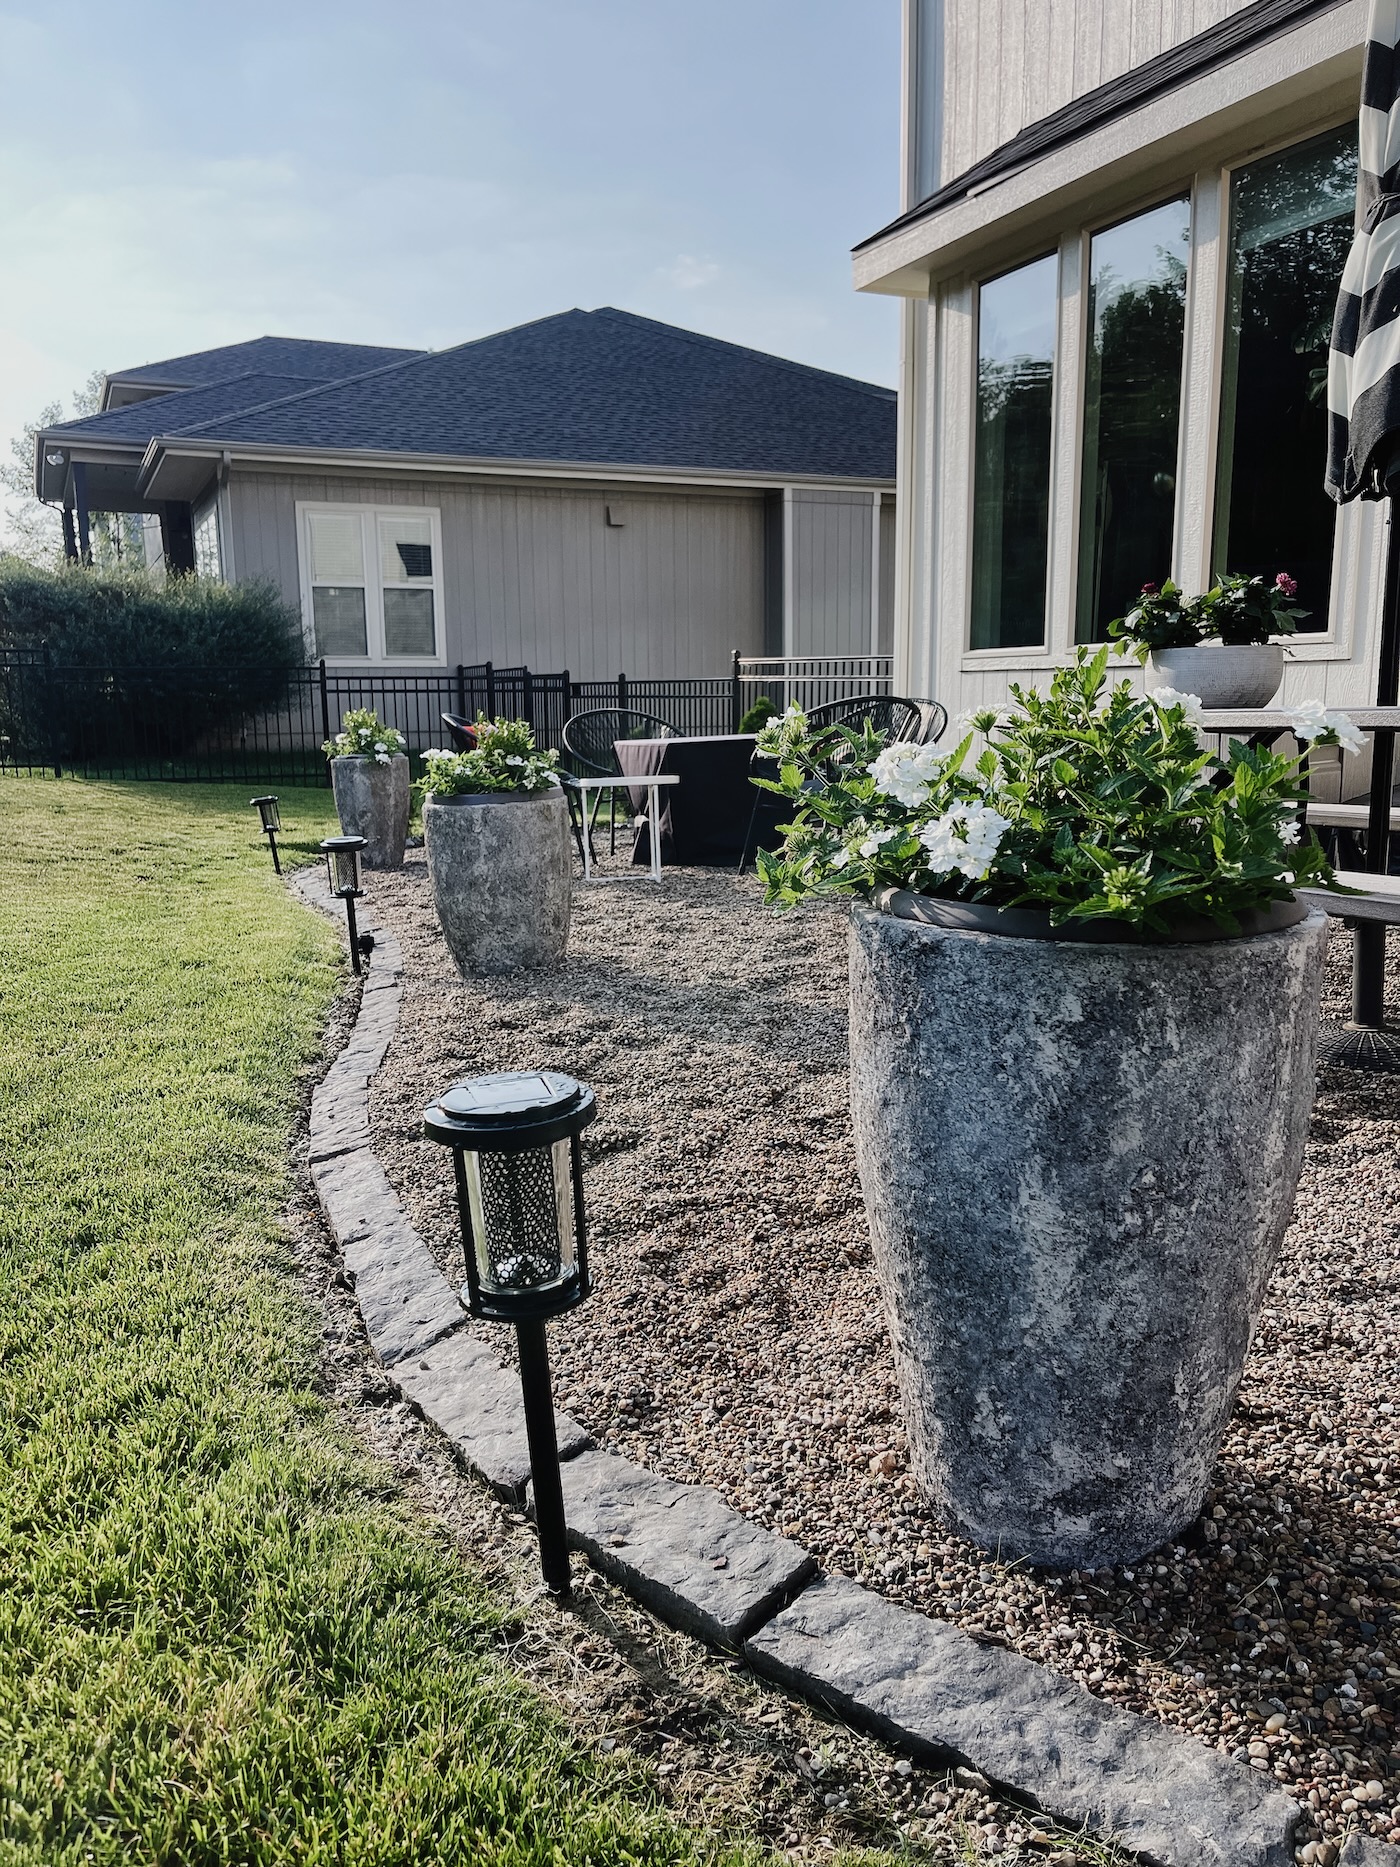
Overall, this was a pretty easy project and was not expensive. I love the look and they are holding up so far! Let me know how you liked this tutorial on how to make DIY textured planters using stucco. xo
[…] UPDATE 2023: These looked great in the beginning, but did not hold up over the winter. They really chipped! I’ve since tried a new technique that I love so much more. Find that link here! […]