Original post: July 2014 (some photos in the post are from the original DIY process)
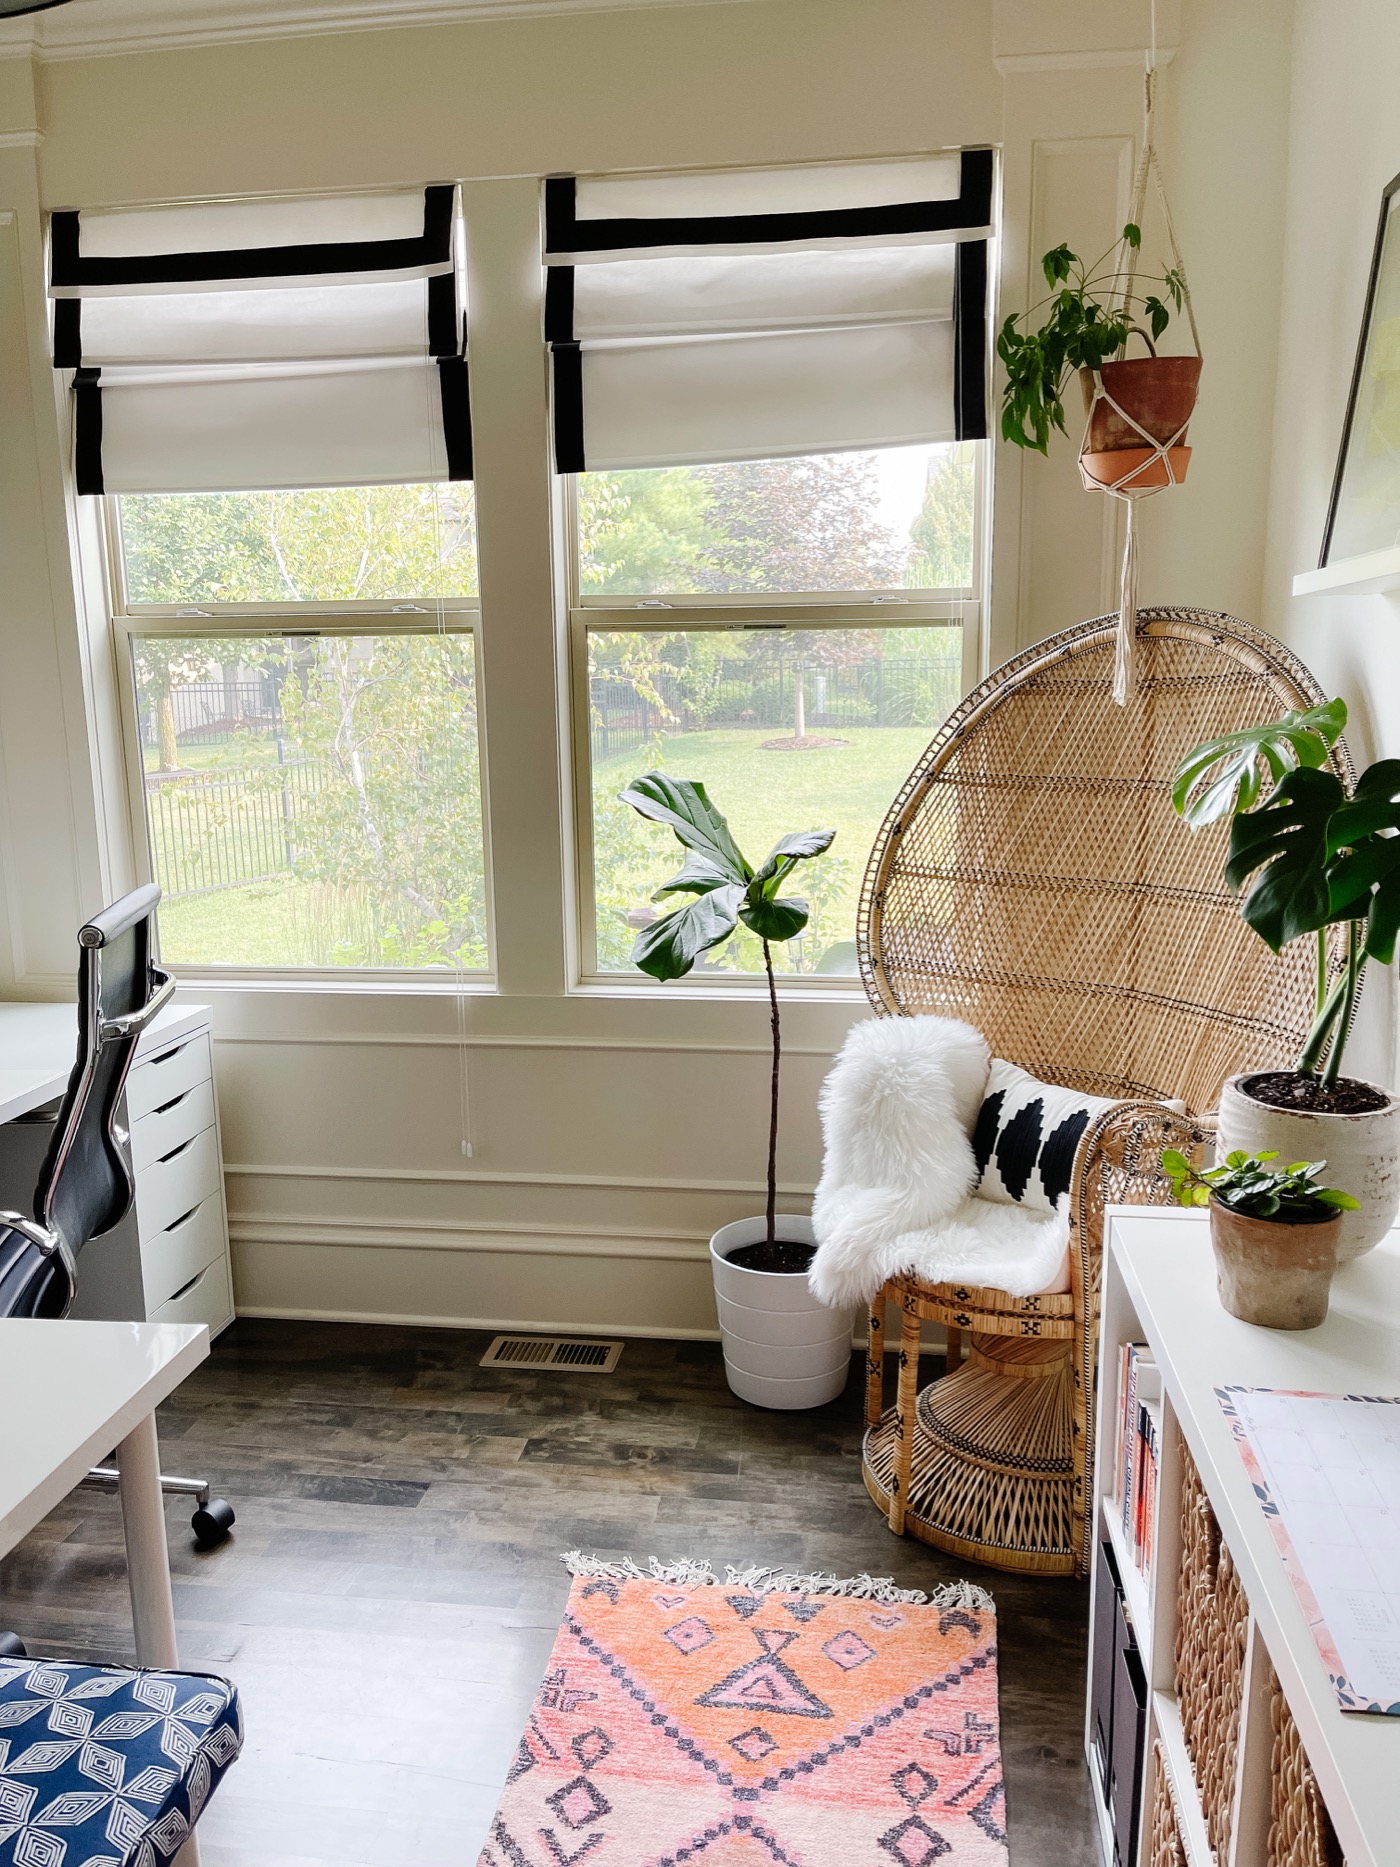
Updated post: August 2021 (updated photos of the space with the shades)
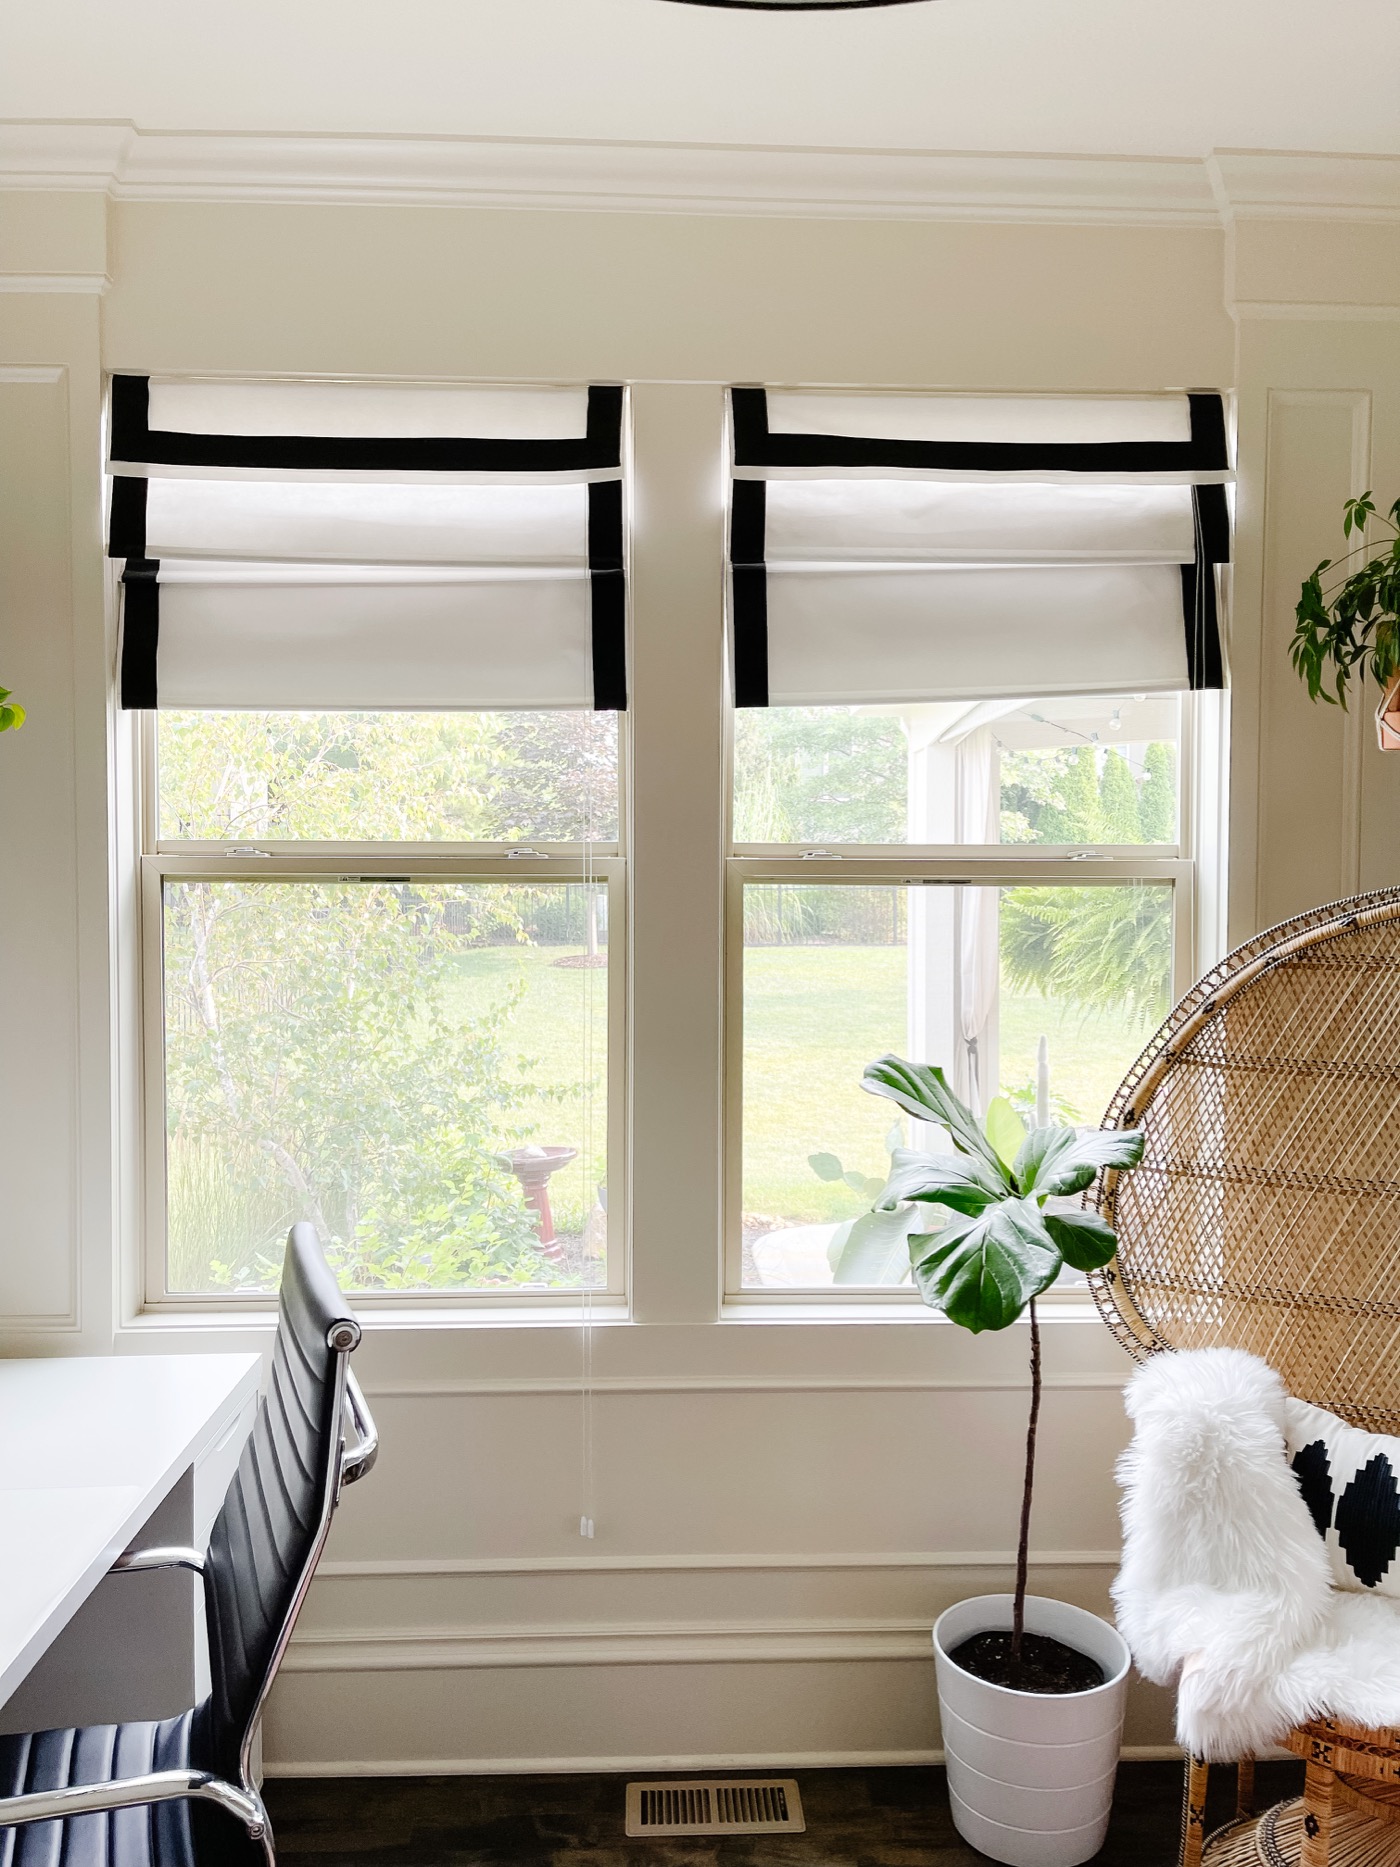
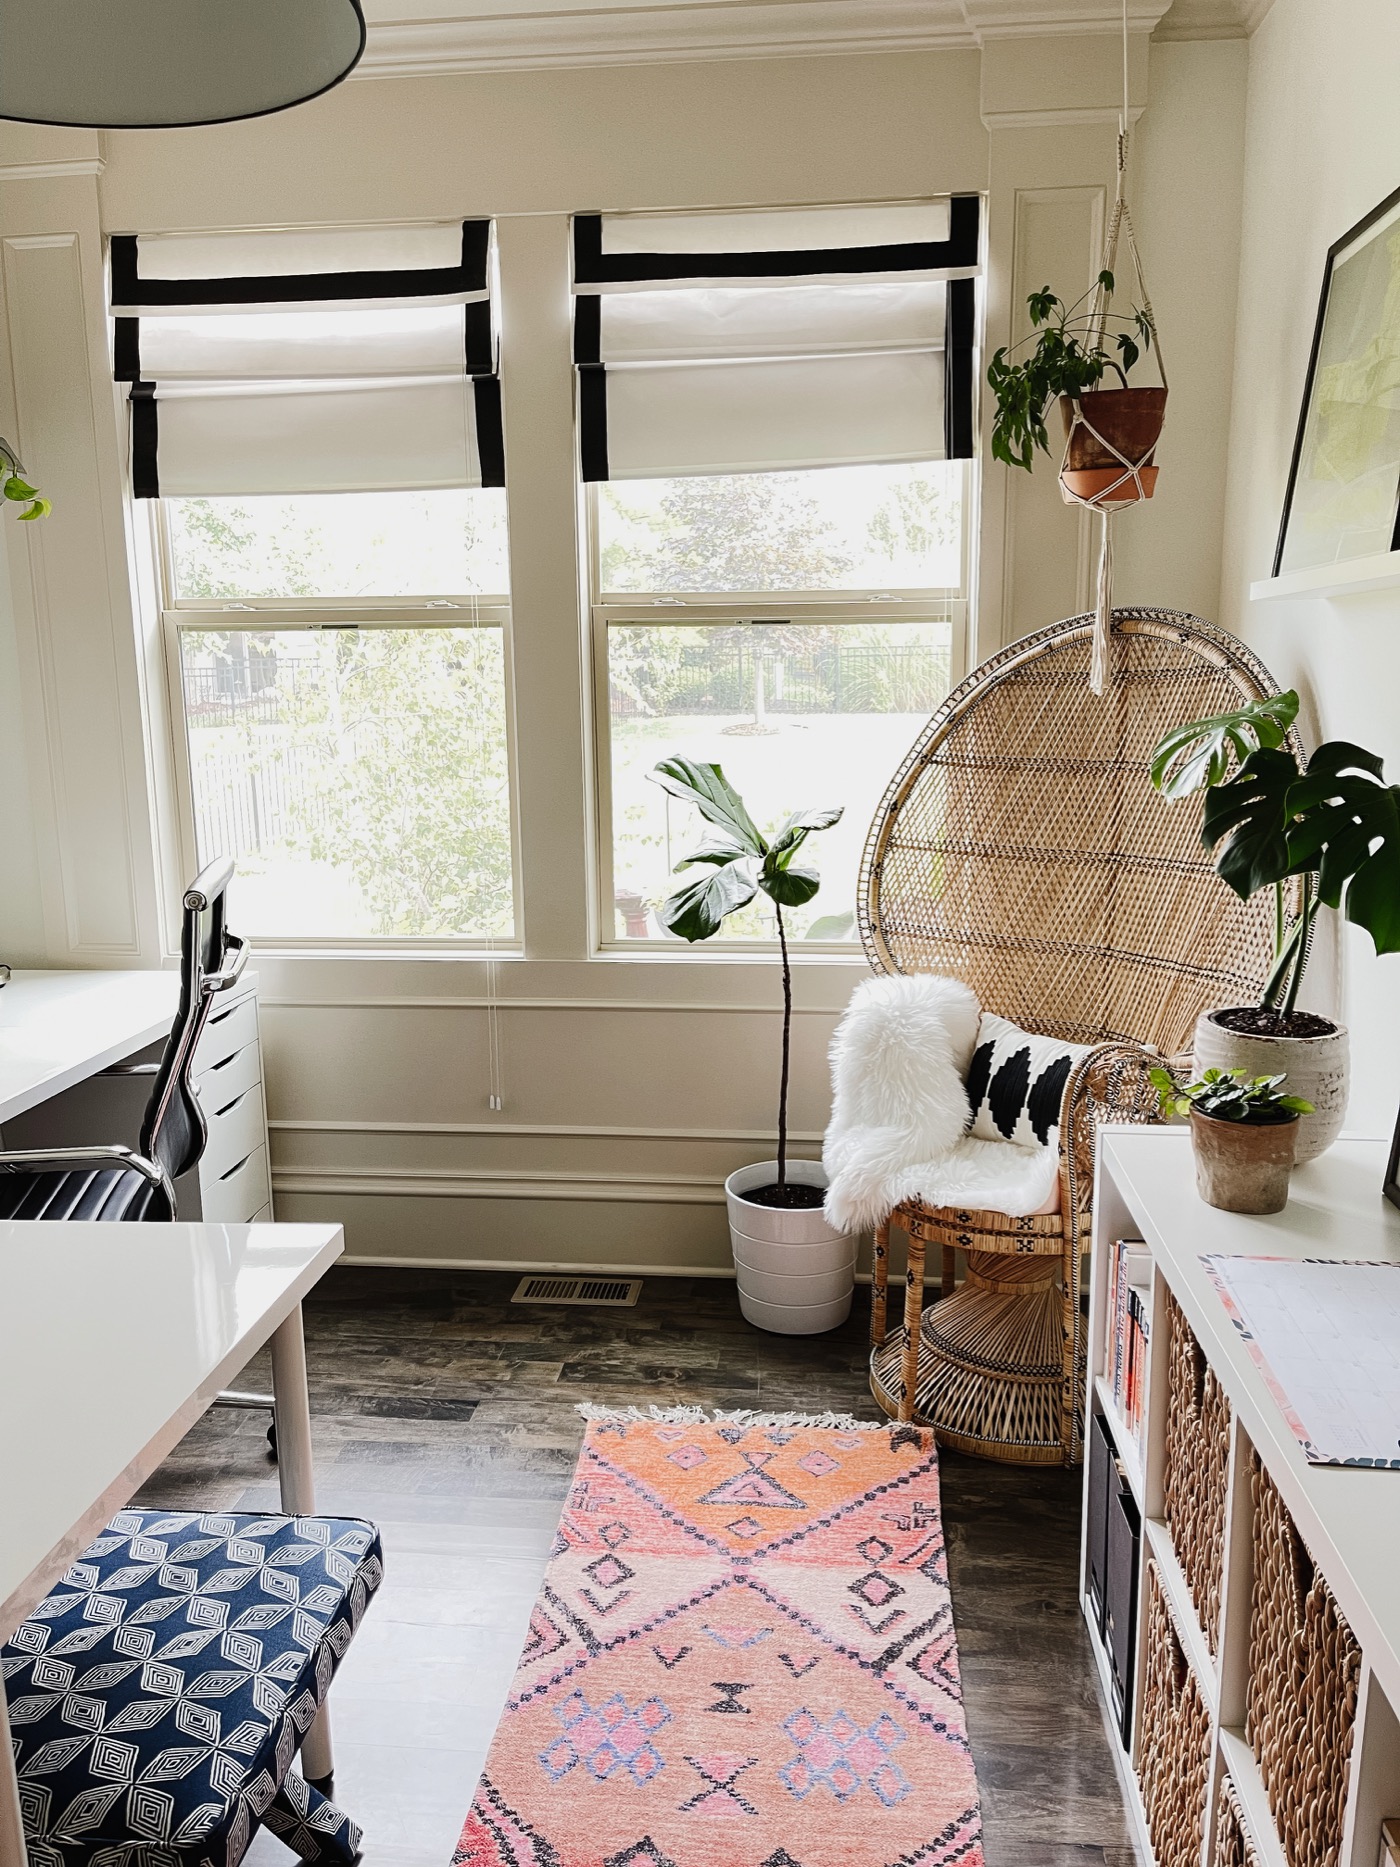
I have recently been putting our office space together, and several of the projects are DIY (which is the way I like it)! When it came to window treatments for the space, I decided to work with what we already had, and simply add a little something to make them pop. Cue my DIY Ribbon Trimmed Roman Shades (no-sew too)!
Inspiration
We purchased some inexpensive white roman shades from JCP online several years ago, and two of them found their way into the office space. Each roman shade was about $25 for the size we needed. The windows in this space have pretty millwork around them, so I knew I didn’t want to cover those details with curtains. I think roman shades add just the right amount of light filtering/coverage with a softened edge. But…the plain white just wasn’t doing it for me!
I decided, after finding this inspiration image, that I would trim the shades with black grosgrain ribbon for a more custom look. Here is the inspiration photo from Pottery Barn.
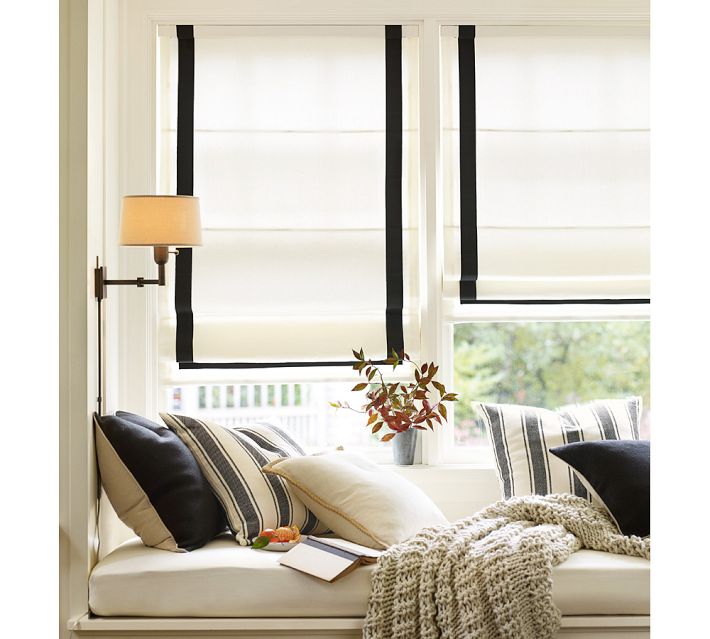
One of these roman shades from Pottery Barn, in the same size as my window, comes in at a whopping $194 (this is the sale price!). The original price for one roman shade is $229! I was able to make each ribbon trimmed roman shade for a total $32, which includes the cost of the plain roman shade!
I love the classic pop of black against the millwork! This office space is light and bright with pops of color. The touch of black helps ground the space.

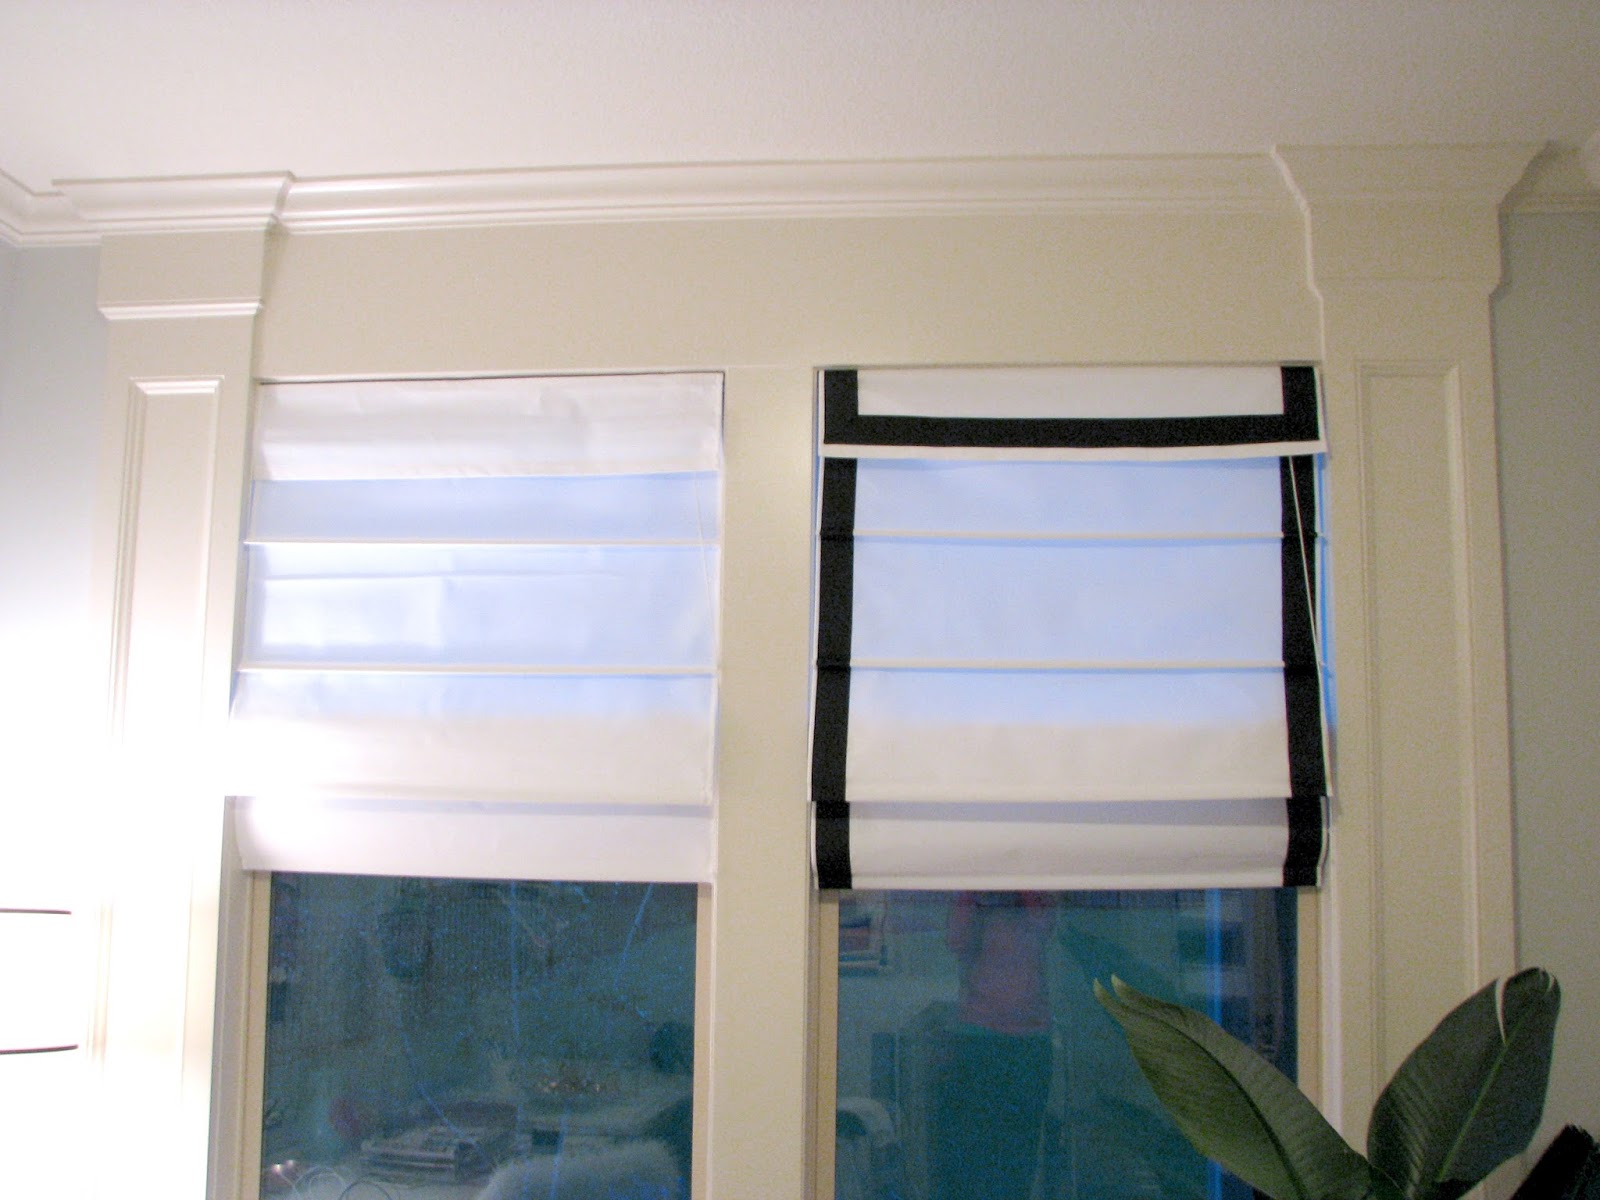
Before + After
You can see here what a difference the trim makes with a before and after!
Materials + Process
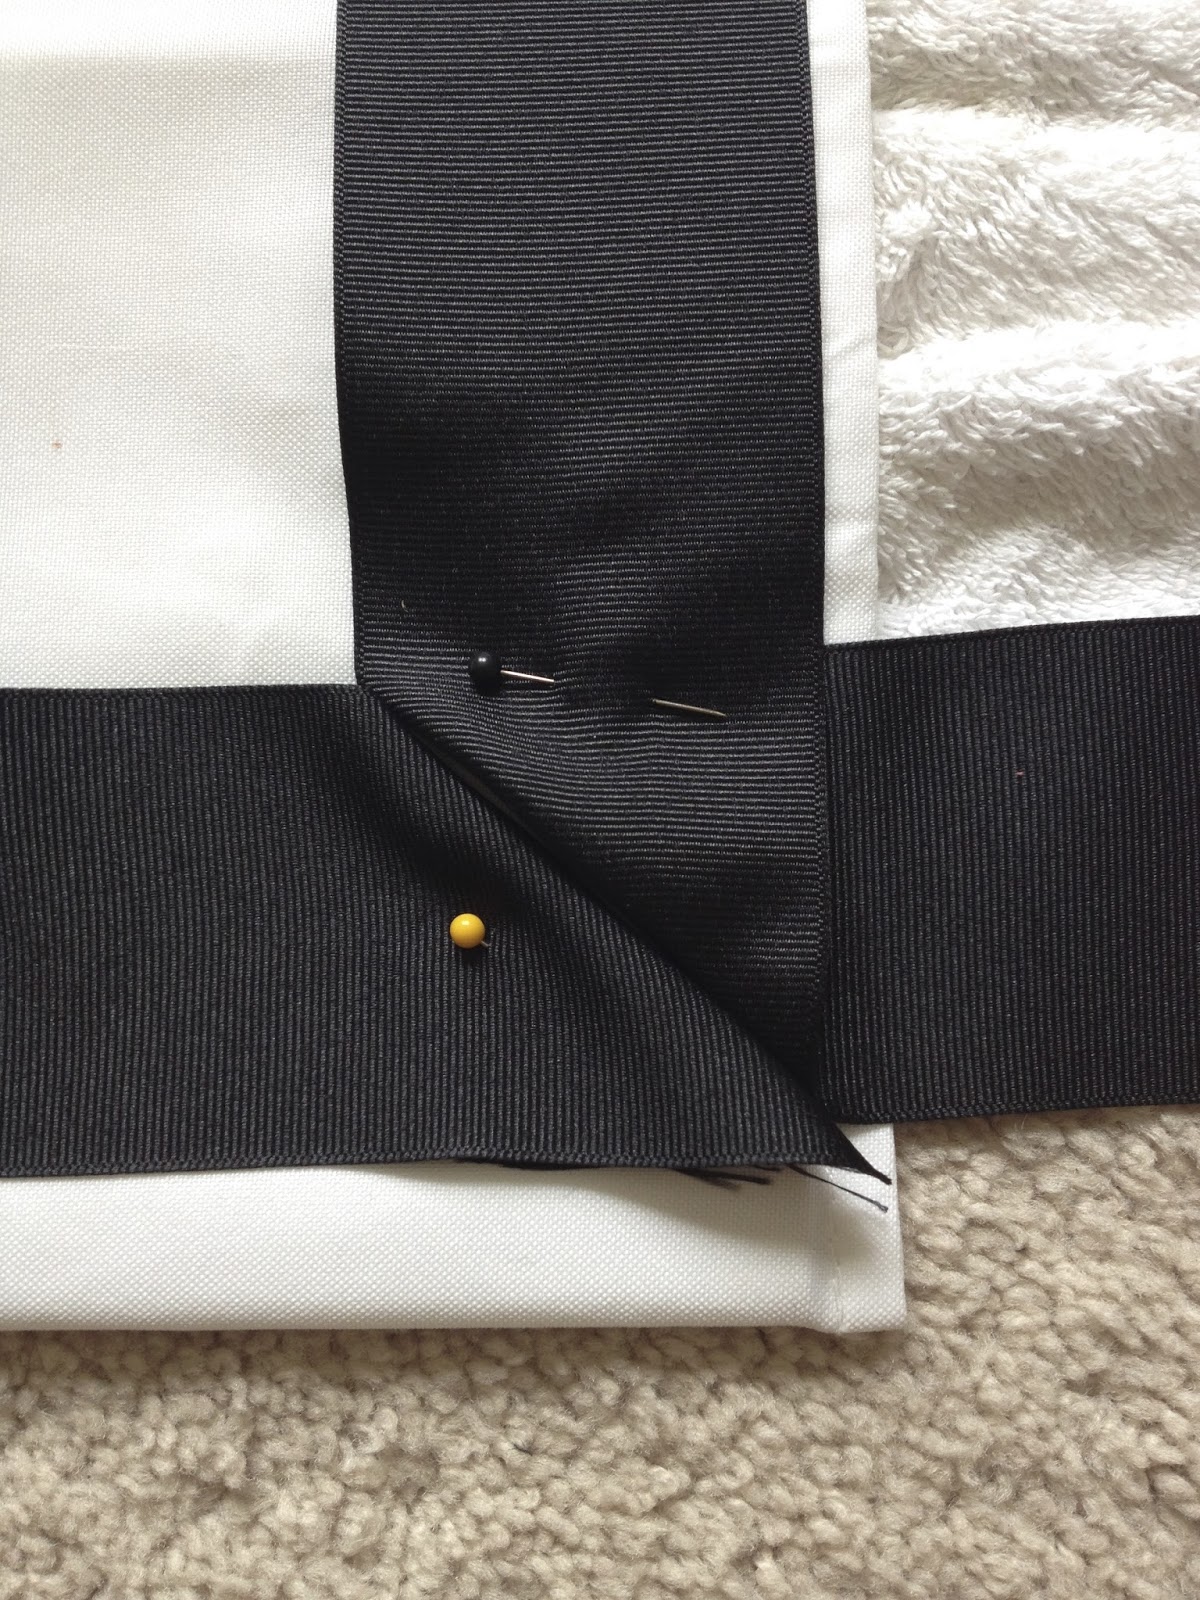
For this project, I purchased 2 1/2″ black grosgrain ribbon from Joann Fabrics. I ended up needing 4 rolls, each costing $2.99. Also purchased and used were (2) rolls of no-sew, iron-on adhesive that I found at Walmart for $1 each. The only other thing I used for this project is my trusty iron! Make sure you use a hot iron and a wet cloth over the top of the ribbon/shade when using this heat & bond. It’s really quite easy to use and will go quickly once you get the hang of it!
The rolls of ribbon were long enough to reach down the entire length of my roman shade, making it seamless. I used the seam line on the side of the shade as my marking point to know how far in to secure the ribbon. No measuring involved here! My kind of project!
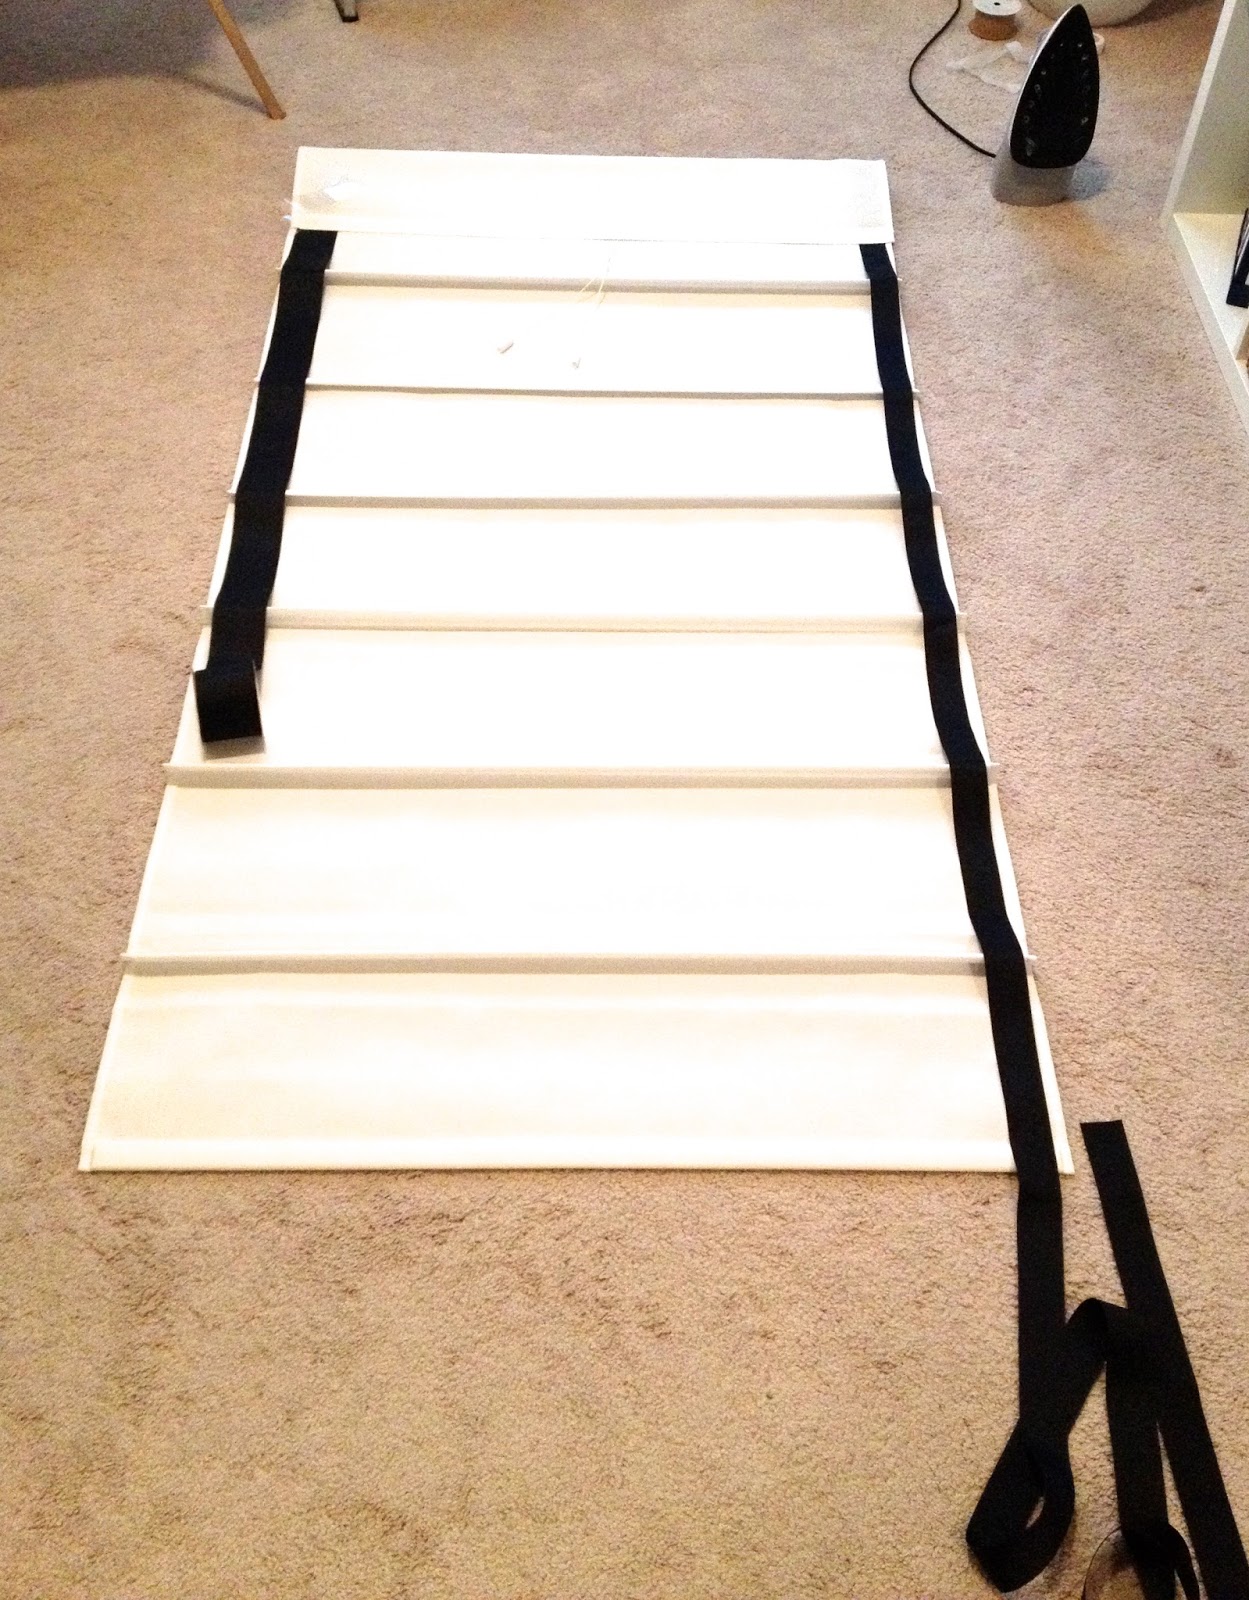
At the bottom, and around the top flap of the shade, I folded the corners over to make them come together at a 90* angle, and secured them with the no-sew adhesive.
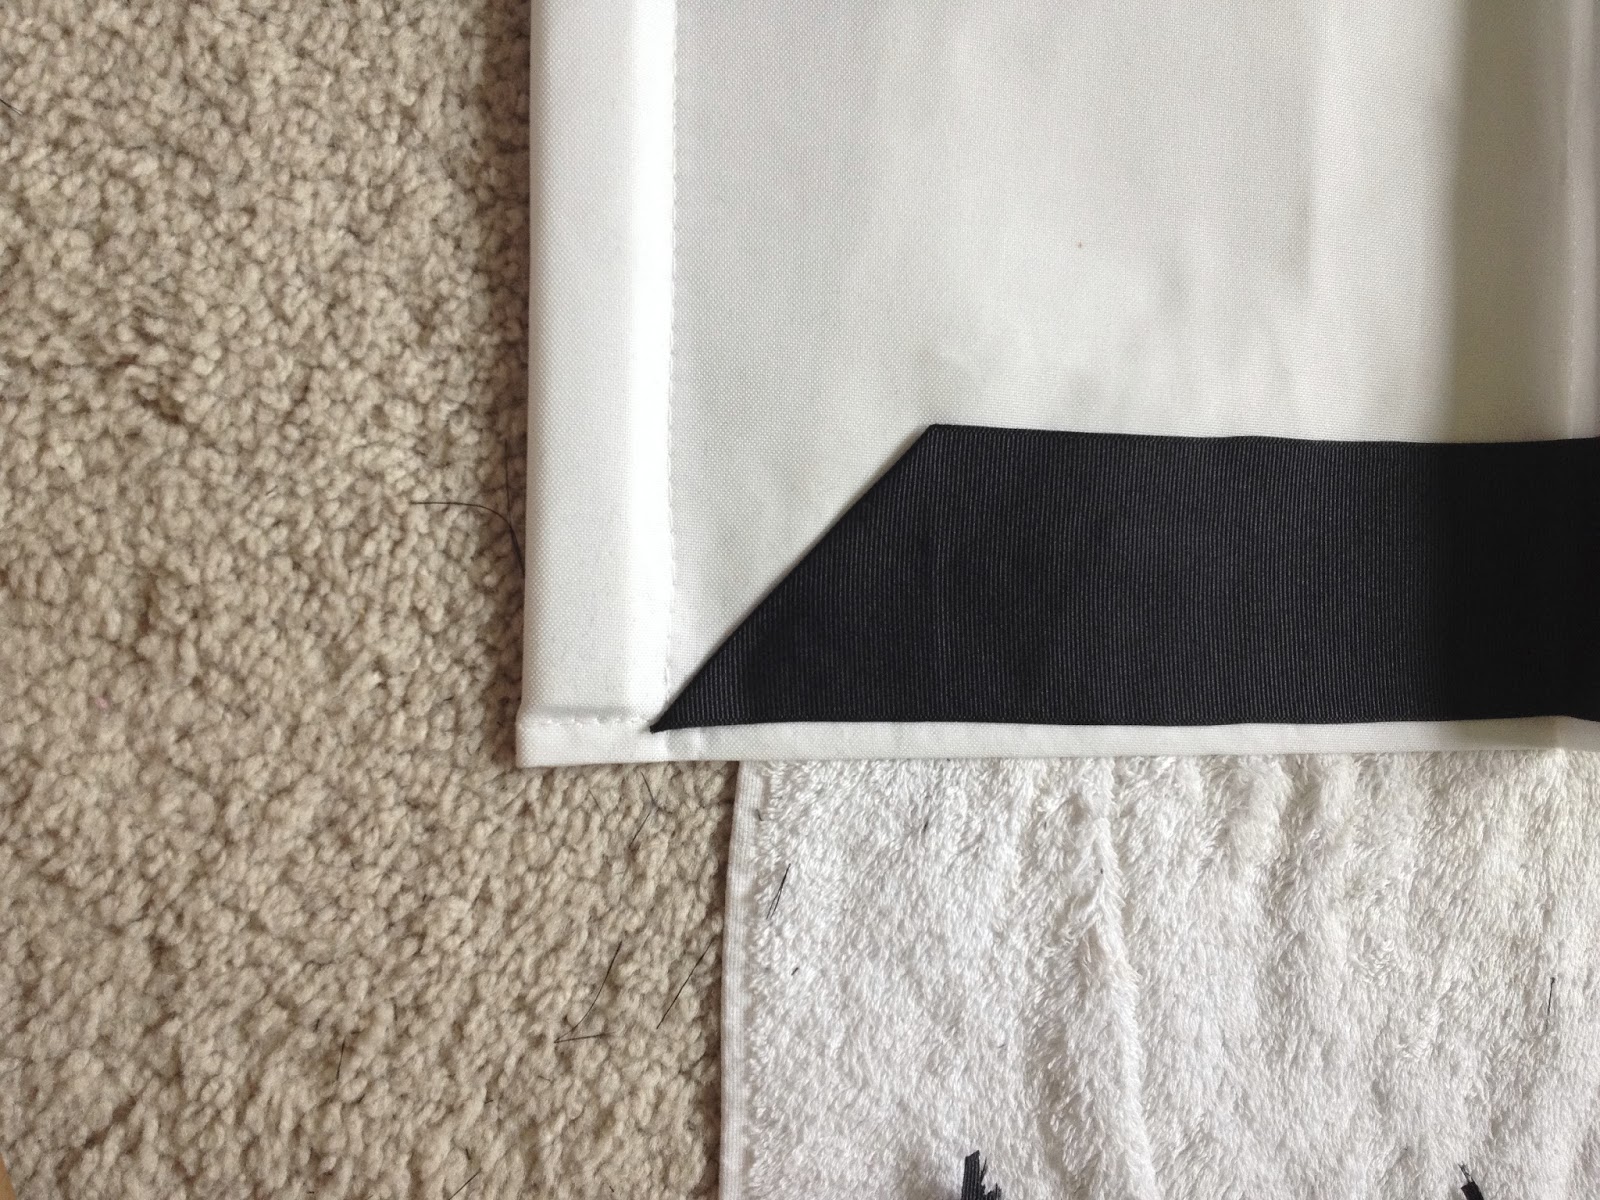
Following the seam along the side of the shade made it easy to knock this project out in a few hours. I took my time making sure the no-sew adhesive tape was very secure before hanging. What a difference these make in the room!
Cost Breakdown
Total cost for (1) DIY Ribbon Trimmed Roman Shade was $32! The shade was $25, $6 for the ribbon, and $1 for the heat & bond tape. Mine are not perfect, but it sure beats the $229 price tag from Pottery Barn!
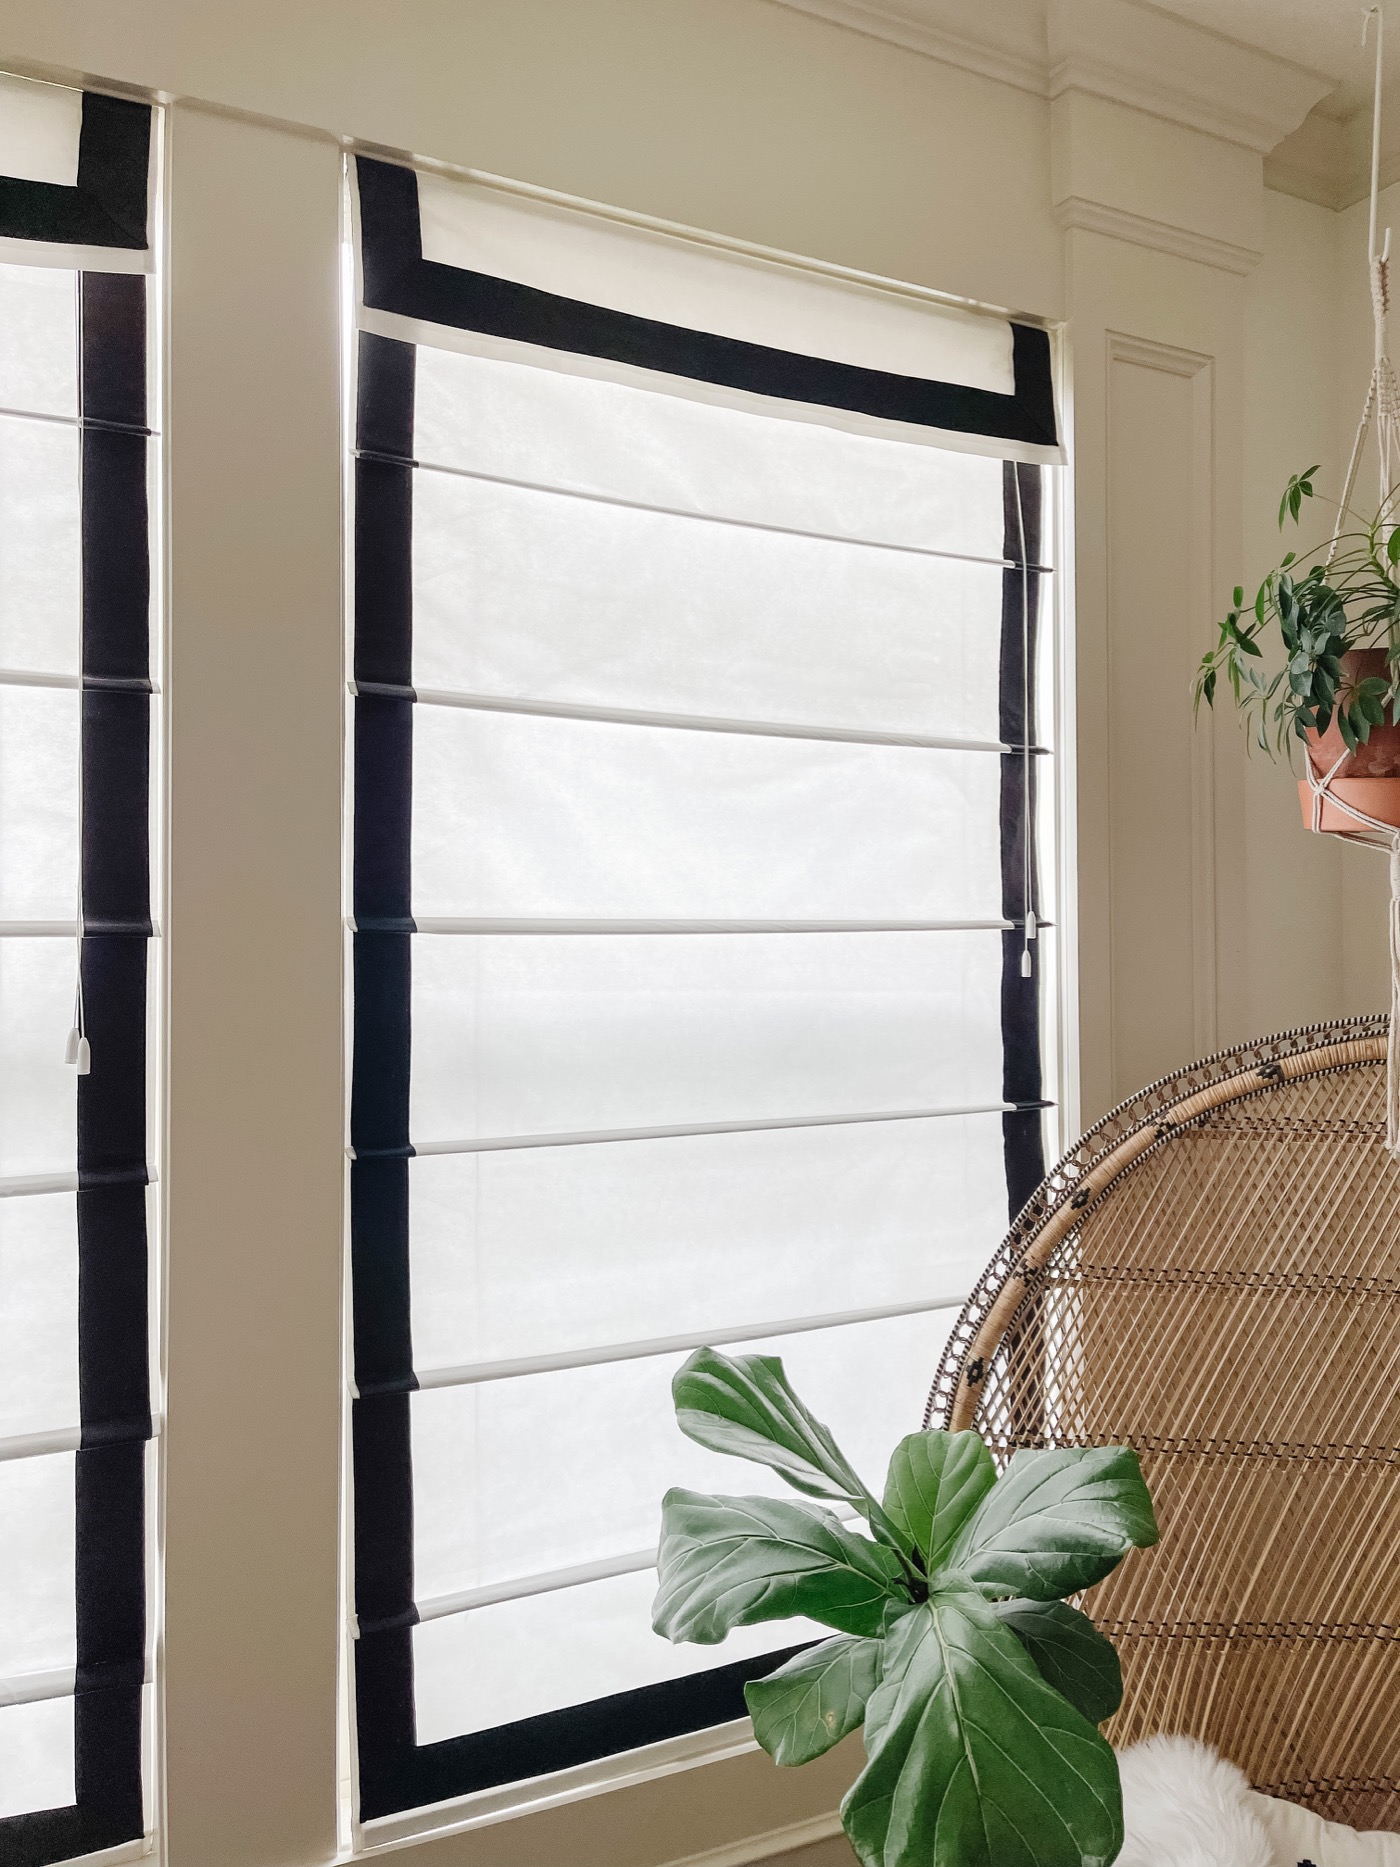
I’m so happy I decided to tackle this project. These DIY Ribbon Trimmed Roman Shades add a statement to the room, without feeling heavy. Love!
August 2021 Update: These shades are STILL in our office space SEVEN years later and they still look like new! When you add something classic to your space, it can last forever! The rest of the room has changed (photographed in this post), but the window coverings are still the same! XO
This is such an elegant look, I absolutely love it. Great work! Thanks for being a L4L'er!
Thanks Kayla for having me be a part of this again!
So cute! I love love love love it! I've been wanting to do a roman shade in our kitchen forever, I'm totally stealing this tutorial!
xo,
Kylie
Thanks Kylie! Super easy to do, I think one in a kitchen would be so stunning!
Uhhh i love roman shades!!!! I have the same deal in our house as far as not wanting to cover the wood work around the windows, an easy roman shade has been on my list for a couple months now. thanks for sharing and looove what the black added to the space 🙂
Thanks Gracie!!
I love roman shades and you chose to do a stunning classic design! They look fabulous. I'm going to do this with my plain white shades. Thank you for the inspiration!
Because the shades were so inexpensive, I figured if I screwed them up, oh well! Luckily this was an easy project and I like the way they look!! Thanks for stopping by!
Our kitchen window needs this! Where did you find the plain shade?
Hi Colleen! These shades are inexpensive shades from JCP from several years ago. They probably still sell some sort of version of this. I also know that Lowes and Home Depot sell a similar plain white shade. Hope this helps!
Wow! I've thought of trashing the roman shades in my living room because they are BORING, but maybe I will give this a try!
It was amazing to me what a little ribbon could do to these boring shades!! 🙂
HI Ashley! Yes, this is so much more cost effective. It's amazing how a little ribbon can change the whole look! Thanks for stopping by. xo
What beautiful shades! It appears that we have the same JCP blinds. Mine are white "Savannah" shades from JC Penney (but I've never seen them for $25…wow what a great deal for mine were $65 for a 39" shade). Question, this roman shade comes with 7 panels (folds), did you go under each fold (slightly) with the grossgrain ribbon? To ask another way: did you run the ribbon straight down from top to bottom tautly or did you run the ribbon straight down from top to bottom while also turning/pinching/folding the ribbon under each panel where the wood slat is. Sorry, for the ramble; I found it hard to describe. Thank you!
Hi Bev! You are not rambling – I know exactly what you are asking! My blinds have 6 folds, and I turned/pinched the ribbon around each fold. This allows for the blinds to be free flowing and come all the way down. It's probably a little more work to bring the ribbon all around the fold, but I think it looks more finished this way. Thanks for stopping by!
Thank you for your quick reply. I took a very close look at your roman blind and yes it appears we both have the same roman shade. Savannah from JCP. What a great tutorial. I plan to do it this weekend. What's extra great is I know what mine will look like before I've finished since I will be copying yours. You're awesome!
What is the standard width of trim for a roman shade? I found a 3in trim, but fear it may be too large. Thank you!