Our next door neighbors and friends threw a nautical themed one-year birthday party for their son this weekend. My friend asked if I would make something that could be used as party décor. A bonus would be if it could also go in his room after the party as his bedroom is also nautical theme. I love the way it turned out! Here’s how to make a DIY personalized life preserver for decor.
Supplies Needed for Life Preserver
- navy craft paint
- fine tip paint brush
- white nylon rope
- canvas drop cloth (smallest size)
- a wreath form (I used straw)
- batting/stuffing
- stencils to create your letters/numbers
I realized later on that I did not do a good job of taking pictures along the way! I’ll try to do my best to explain!
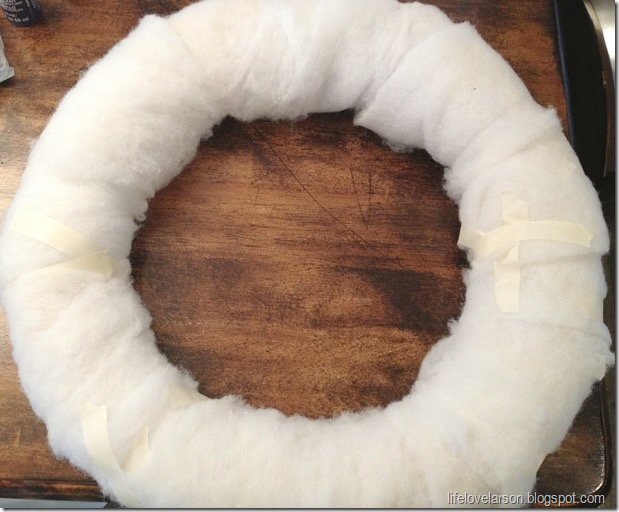
Add Batting
I started out using a straw wreath form and covered it in some extra batting I had laying around. This will eventually be covered with fabric, so there is no need to make it even. Just wrap it enough that the life preserver will look thick in the end. I used masking tape to tape the batting together.
Wrap the Drop Cloth
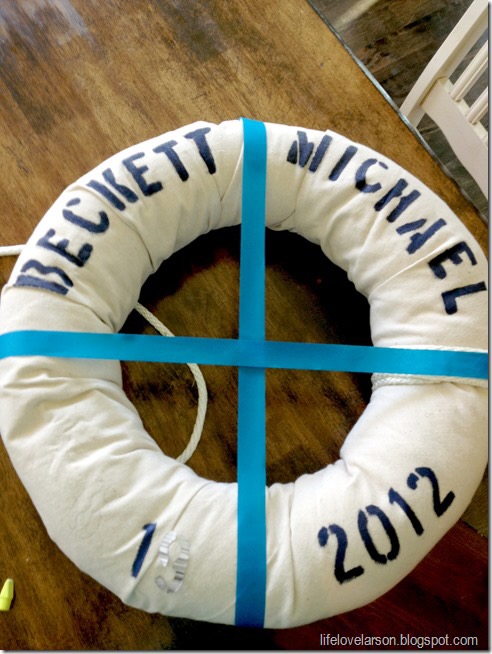
Next, I cut a small drop cloth in half and laid one half across the bottom and top halves of the wreath form. Start cutting, forming, twisting, and manipulating the drop cloth around the wreath form. I secured the back with safety pins. As you can see, there are creases on my final product, as that was the only way I was able to make it work. If this is frustrating, another way would be to simply cut pieces of drop cloth and wrap around the wreath form.
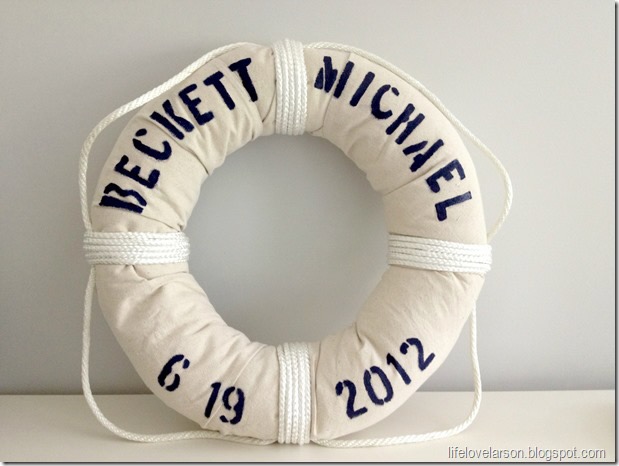
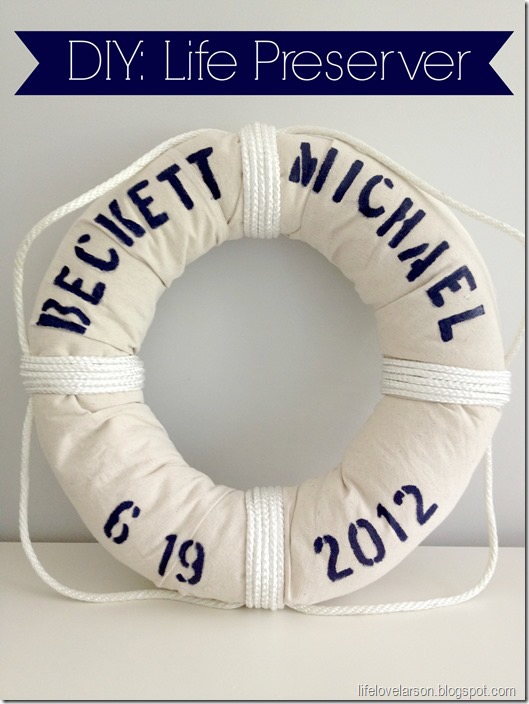
Adding Letters and Numbers to Life Preserver
Once the drop cloth was secured, I got to work on his name and birthday. I used the same font Boston Traffic. After printing and cutting out the letters/numbers, I traced around them onto the drop cloth with pencil. This was definitely the most time consuming part because this font has several different pieces for each letter/number! I was scared to use a stencil form to paint because I didn’t want to get any paint on the drop cloth. Too much room for error!
Using my outline from the pencil stencil, I was able to go in with a fine point paint brush and fill in the letters and numbers with navy acrylic craft paint.
Adding the Rope
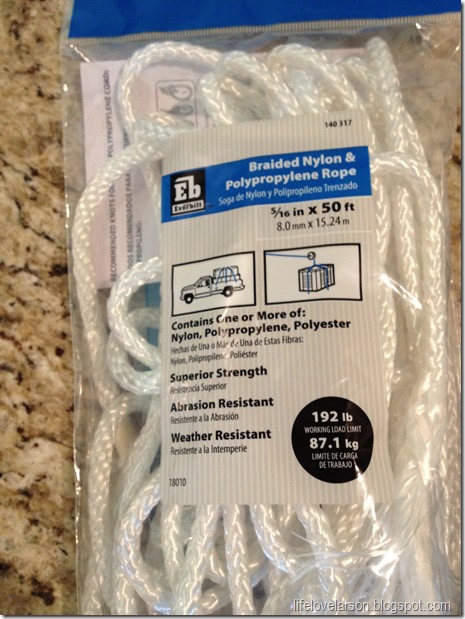
Once the letters were painted and dried, it was time to add the rope. The is what really makes it look nautical. You can buy this white nylon rope at any hardware store. Mine came from Home Depot, and I bought a large pack versus buying by the foot. You will need more than you think!
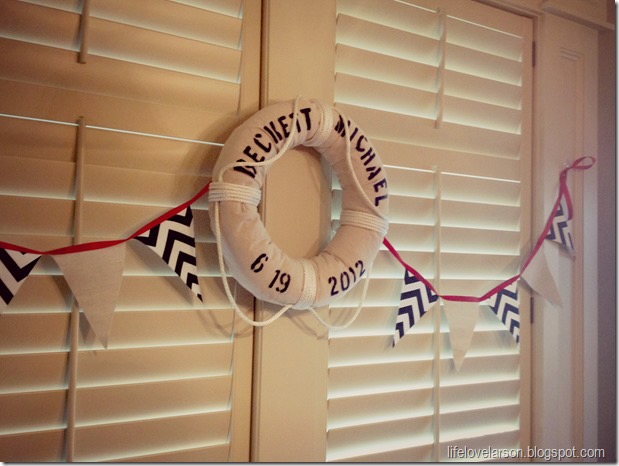
I wrapped the rope around four sides, five times and secured with a little hot glue. I then cut four equal pieces of rope to go around the preserver. You want these pieces long enough so they swag. I also just tucked these pieces under the rope and used a little more hot glue to secure it.
Here is a shot of how my friend styled the life preserver for the party. It looks adorable! Love the classic look of the navy and white.
I have never made anything like this before, so it was a fun challenge for me. Using my hands to make handmade gifts makes me happy!

I hope you learned how to make a DIY personalized life preserver for decor! This is such a cute idea for a birthday party, pool party, or simply to hang in a child’s bedroom. XO
That's super cute!! It turned out great!! You did a fantastic job!!
Just wanted to let you know that I liked this tutorial so much that I tweeted about it. (As far as I can tell you're not on Twitter so you probably wouldn't know if I didn't tell you.)
Thanks!
This looks awesome!!! We would love it if you would link up at our linky party:
L-O-V-E, love this!!!
This is so clever!! Love it! Pinning! Jenna
Amazing, looks custom-made from a store! love it!!! Need one for our pool house!
Thanks for the sweet comment-it was a labor of love!!
I love this idea! How fun for pool party decor, too! XO, Aimee
Thanks Aimee!! xoxo
Super cute! I love this! Visiting from Keeping it Simple!
Thanks Britany for stopping by!
Wow this is amazing I love it xxx
Thank you Aimee! xoxo
Just saw your life preserver featured on Fun Home Things and thought it looked a bit like my faker preserver. Turns out it was the link your friend showed you! Well done! It looks great and im sure your friend loved it too!
Just saw your life preserver featured on Fun Home Things and thought it looked a bit like my faker preserver. Turns out it was the link your friend showed you! Well done! It looks great and im sure your friend loved it too!
Yes, you were the inspiration that my friend showed to me! I meant to email you a pic and dropped the ball on that so I'm glad you found me!