Lately, Kate is wearing fewer and fewer bows (much to my dismay), and more and more headbands. I needed some storage for the growing collection! There are several tutorials and versions of this on Pinterest, and it really is such an easy project. Best part…this project cost me $0, because I already had everything on hand! Here is how to make DIY headband storage using simple supplies.

Supplies Needed
- Mod Podge
- Fabric of choice
- Empty oatmeal container
- Hot Glue
- Spray paint (for the lid)

How to Make Headband Storage
- Remove oatmeal label and clean out the container and lid.
- Cut a piece of fabric to fit the cylinder shape. Leave a little extra on the top and bottom of the container to wrap the top.
- I used the Mod Podge as a glue. Put a thin layer on the container and smooth down the fabric until it starts to adhere. Work in small sections to make sure you fabric is even on both sides.
- When you get to the end, tuck the extra fabric under and add a dab of hot glue (sort of like wrapping a gift).
- Once the base is done, you will want to hot glue the extra fabric to the top and bottom of the container.


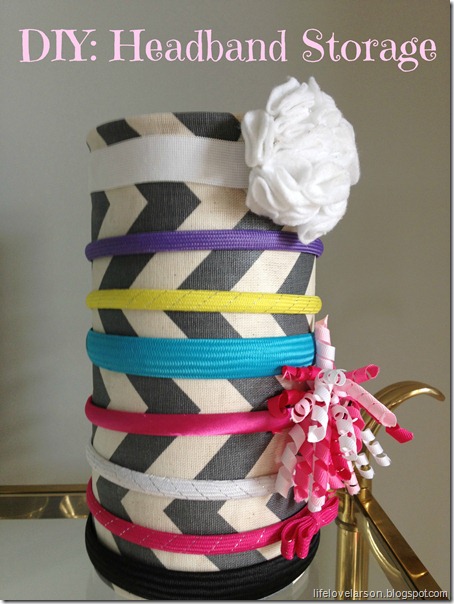
This is what it looks like once the fabric is adhered to the container.


Finishing Touches
Next, add a thin layer of Mod Podge on top of the fabric. This sets it and gives it a hard coating. Don’t worry, it will dry clear. You can brush Mod Lodge on with a paint brush or foam brush.

Let this sit overnight and it will be ready for use in the morning! As a bonus, you can also use the inside of the container for storage. Think scrunchies, barrettes, even a brush!

I decided to go ahead and spray paint the lid of the oatmeal container too.

One of these days I will get around to embellishing the plain headbands, but for now, she can wear these and a winter hat. I love the extra pattern and color it will add to her bedroom too.

I hope you found this helpful in how to make DIY headband storage. Items that can serve a function and still look cute is a win for me! XO